

![]()
![]()


Welcome to the Chelsea Pants Blog Tour! This is the first blog tour I’ve organized for Greenstyle Creations (or anyone, for that matter!), but I’m really excited, because it means that I get to keep sharing my new favorite Chelsea pants, and linking up to other awesome bloggers who will do the same!
![]()
![]()


This week has many exciting things in store for you, including a giveaway, so make sure to read all the way to the end (because who doesn’t like free fabric and patterns?!)
![]()
![]()


Of course, if you’ve been around my blog in the last week, you’re probably thinking….more Chelsea pants?! Doesn’t she have enough of those yet? Nope, nope, nope. And while last week’s pairs were all cut straight from the pattern (except for the usual grading/shortening), this week I get to go off the books, and share a little hack with you!
![]()
![]()


One thing about working with a pattern company, is that sometimes you test things that you aren’t initially sure you’re going to love (remember my Thong Plan?), but end up trying anyway, because it’s part of the “job” (it’s a tough gig, but someone’s got to do it!).
This forces me out of my comfort zone a little bit, and opens my wardrobe up to new styles and trends. The Chelsea pants were like that for me- I’ve never worn bell bottoms, because I’m too short for anything off the rack, and hemming them after construction means that they end up looking like boot-cut pants rather than bells. So I was pleasantly surprised by how much I loved the dramatic flare of the Chelsea pants, and I’ve got several more in the works!
![]()
![]()


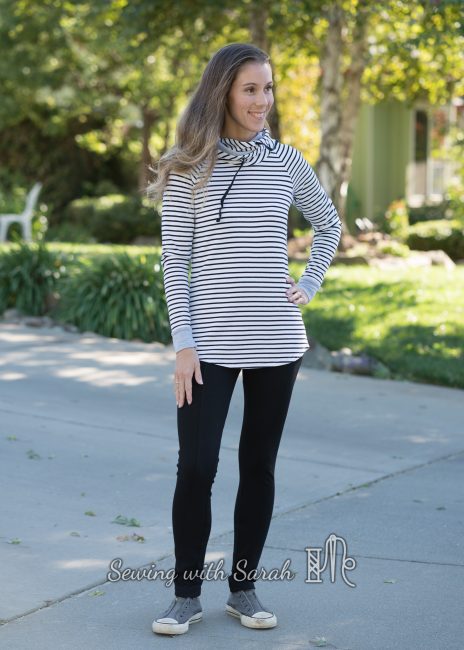
However, I’m a skinny jeans girl at heart, so I knew from the get-go that I would try to hack them into skinny pants, and that’s just what I did!
I used a black ponte from my stash that is super stretchy and has an awesome thickness and recovery- I wish I could remember where I purchased it, because it’s really high quality.
![]()
![]()
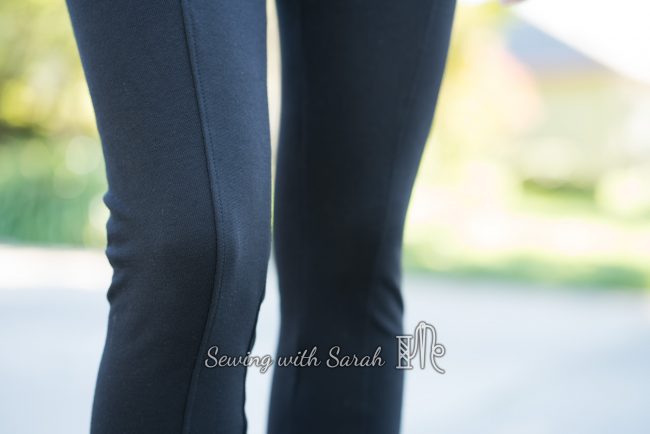


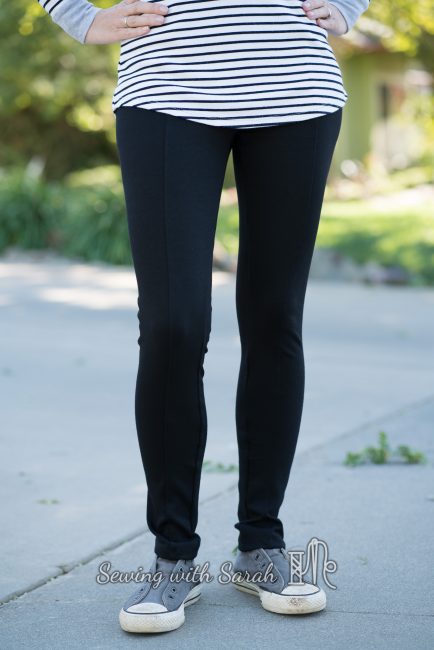
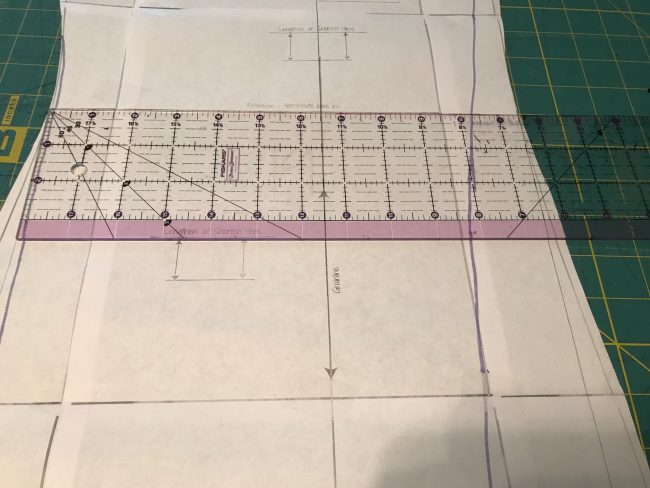
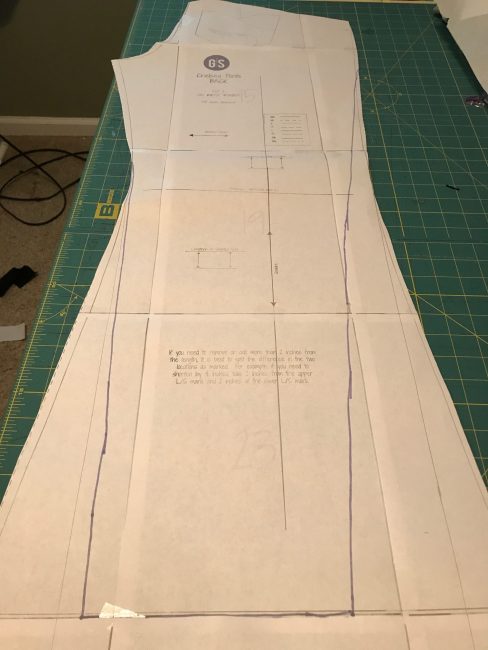
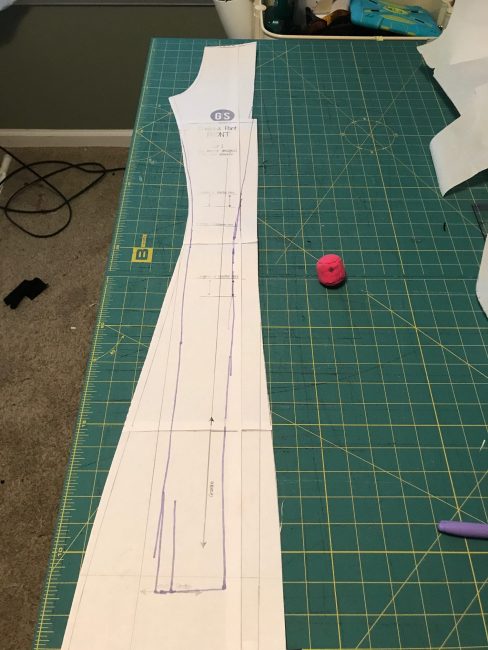
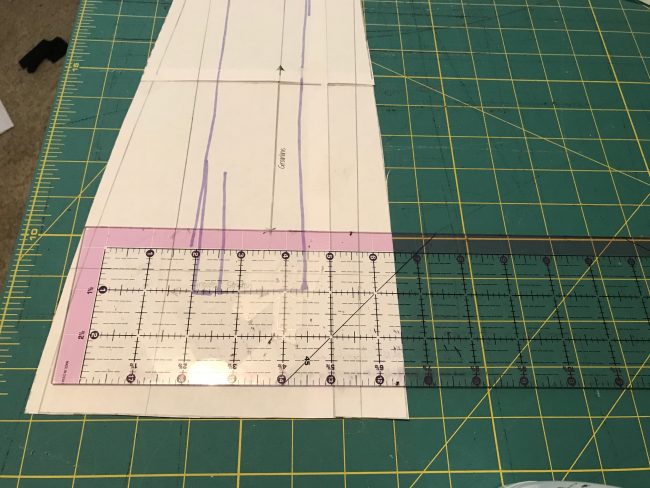
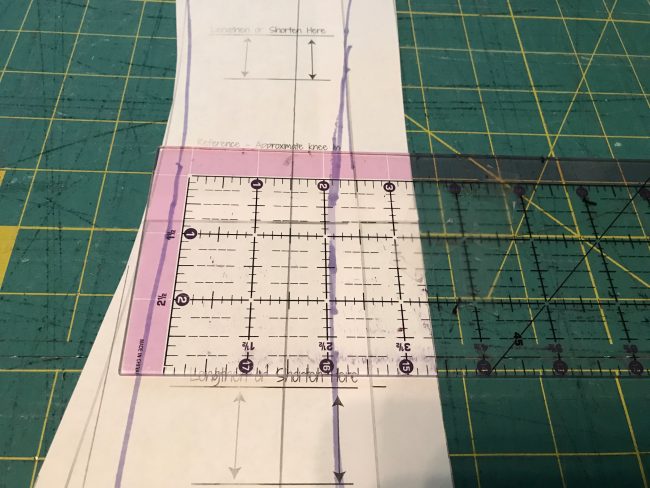
I started the hack by drawing a tapered line down from the knee point to the bottom of the pants from the inner leg seam and the center front seam on both the back and front pieces. I then sewed the center front seam of the pants using these pieces, but did not topstitch, instead using a basting stitch along the inner legs to test out whether they had achieved my desired “skinny-ness”. The amount you need to adjust is going to depend alot on your fabric- I would need to take less out of a stretch denim than I did with this super-stretchy ponte.
You want to make sure, as you’re basting and hacking away at the center front seam that you’re keeping the seam right down the front of your leg- too much off either side and you’ll end up with a twisted seam. I would serge some off, pin it around my leg, and then mark a new line to serge, etc. Keep track of all your adjustments so you can alter the second leg to match, and have a pattern piece for next time!
After I had gotten the legs the way I wanted them, I toptsitched the center front and went to work on the inner leg seam. The way the pattern instructions have you sew up the legs is helpful here, because you can make small adjustments to the inner leg seam as you go. Again, just be careful that the center front seam doesn’t get pulled toward the side.
The purple line in the photos shows how much I took these in, but again, your mileage may vary depending on your fabric and how much you want to narrow the pants. I’ve tried to provide some measurements here with the ruler, so you can see what I did- don’t mind the messy floor! Less time cleaning means more time sewing, right?
Pants Back Alterations:
![]()
![]()


![]()
![]()


![]()
![]()


Pants Front Alterations:
![]()
![]()


![]()
![]()


![]()
![]()


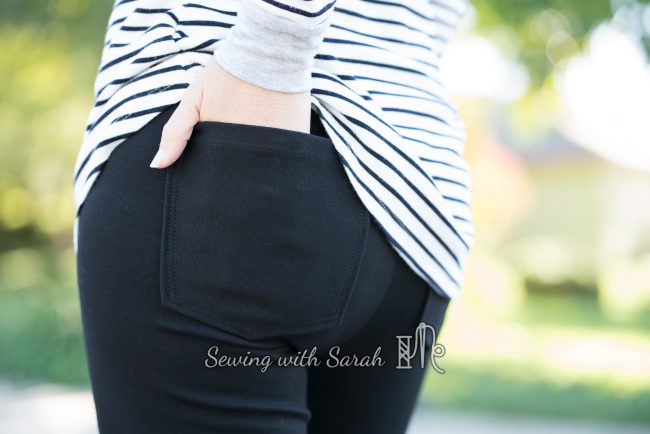
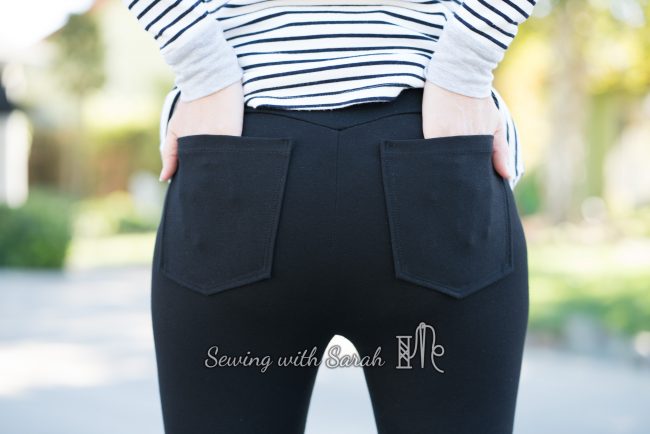
After I was finished with the legs, I added back pockets, using a more traditional “jeans” pocket shape and topstitching, to match my “jeggings” look. While the pockets included on the Chelsea pants are adorable, I needed something a little larger for my phone, and this fit the bill perfectly.
![]()
![]()


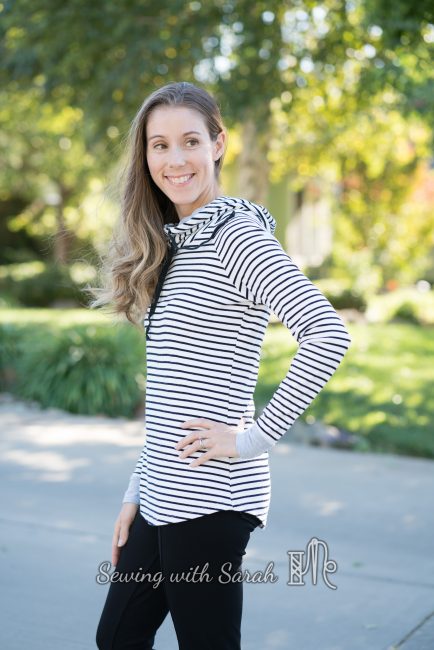
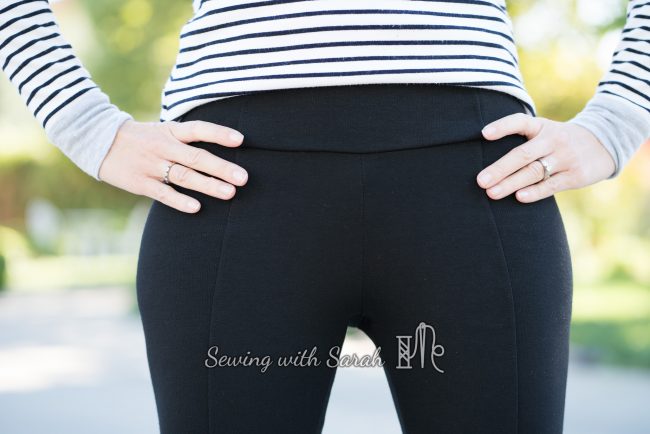
I also went with the high rise waistband, using a compression knit for the inner pieces to help hold everything in. This hits a couple inches above my belly button, in case you’re wondering.
![]()
![]()


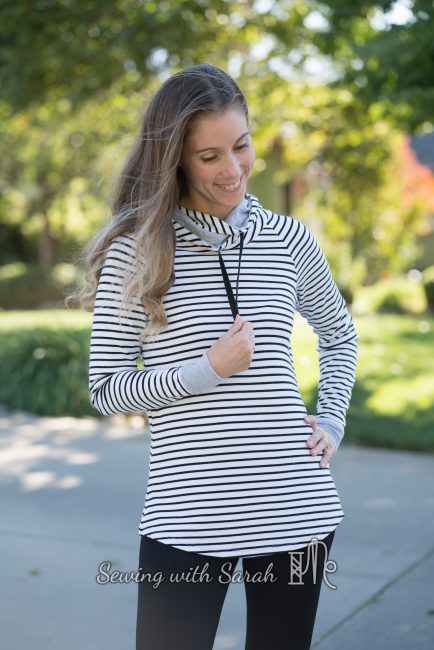
I’m in love with my new pants, and hope this helps show the versatility of this pattern, if you’re willing to get a little creative! As a side note, I’m wearing my very favorite Slim Fit Raglan here- it happened to match perfectly!
![]()
![]()


Each day this week we will have one or more bloggers on the tour posting their Chelsea pants, tips, hacks and tricks, so stay tuned!
EDIT: I’ve now included a short video on how to adjust the flare and/or create a pair of Skinny Pants from your Chelsea pattern! Check it out below:

Would you like to win a pair of the Chelsea pants (or another Greenstyle pattern, if you’ve already purchased the Chelsea’s) for FREE? How about some awesome stretch denim from Aurora Fabrics to complete the package? Enter the giveaway below, and check out all the other bloggers on the tour! Don’t forget to subscribe to my blog, and follow me on Instagram so you don’t miss a post!
Chelsea Pants Blog Tour
Note: this post contains affiliate links. Thank you for your support!