

![]()
![]()


I hinted at this on Instagram a few weeks ago- but I finally did it! I completed my first pair of me-made jeans, and guess what?
Just like everyone said, it wasn’t all that hard. Sure, there was a bit of a learning curve, especially with the fitting, but the actual construction process was more time-consuming than it was difficult. If you’re still on the fence about me-made jeans, or wondering if you should invest the time, I want to assure you right here and now that not only is it worth it, it feels damn good!
How I got started
I knew if I was left to my own devices, I’d overthink the whole thing, and never get past the tracing phase, so I signed up for a weekend jeans making intensive at Hart’s Fabric in January (that was forever ago! Bad blogger!).
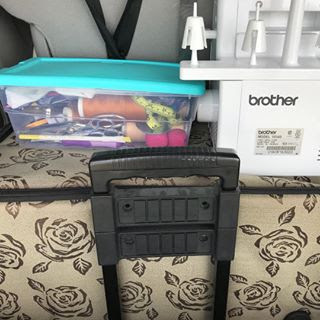
I live a good 4 hours away, but I lugged my machines, fabric and notions to Santa Cruz, with my daughter (who is still nursing, and not ready to spend the night without mama) and my mom (who is the most awesome traveling babysitter ever) in tow.
We were given a few options about which pattern to use- I chose the Ginger Jeans based on the rave reviews and the plethora of resources and experiences on the blogosphere.
![]()
![]()


The class was led by Kiki, who has pretty much the opposite sewing philosophy from me. It might seem like I’m always hacking patterns and mashing them together, but when I sew something for the first time, especially something as “complicated” as a pair of fully featured pants, I follow the pattern pretty rigidly. Kiki, on the other hand, was much more relaxed about the whole process, viewing the pattern instruction and design as a suggestion, rather than a hard and fast rule.
![]()
![]()


For example, the first thing she did was suggest that we just make up our muslins with 1/2″ seam allowances, instead of the 5/8″ included in the pattern. She also told us we could use either stretch or non stretch fabric for our test pair (the pattern is designed for stretch). My type A personality pretty much had a heart attack right then and there, but as soon as I recovered, I realized that I could really learn alot from her approach.
While she was laid back, she was certainly no slouch in the fitting and construction process, and did a really amazing job helping me (and the others in the class) tackle our fit issues and construction fears (fly front zipper phobia anyone?).
Having someone walk me through the process of constructing and fitting a muslin was invaluable- and totally worth the price of the class in itself, especially since I’d never muslined a pants pattern before (I made these chinos last year, but they didn’t fit me well at all, and I didn’t have the slightest idea how to fix them).
My Muslin
Before cutting into our muslin fabric, Kiki had us measure ourselves at several key points, including the waist, hip, thigh, knee and calf, and compare these to the pattern. This was a great suggestion, and revealed that the calves would be way too tight (something I think is common with this pattern), and that the waist would be a bit too loose.
This took a little math, but saved at least one round of muslining right out of the gate, as we made adjustments to the flat pattern to accommodate. I also shortened the pattern by 2″ at the lengthen shorten line, to account for my height at this point.
![]()
![]()
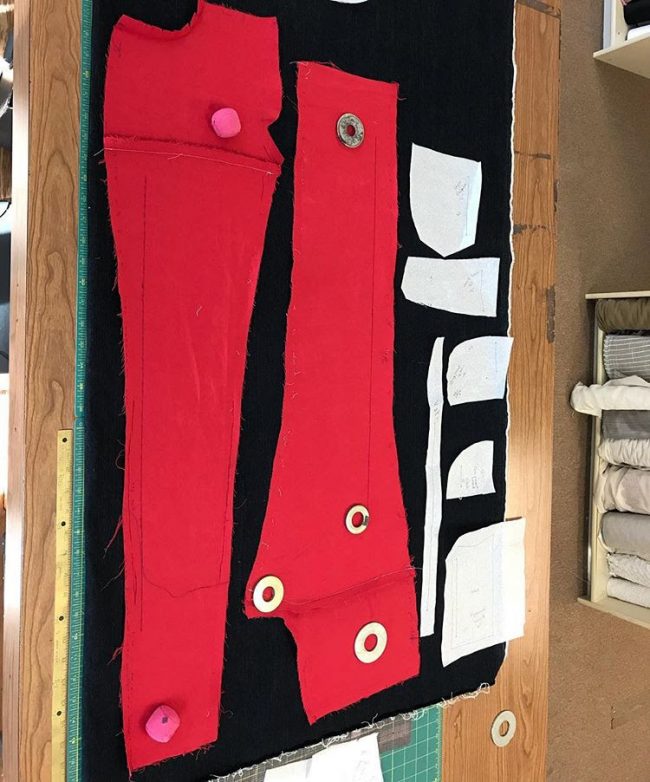


My muslin was made from some red stretch denim from my stash- it wasn’t quite enough for a full pair of pants, but worked great to test out the fit.
My first fitting revealed a pretty good fit in the waist, hips and through the crotch, which is one of the areas I was dreading having to adjust. However, I had significant (to me!) wrinkles on the backs of my thighs, and Kiki found that if I took an additional 1″ horizontally out of the upper thigh, from just below the crotch point, that many of those wrinkles disappeared. She also suggested a low butt and thin thigh adjustment.
![]()
![]()


After trying on our muslins, we took them apart. She suggested that we use them as our pattern, but I wanted to make sure that I had the adjustments down correctly on my original tracing as well, so I took a bit of time to transfer the markings, with her assistance.
At this point, I was pretty happy with the fit, but I ended up making more adjustments later on, as my fashion fabric had slightly different stretch and weight than my muslin fabric.
The Real Deal
I had originally brought a few fabrics to use for my jeans, but the thing about sewing in a fabric store is that you have allll these options just staring at you, tempting you to abandon your plans for fabric austerity and make a purchase. The class discount wore away at the last of my resolve, and I purchased some Italian designer stretch denim from Hart’s to use for my final pair.
Kiki was kind enough to take it home and wash it for me during the lunch break, so I could use it right away (seriously, she was the best!). This fabric felt amazing right off the bolt- like it had already been “broken in” and washed up to the perfect softness.
My other hang-up about making jeans was the construction process- I had no idea how to install rivets, do topstitching, etc., so having the momentum of the class to carry me through was exactly what I needed. I almost never get two and a half solid days to sew, so while I didn’t leave with a fully constructed pair of jeans, I was amazed by what I was able to accomplish.
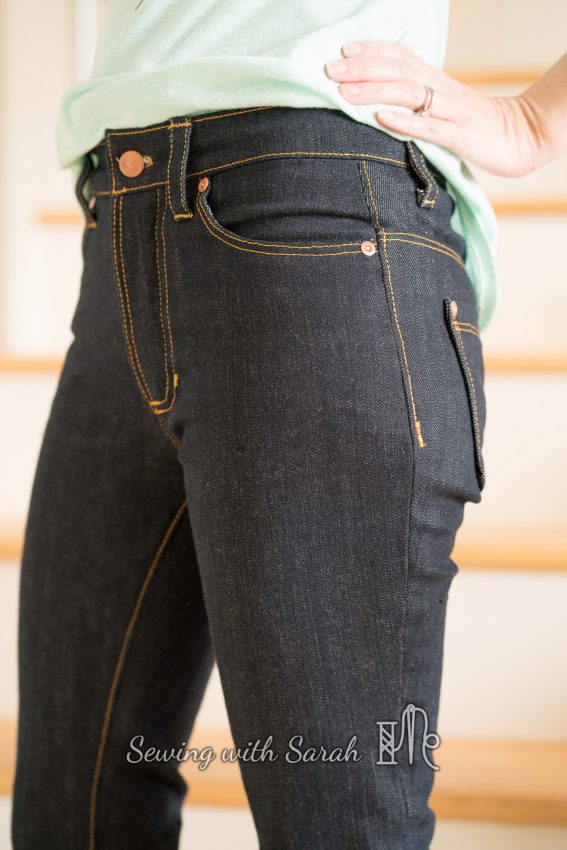
I was pretty excited when I whipped up my fly front:
![]()
![]()
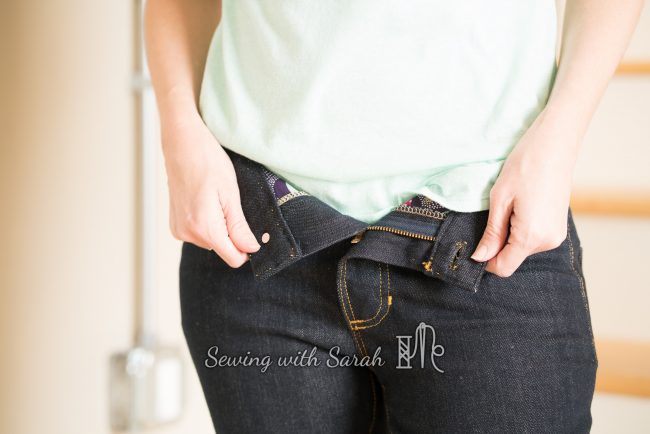


![]()
![]()


and we spent our lunch breaks talking about pocket designs. I was pretty excited to come up with this:
![]()
![]()
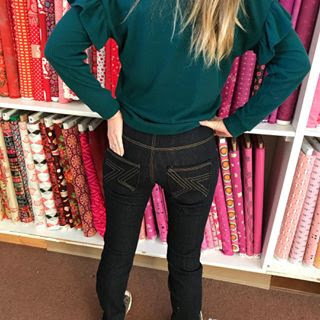


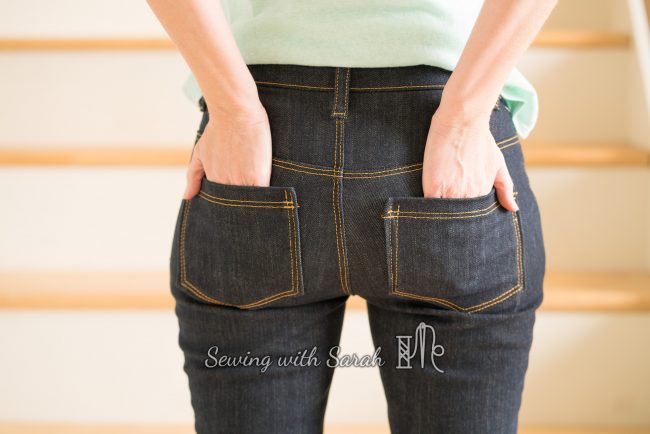
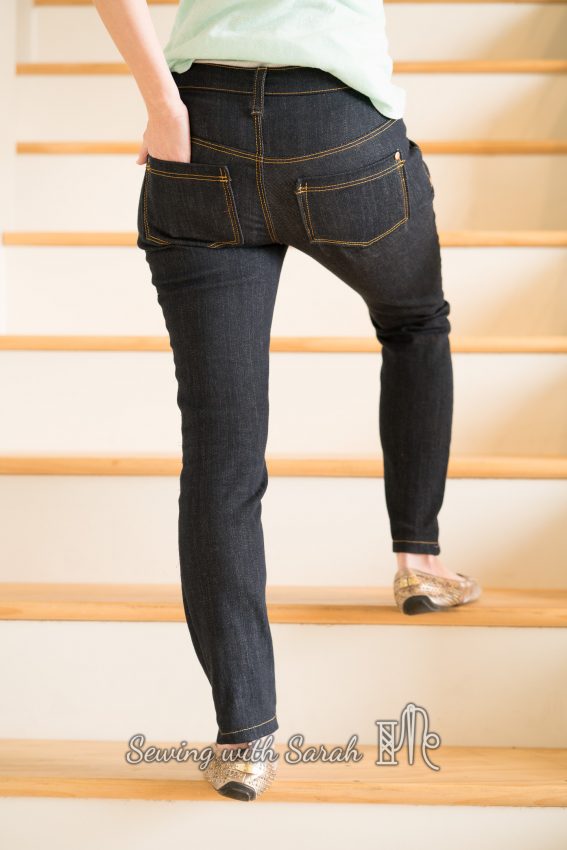
Until I took it home, lost one of the pockets, and realized that it pretty much looked like a pair of parentheses for my ass. Since I had to re-do one anyway, I just went with a plain top stitching design, like my favorite Gap jeans.
I also switched out the Ginger pockets for the Itch to Stitch Mountain View pockets (check out my review of those here)– they were smaller and more flattering on me. I’m pretty stoked about the pocket placement- it took alot of wonder tape to get it right solo, but I think it works well!
![]()
![]()


All of the notions for my jeans came from a Closet Case Files kit I ordered when the pattern was first released. I was only capable of sewing T shirts back then, but I knew someday I’d be able to tackle these!
![]()
![]()


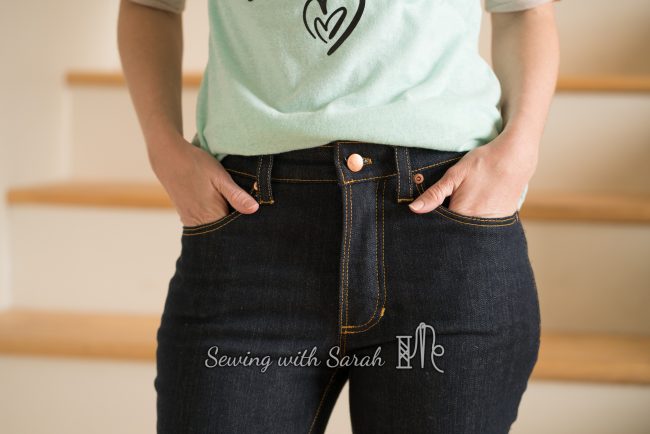
My machine was NOT in love with the heavy thread- I learned that it needed regular thread in the bobbin, and topstitching thread in the top only. For the bar tacks, I couldn’t use the heavy topstitching thread without causing a thread nest, so I just used matching standard weight Gutermann thread.
I also debated at length about thread color- IG peeps came to my rescue, and recommended I go with the classic gold. I’m so glad I did- it really pops on these pants!
![]()
![]()


I also learned later that the nipple rivets I used are actually more difficult to set without a snap press die- standard rivets are much easier to use with a hammer, and what I’ll be sourcing next time (until I can afford a jeans die for my snap press. Unfortunately, I own the KAM brand, and they have a very limited selection of jeans dies and rivets, so I think a new press is needed).
I left with a happy heart, some great new friends, and a pair of jeans that was fully constructed except for sewing on the back pockets, waistband, and rivets.
![]()
![]()


Which is where I came to a screeching halt, as life, and my naturally tendency at procrastination got in the way.
Fortunately, No Fear Jeans month came along, and provided the motivation I needed to finish these babies up!
![]()
![]()


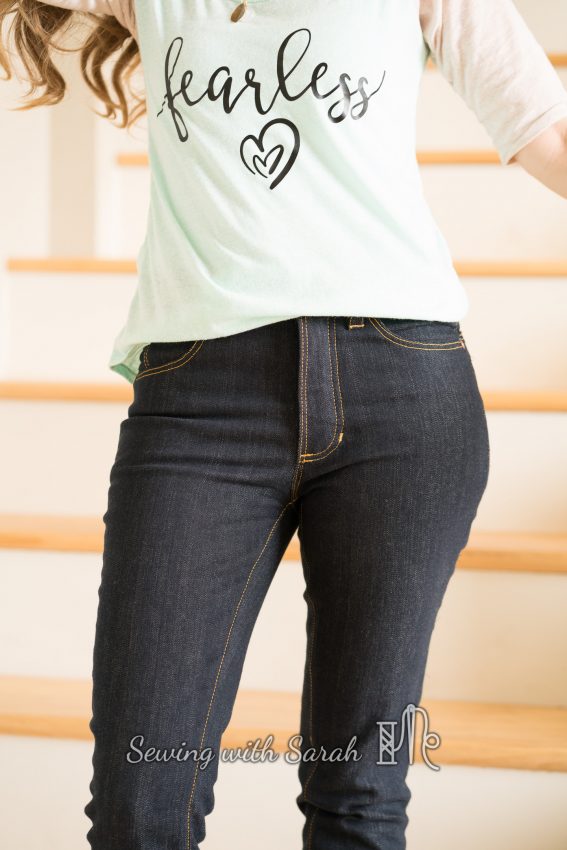
After trying them on a few times at home, I decided to scoop out the back crotch more, let out the hips a bit, and take in the legs through the thighs and knees. I got rid of most of the wrinkles below the butt and knee, though I’m still wondering if I need a knock kneed adjustment.
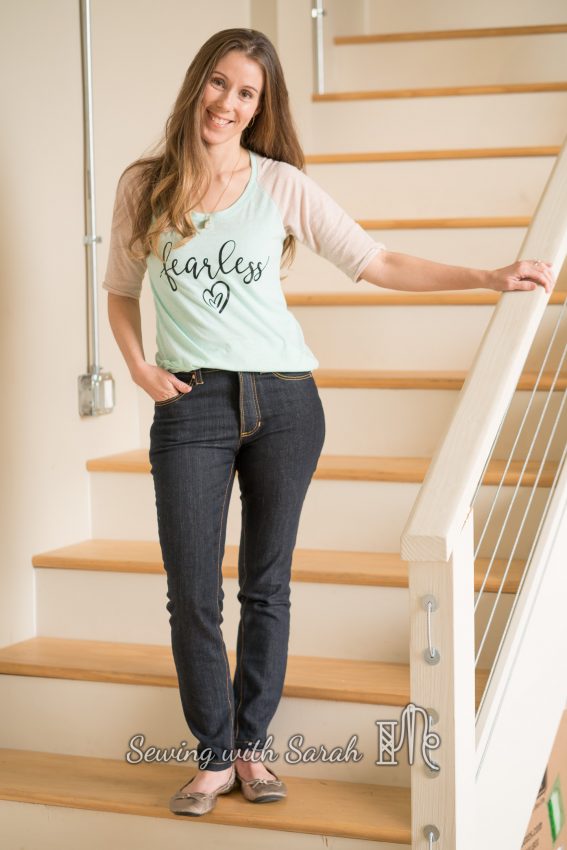
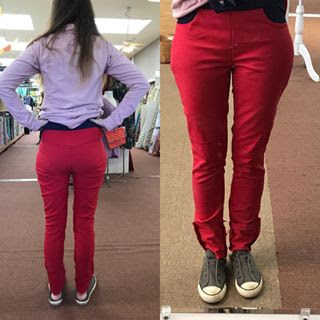
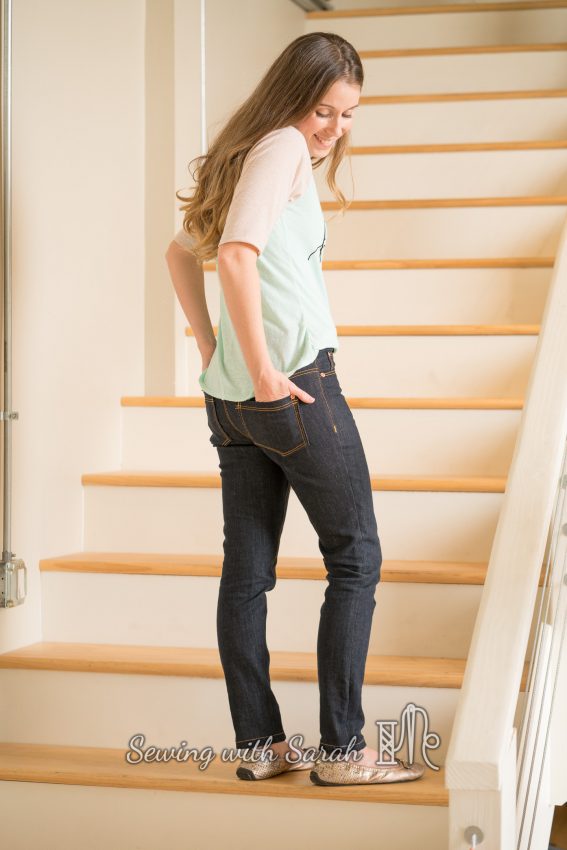
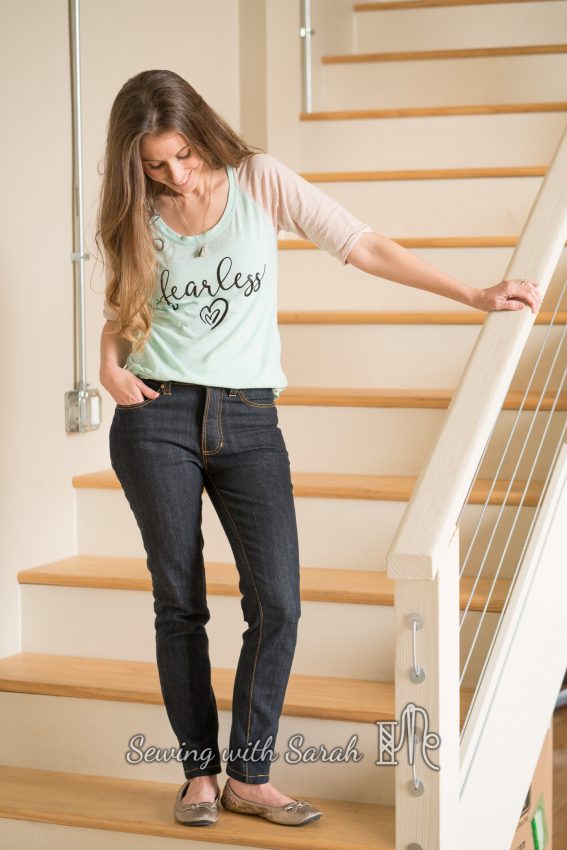
Here’s how they ended up:
![]()
![]()


![]()
![]()


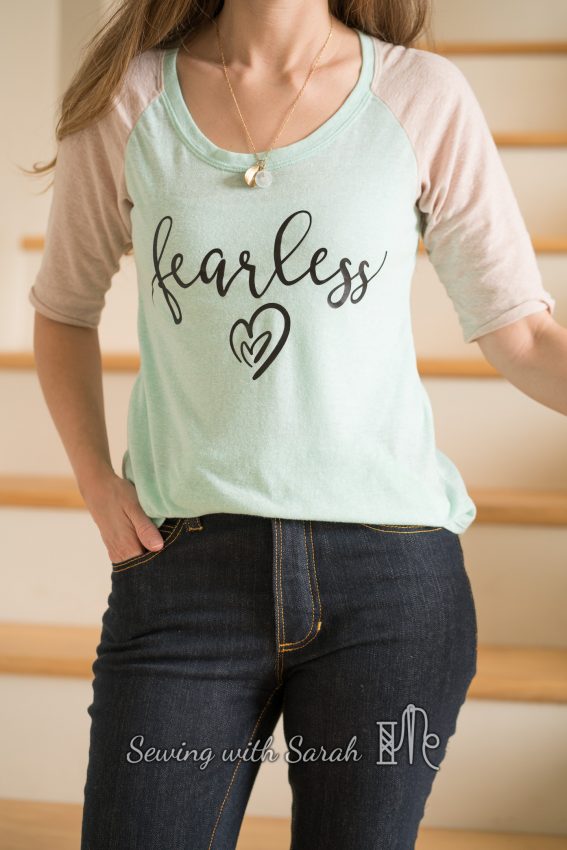
They really did make me feel fearless, so I had to make the tee to match (Jalie 3245).
![]()
![]()


My thoughts after wearing them for a while
I was on a sewing high after I made these, and wanted to make a dozen more right away. I may or may not have ordered a dozen yards of cone mills toward that end (hey, in my defense the plant was closing and I didn’t want to miss out!). However, I decided to hold off until I could wear them around ab it, and really evaluate how they felt and performed over time.
Here’s what I noticed:
- Leg twist. This is the most frustrating aspect of these jeans. Kiki did not have us cut our jeans on the single layer, and I’m not sure it would have mattered, because I experience leg twist on my left leg in almost all of my pants- store bought or hand made. I think it has to do with the angle of my feet- I had a medical issue as a child that required casts to straighten out my legs, and I think they might still be at a bit of an angle. I wish I knew how to adjust it though!
- Poor recovery: This fabric was super soft, but doesn’t have great recovery, meaning I can’t really wear them several days in a row without the fabric bagging out a bit. Next time I’ll test my fabric more carefully.
- Bum is a bit too tight: All that scooping I did at the back crotch for a low butt adjustment made the lower bum area and hips a bit too tight. Maybe I need to add some room to the sides? I’m still not 100% happy with the back of the legs either, so I’m still contemplating this.
- The waist is also too loose throughout the day. I did not add in the interfacing, as I wanted them to “give”- I think some knit interfacing might be a good compromise to allow some structure without feeling restricted.
Overall I’m pretty proud of myself for making these pants- I feel like I leveled up in the sewing world, and highly recommend them to anyone thinking about diving into jeans!
What’s Next?
The weather’s getting warmer, so I’m going to turn my focus to shorts. I tend to like my shorts a bit looser in the thighs than the Gingers would be, but maybe the Morgan’s would make good shorts? When the weather cools down again, I’d like to try a pair of Birkin Flares, and I’ll have a comparison between the Gingers and Sasha pants to share with you soon (oooh, maybe Sasha shorts?). If you’re curious, you can check out the Sasha trousers I made here.
Thank you for taking the time to read this post! It was an exhausting one, but I hope it was helpful! I’d love it if you would take a minute to subscribe to my blog, and I always enjoy connecting with people on Instagram as well!