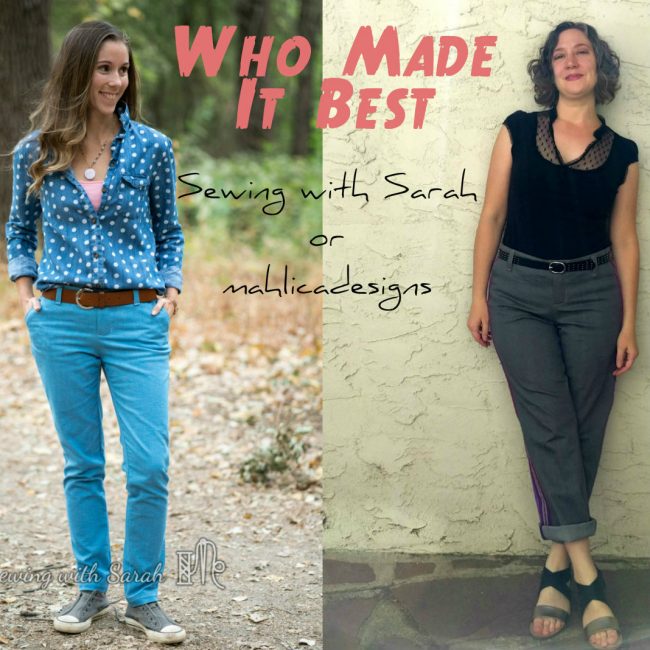
Who Made it Best? Chi Town Chinos Edition!
![]()
![]()
You all know how much I love pattern testing and blog tours to bring on the heat when I’m feeling lazy or my sew-jo is lacking, right?
Well, I figured that to get over the REALLY BIG hump that is sewing a pair of fully-featured pants, I’d need a stronger cocktail- and Melissa of Mahlica Designs provided exactly what I needed in the form of her “Who Made it Best” Blog Competition.
What is that, you ask? Here’s the deets:
Who Made It Best is a friendly challenge hosted by Melissa of mahlicadesigns where she pairs up with a fellow bloggers, and we sew the same pattern to see Who Made It Best. The challenge rules are simple: 1. We agree on a pattern to use 2. sew it up to suit our personal styles 3. share it with you and ask you to vote for your favorite.
Sound fun right? I couldn’t resist! I begged her to accept me as a competitor, and she did! (Thanks Melissa!)
I wouldn’t call myself a competitive person….except, ok, fine, I’m a competitive person. I’m all about cheering everyone else on, but when I have a horse in the race, all magnanimity goes out the window and I’m the crazy mom cheering like mad at the side lines because MY KID just got the goal.
![]()
![]()

So…a blog competition would be not only fun, but force me to knock out the best damned first pair of REAL PANTS I’ve got in me. No rushing through to meet a deadline- I would start these puppies early and go methodically through, taking my time with each step and making sure they were as good as I could get them.
![]()
![]()
Which was a great plan. Until real life stepped in, and I had 5 birthday parties to plan and execute (our family has a very strange confluence of birthdays in September), work to catch up on (yes, I do have a real job), kids to teach, and a house to run. Not to mention the little things, like sleep and food.
![]()
![]()
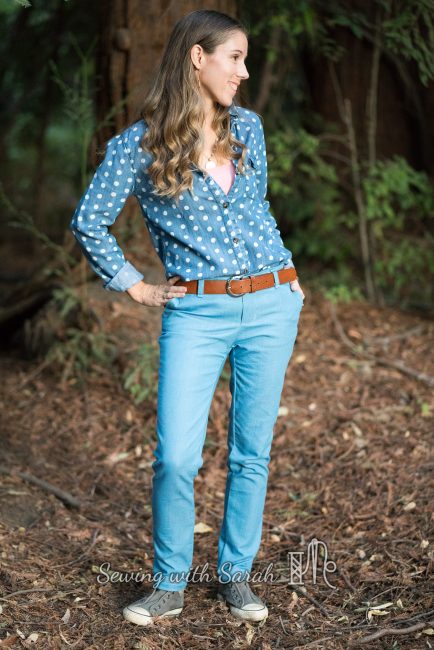
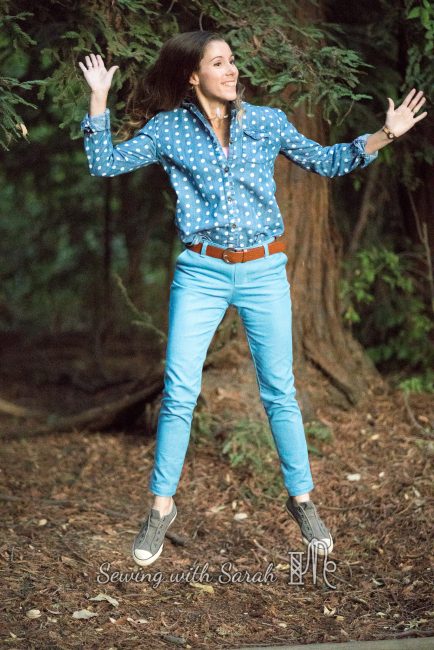
But, I had a deadline, and I wasn’t going to miss it- Melissa had been kind enough to take a risk in working with me for the first time, and Alina of Alina Designs had gifted me the Chi Town Chinos Pattern to sew up for the competition, so it had to get done! Throwing all my eggs into one basket, I grabbed my good fabric (light blue denim from my San Francisco fabric shopping trip), looked over the instructions a billion times, took a billion more deep breaths (because REAL PANTS, people) and dove in.
![]()
![]()
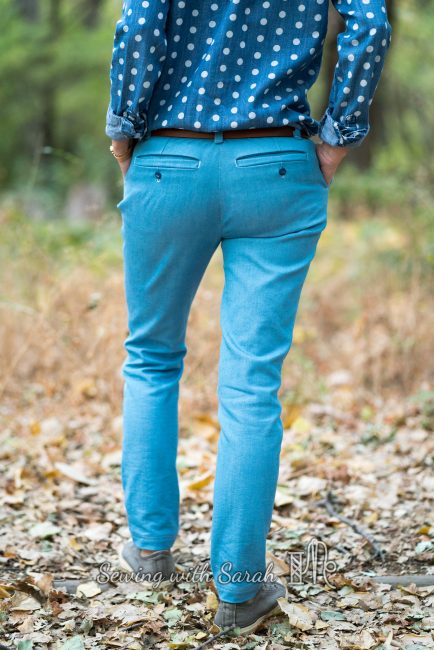
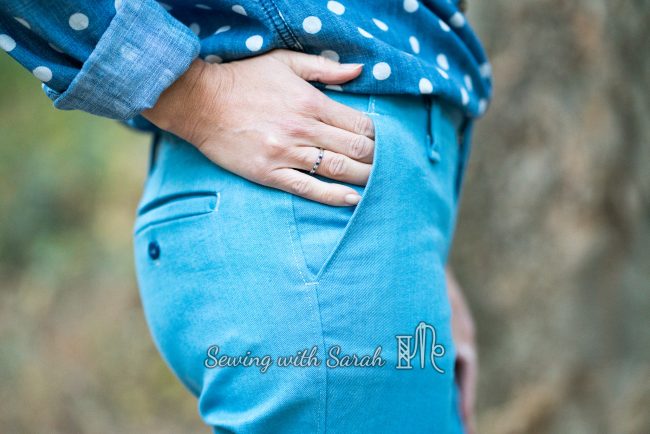
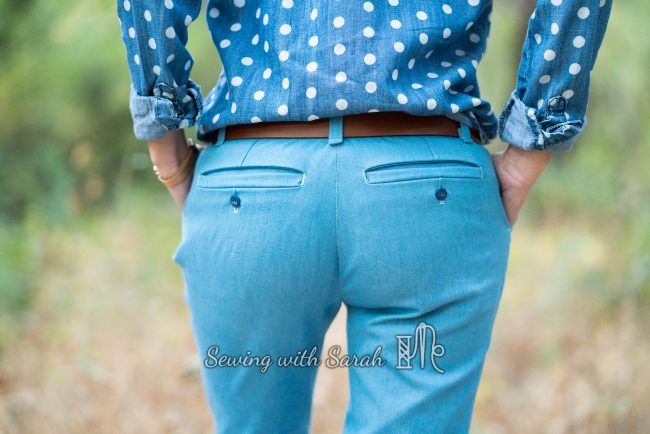
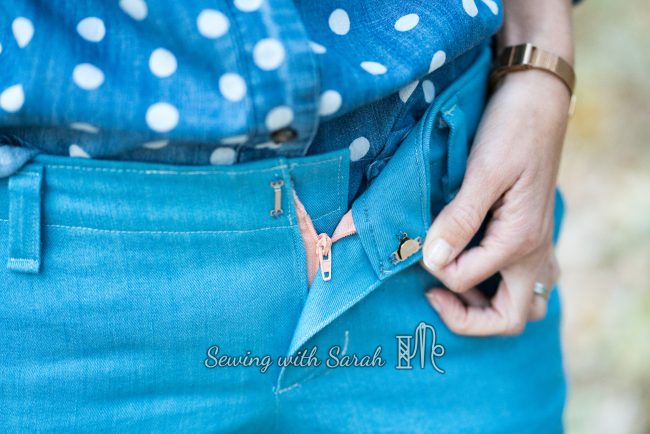
If you haven’t checked out the Chi Town Chinos, you’re in for a treat. Alina has thought of every detail with these, from pocket facings to french seams, to fly shields. I chose to sew up the pants version with the back welt pockets, because why not? I’ve done welts and a fly once before (on these pants for my son), but the grown up version was much more detailed and scary.
![]()
![]()
Fortunately, Alina has really great instructions, and a full sew along on her blog, both of which I stuck to like glue (Alina, if your number of blog views tripled last week, that was me, sorry!).
![]()
![]()
Somewhat miraculously, everything came together beautifully, until I got to the step of trying them on for fit (I’m SO thankful this step was included in the instructions!). I’d chosen to sew a size 2, as I was between the 0 and 2 but figured they would be easier to take in than let out.
This was true, but my first fit test revealed that they were WAY too big for me, and the fact that I skipped right to sewing the pants without making a muslin backfired hard. After having a mild panic attack, I dug in and set to work basting and re-basting to adjust the fit to my body. Honestly, this was a great process for me, and will be necessary with any pants pattern (bottoms are so much more complicated to fit than tops!), so I don’t fault the design at all.
![]()
![]()

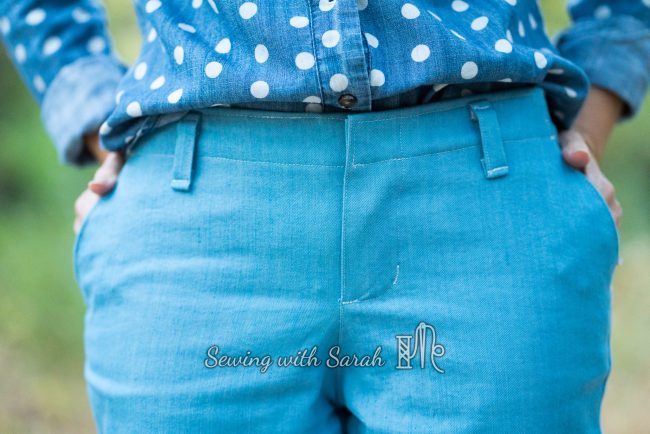
My adjustments included sewing the side and inseams with a 1-1.5″ seam allowance starting just below the hips, and using the center back extension to take the pants in an additional 2″ at the waist. I also performed a flat butt adjustment (sad, but true), to get ride of some wrinkles around the tush, according to the Closet Case Files pants fitting guide.
The fact that the Center Back seam is sewn at the end makes the waist easy to adjust, so that alteration was seamless and didn’t require any unpicking. In the end, there are still some wrinkles going on back there- but I don’t think they are too bad for a first try, and certainly no worse than my ready to wear chinos!
![]()
![]()
I also think any wrinkles are extra obvious in my photos because I had worn them all around town before we were able to stop off at the park to take the photos.
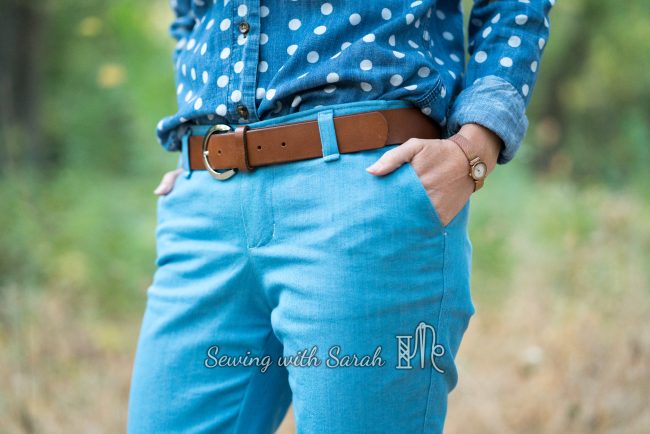
One of the steps I was most anxious about was constructing the belt loops and bar tacks- I just couldn’t imagine how my machine could go through so many layers! Surprisingly, it didn’t struggle at all, once equipped with a jeans needle. I also used a folded piece of fabric behind the presser foot in a few places to help it get started over any big bumps.
![]()
![]()
Some other tips I might offer if you plan to sew these up (or any full pants) is to try out the fly and welt process on a scrap before beginning, so you get a feel for how it’s supposed to come together. This makes it much less stressful when you’re cutting into your favorite fabric!
Also, it is MUCH easier to follow Alina’s advice and get all your prep work done before starting- because you won’t want to stop to do this after you get on a roll! Also, these will take ALOT of thread. Go ahead and buy the really fat one- you’ll need it! Finally, and I’m hanging my head in shame here, it’s probably a good idea to do a muslin, before you start. I really lucked out with my fitting adjustments- I think we tend to be really hard on our self-made garments, but when I look at them objectively I’m really quite happy with the fit I was able to achieve! Of course, next time I’ll be able to do even better.
When I look at them, part of me can’t believe I actually did it- and I’m very grateful to Melissa and Alina for helping make it happen! I feel like it really opens up a whole new world in sewing for me, giving me confidence to tackle longer and more detailed projects that I might have passed over before as too complicated or time consuming (Evergreen jacket, I’m coming for YOU!). I might have jumped for joy a few times!
![]()
![]()
Now please excuse me, while I go sew up a simple T-shirt with my eyes closed while wearing my awesome new Chinos!
But wait! Don’t go yet! You have to vote for a winner!
Please visit mahlicadesigns for more pictures and details on her version, then place your vote for Who Made It Best. The poll will be on both sites, so you can see both versions before you choose your favorite. Voting will be open for one week.
![]()
![]()
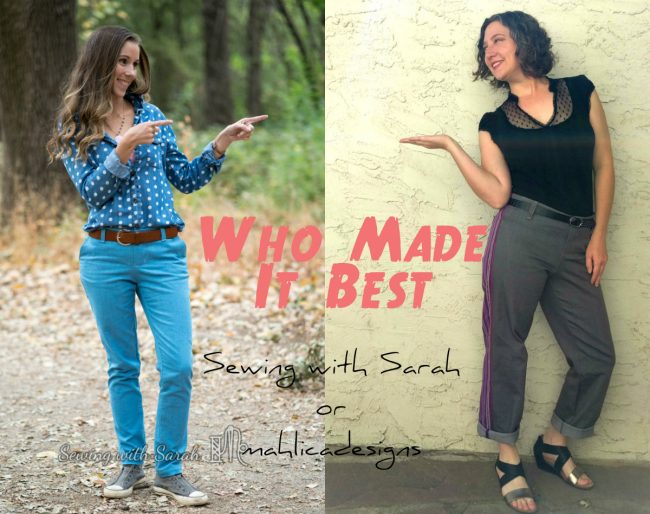
VOTE HERE
Note: this post contains affiliate links. Thank you for your support!
[…] the original pattern plus expansion pack for our challenge. Please check out Sarah’s blog here to see what she […]
Oh my, your first “real” pants & you made the welt pockets too! It seemed like I spent two hours on those welt pockets on my first pair- so many steps.
I’m just a little ahead of you in my pant making experience and I’m happy to share that the gleeful feeling of accomplishment continues on. Like you, it opened up a whole new area of sewing for me, helped me conquer my fears about fitting, and helped me fill a terrible need in my wardrobe.
Thank you so much for joining me in the Who Made It Best challenge. It was fun to get to know you a little better and to see what we would come up with based on the same starting point.
Thank you Melissa! I’m thrilled to have a sewing mentor to follow and really enjoyed the challenge! Your pants look perfect- I hope to get to that point someday!
These are awesome! Great work!!
Thank you Jennifer!
[…] up the Lander Shorts for this week’s challenge. Please also check out Arielle’s blog here to see her super cute version. Isn’t this print she choose […]