


![]()
![]()


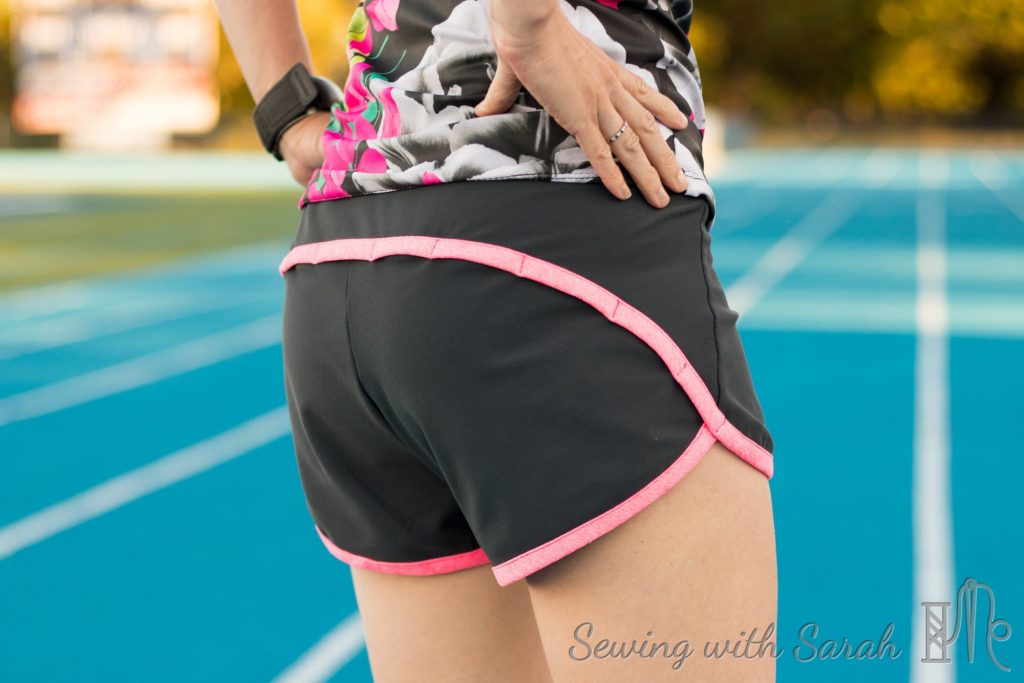
The Moxi shorts from Greenstyle Creations are one of my go-to summer patterns- they fit my #momlife perfectly, and give off a cool, athletic vibe even if I haven’t hit the gym all week.
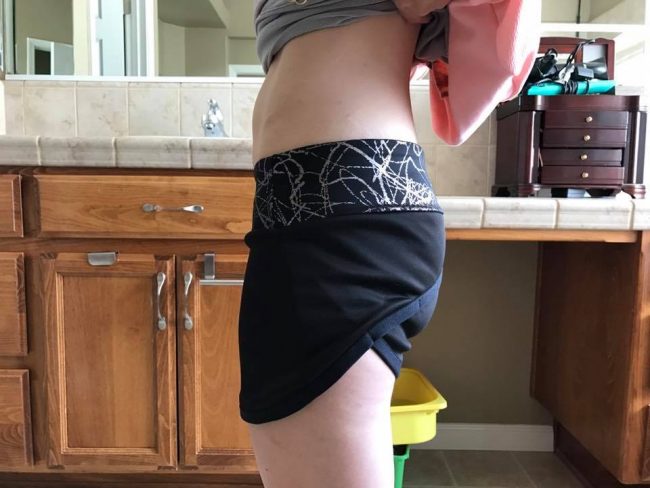
Once you know the pattern, they go together pretty quickly, but there are a few “tricky” parts that might trip up someone who’s unfamiliar with their construction. Someone like, you know, ME. Confession time: the first TWO times I made these during testing, I sewed them together WRONG. While this was exceedingly embarrassing, it was also a great learning experience.
See how the back is SO SHORT here compared to the front? That’s a tell tale sign of incorrectly assembling the upper and lower back. I share this terrible photo for posterity- so you don’t follow in my footsteps.
![]()
![]()


I also wasn’t too fond of bias tape before making these shorts- I’d used it in a few patterns, but nothing recent, and I was dreading all that ironing, folding and precise stitching.
Well, after sewing up a bizillion versions during testing I made friends with bias tape, and I want to help you do the same. I’ll also show you how to properly attach the upper and lower back of the shorts so you don’t end up with the dreaded “underbutt” featured above (if you aren’t familiar with that term, I’ll let the urban dictionary do the work for me!).
If you’re new to sewing with bias tape, I’ll give you a quick run-down. Bias tape is a folded binding made from strips of fabric cut on the bias, or the diagonal. When you cut a woven fabric on the diagonal, it has a fair amount of mechanical stretch, making bias tape perfect for finishing curved edges, like necklines, armholes, or hems, because it can stretch slightly to accommodate the curve. You can also cut knit fabric on the bias, and both knit and woven bias tapes tend to lay nicer than straight cut strips.
Bias tape is created by ironing the bias strip in half, and then ironing the two edges in half again, to meet the fold. If you’re using double fold bias tape, like the Moxi shorts, you will be ironing it in half again, to enclose all edges. If you’re using single fold bias tape, like I did to finish the arm and neck edges of my Jalie Rova dress, you will just iron the two edges toward the middle. On my Rova Dress, the bias tape was not visible from the outside- on the Moxi shorts, the bias tape will wrap around the hem of the shorts and be visible on both the right and wrong side of the fabric.
In the video below, I use the following tools to help me with my bias binding (aff links).
- Bias Tape Ruler (to cut my strips, not necessary but helpful!)
- Washaway wonder tape (to help attahc the upper to the lower back)
- Sewing Clips (great for so many things! I had to buy a second set because they are very popular for fort building in our house!)
- Clover bias tape maker (you need a 1 inch bias tape maker, but I like the set available here so you have other widths available too)
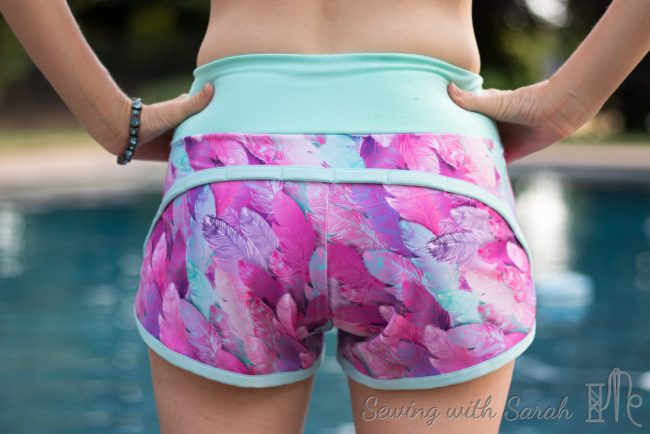
My fabric is a stretch woven from the Fabric Fairy– I just love how lightweight it is for summer! But remember, as long as you choose your size correctly (sizing down for knits), the Moxi shorts are quite flexible and can be made in everything from stretch chiffon to yoga knit or athletic brushed poly.
There are many ways of applying bias tape- in the video, I’m showing you the way that I am most comfortable with, that I believe is easiest for beginners. Side note: If you want to learn more about sewing with wovens, check out my blog tutorial on Wovens 101 HERE.
Now I can hear all your inner lazy seamstress voices asking: Can’t I just buy bias tape at the store? Well, I’m as lazy as the next over-tired-mom, but I can tell you this is a terrible shortcut. Store bought bias tape is stiff, unforgiving, and, frankly, kind of ugly. You’ll be much happier with the effort you take to make your own- I promise!
What about Fold Over Elastic? Ah, your inner lazy seamstress strikes again! I have used FOE on my Moxi Swim shorts (blogged here):
![]()
![]()


While FOE may seem easier, it is actually more challenging to apply well. It also isn’t a good match for all fabrics- you want to make sure that the weight of your bias tape matches your fabric- so stretch woven fabric really NEEDS a stretch woven bias tape to lay correctly. However, FOE is a great choice for a heavier weight swim, or scuba fabric. I would highly recommend practicing on a strip of fabric to perfect your technique if you haven’t used FOE before. Here’s another example of a pair I sewed from scuba and FOE:
![]()
![]()


Ready to check out the video? Remember, I’m not sewing the shorts from start to finish here- just showing you the parts that include making and applying the bias tape and sewing the upper to the lower back, as these seem to generate the most confusion. Let me know if you have any other questions- I’m happy to help you sewn your own I-haven’t-exercised-in-ages-but-I-look-awesome-anyway shorts! And if you do manage to hit the track or the weights in your new pair- more power to ya!

Don’t forget to check out all my other videos and tutorials HERE, and subscribe to my blog HERE so you don’t miss anything!
Do you have any interest in a sewalong for these shorts? Let me know in the comments- if there’s enough interest I’ll get one scheduled!