Tutorial: Perfect Knit Binding Every Time!
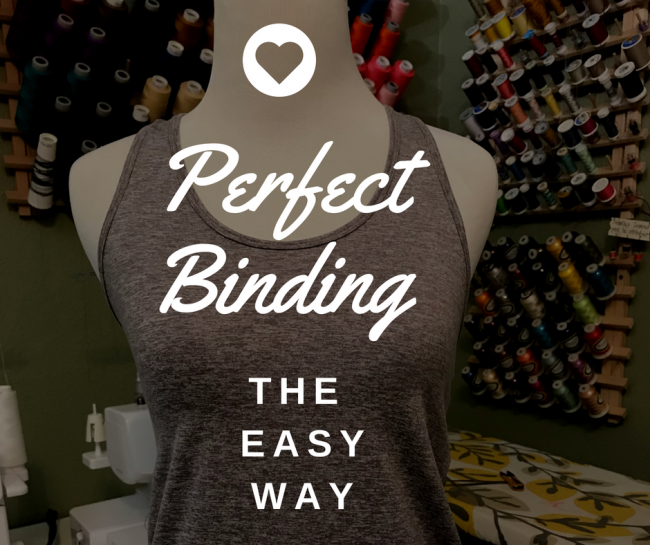
In preparation for the Moxi shorts Sew-Along (join me HERE on 7/23/18) I thought I’d make a few more tanks to match and motivate myself on my new workout routine (killer abs here I come!).
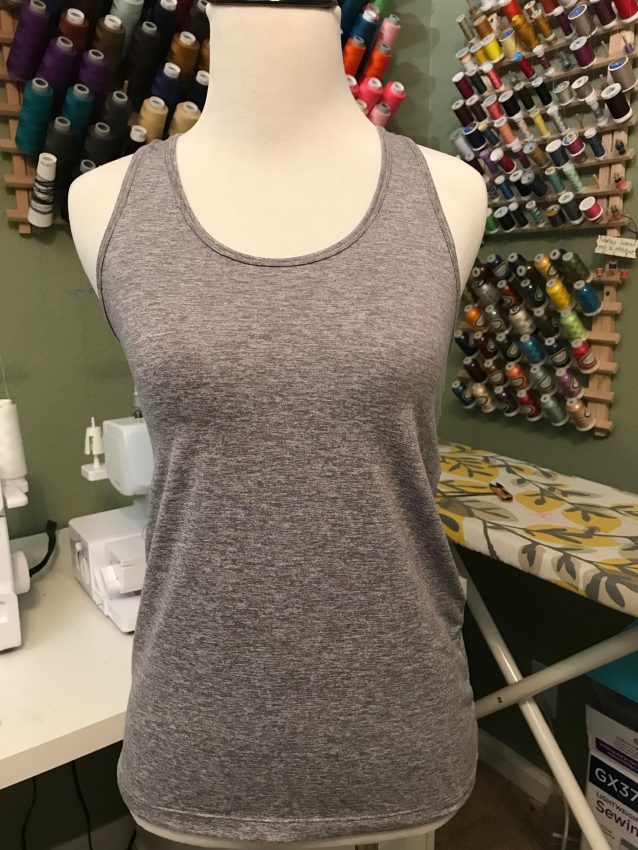
I chose the Lille tank from Greenstyle- I’ve made it before as a dress here, and as a tank here for my Fit Capsule. After making a series of small changes for my body and preferred fit, I’ve gotten it just about perfect, but the binding was always a pain.
![]()
![]()
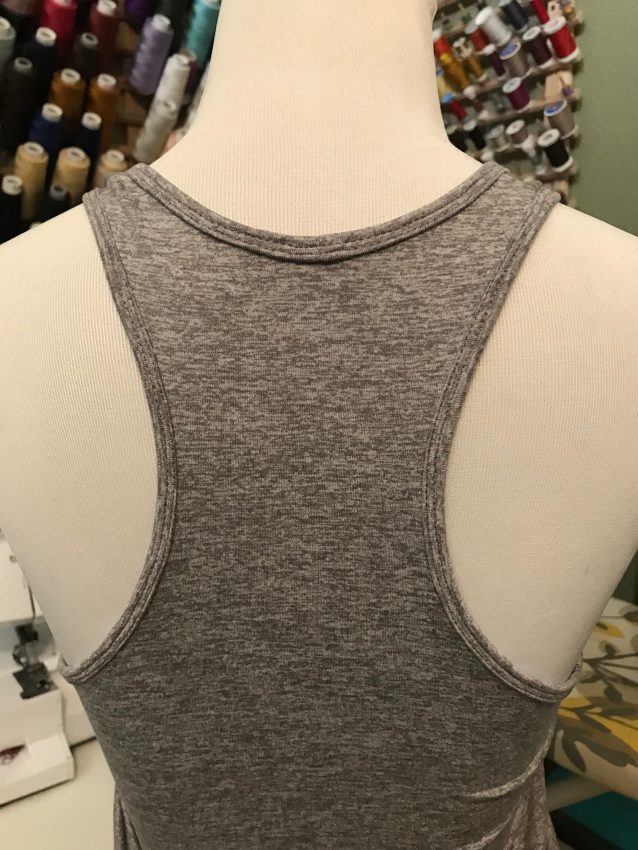
Sewing, unpicking, re-sewing, more unpicking…you know how it goes. They say that doing something over and over again and expecting the same result is considered insanity, and I didn’t want to go crazy with a seam ripper in my hand , so I decided to try something new. And hooray! It worked so well, I thought I’d put it together in a little tutorial for you.
What doesn’t work for me….
Before I get started in on the tutorial, I thought I’d share what I’ve done in the past that doesn’t work out for me:
- Sewing my binding in flat. This is a great technique if you can nail the perfect stretch every time, get those pesky seams to line up just right after binding, or if you’re using a binding attachment for your cover stitch. Since I’m not able to do any of these things, I needed a different method.
- Measuring my binding at 90-95%. This turns out to be too long for a deeply scooped tank like the Lille- it was always gaping.
- Double folding my binding. This is a great technique and necessary for making straps, but seemed like overkill for the inside of an athletic tank. Also, thinner fabrics are especially finicky about staying double folded, and always seemed to be shifting out of whack.
What DOES work! Video Tutorial:
I changed up a few of these things, and breathed a HUGE sigh of relief at how easy my new binding method was! I’ll let the video explain in more depth:
Photo Tutorial:
I also thought I’d offer up a few photos of the sequence, if you’re like me and usually watching these things while getting your kids to sleep. I’d love to hear which tutorial method you prefer in the comments (video or photos)!
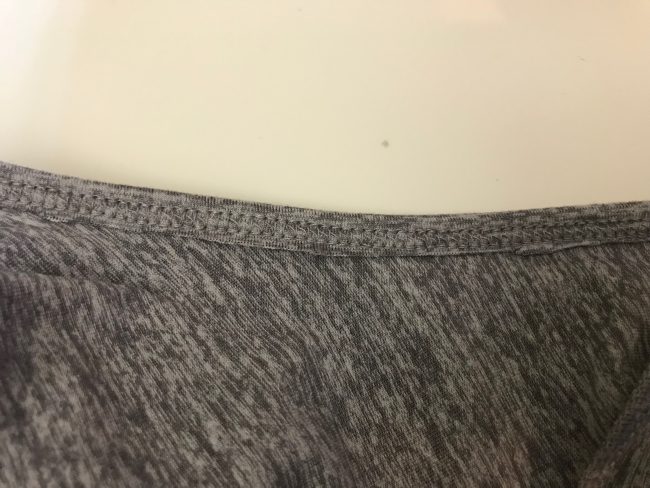
Step 1: Start wtih tank sewn at shoulders nad side seams.
Cut binding strips with the stretch, 1.25″ wide. Sew binding together in a loop (using a sewing machine), and quarter both the binding and the opening.
Step 2: Serge Binding to tank, right sides together, with 3/8″ seam allowance.![]()
![]()
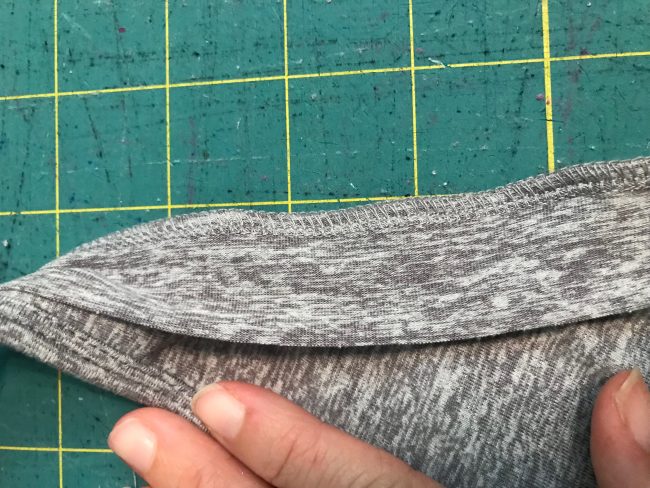
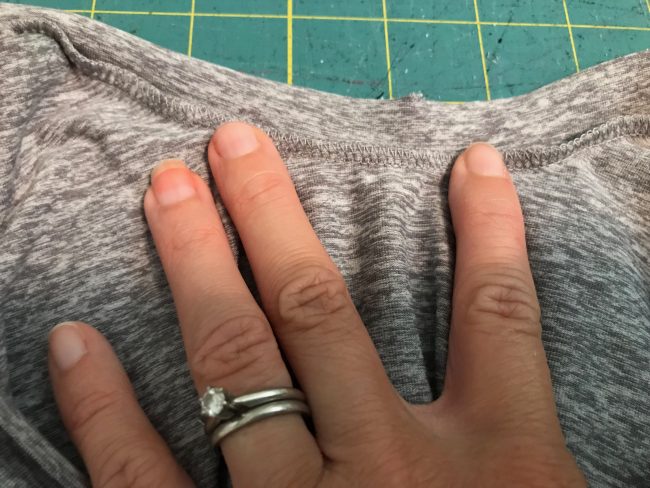
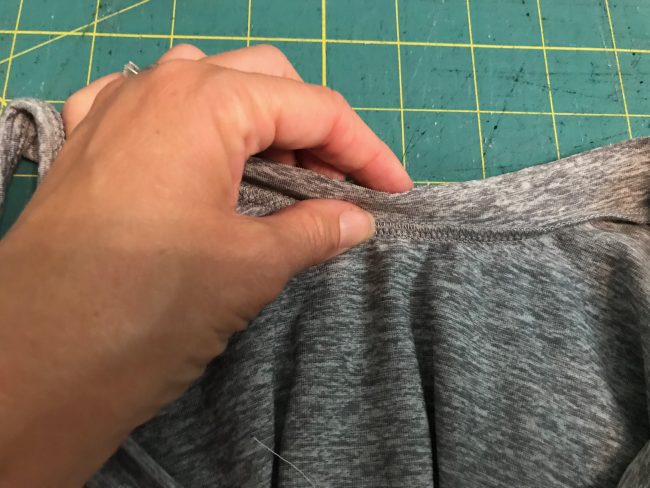
Step 3: Press seam allowance UP toward binding, and fold binding over the seam allowance to the back.
![]()
![]()
![]()
![]()
![]()
![]()
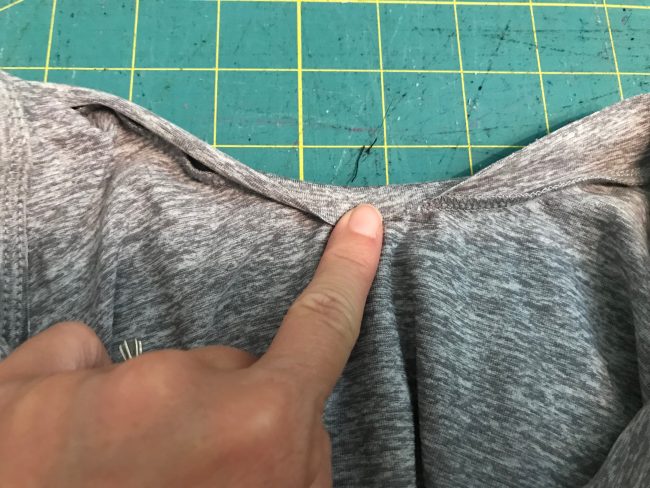
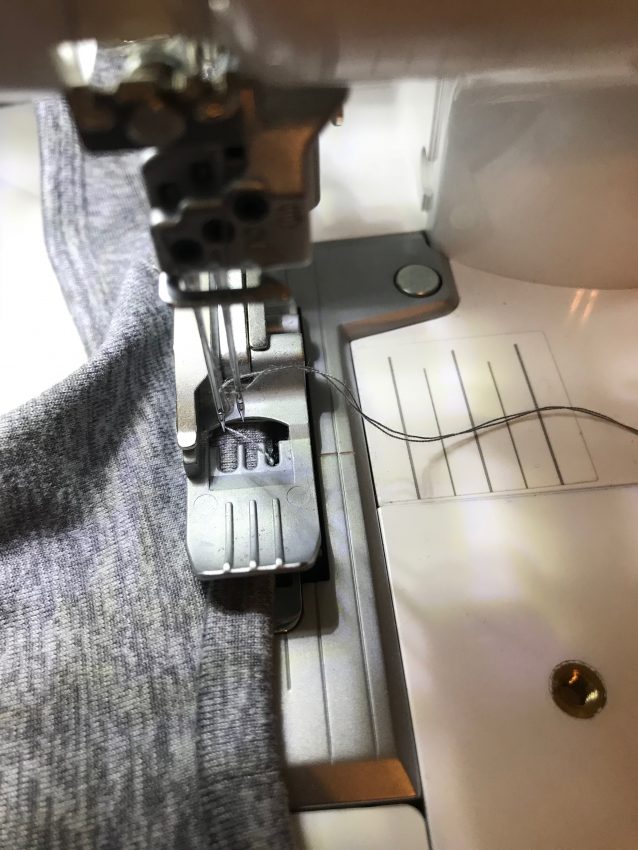
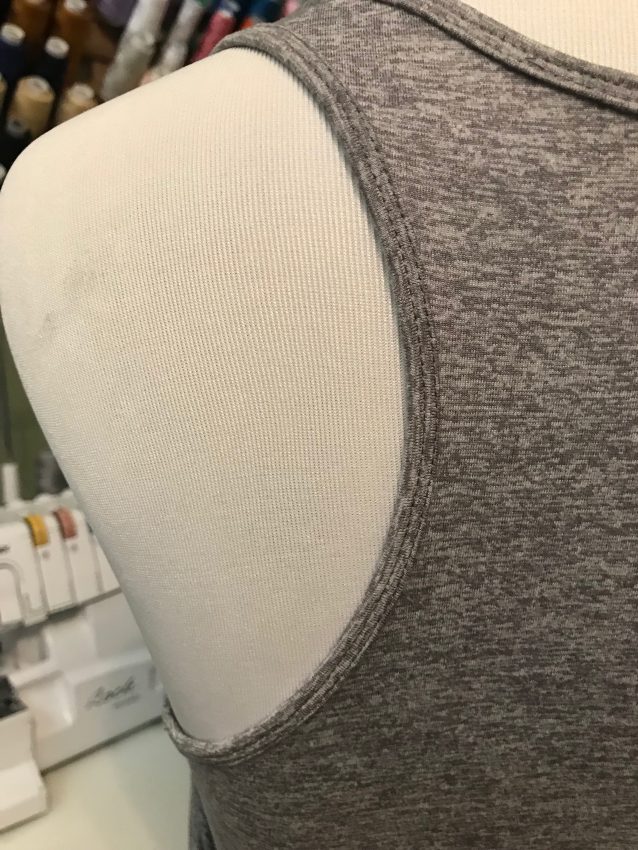
Step 4: Top stitch the binding with a coverstitch or a double needle.
![]()
![]()
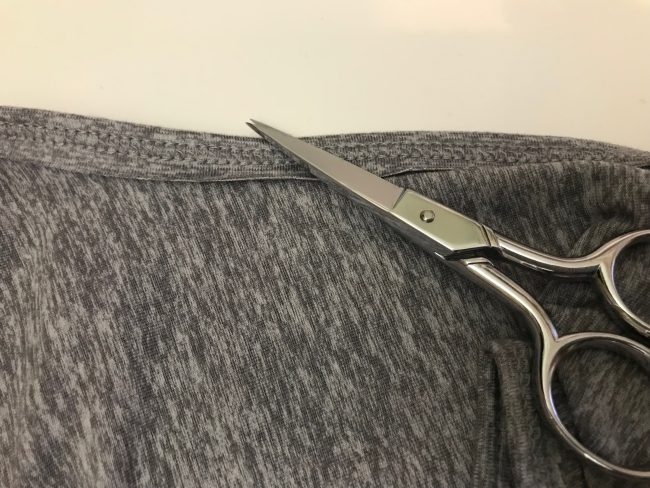
Step 5: Trim away any excess. Enjoy!
![]()
![]()
![]()
![]()
Well, that’s it! Pretty simple, right?
![]()
![]()
Is this how you already do it? I’m well aware I didn’t invent this method- but I’m so pleased to have perfected it!
I’m always down to learn something new, so if you have a hot tip related to binding, please leave it in the comments below, and as always, feel free to use the “share” button to share this link with friends!
![]()
![]()
Note: This post contains affiliate links- they help cover the cost of my sewing habit and the coffee it takes to keep me going! If you enjoyed this post, you can find all my sewing tutorials HERE on YouTube, or at the top of my blog under the “Sewing Tutorials” link (subscribe HERE).
Thank you for a clear and concise tutorial! Since you asked, I prefer to read over the written tutorial first, and then watch it on video. Both are excellent. Thanks again.
I think having both makes it easier as well- I’m glad it was helpful for yoU!
Hi,
Just watched your video. Thank you so much. I have a tank cut out ready to sew, but had a bunch of questions on how to sew the binding. Now I feel I can get started. I took many notes so I would remember all the steps. Knowing how wide to cut the band was a big one. Thanks again. Love all of your makes.
Sherri
I’m so glad the timing was right Sherri! Please keep me posted on how your tank comes out!
I used the same method the first time I tried binding, it’s mostly how I understood it from the Greenstyle tie back tank instructions. Super pleased with the results!
Greenstyle always has great instructions, don’t they!
I have a beginners question:
“Cut binding strips with the stretch” can you explain this please? Also, sorry, one more…is the binding the same length as the opening or a little smaller?
Hi Christne! That means cut the binding so that the greatest stretch runs the long ways. Usually a binding is cut at about 90%.
Great tutorial, Sarah! I haven’t tried this method yet, but I will be now!
You mention that you don’t cut at 90-95% the length…do you have a preferred percentage? I find that I have to vary it a lot based on the fabric and this guessing game drives me crazy.
The video says 85%.
I use 85% or so- but I always pin it and make sure it looks like the right amount first before serging it on, since knits can vary.
Great tutorial Sarah. I prefer video tutorial but sometimes written helps as well. I have been sewing with knits on &off since the late 70’s. Somehow the DNA of binding has changed and my finishing necklines had me put off for a few years. Your tutorial & my new to me coverstitch machine should bring back some happy achievements. Thank you.
You’re welcome! I’m so glad it was helpful- sounds like you have alot of amazing sewing experience!
pin it to check…that is a helpful hint! seems so obvious, but i get caught up in the math.
I also wanted to know how long to cut the binding. I have found 90% is too large. I have a really hard time with bindings.
I find that 85% seems to work well, but that depends a bit on the fabric.
I do 75% or 80% based on how stretchy the fabric is. Then I add in the seam allowance too. I seriously cannot wait to try this tutorial!
Let me know how it goes- I hope it is helpful!
Awesome video and photo tutorial, exactly what I was looking for. Thank you so much, x
You’re welcome Lucy! Glad it helped!
I enjoyed both tutorials!! Thanks for all your hard work! Im a visual person so it doesn’t go unappreciated
You’re welcome Deanna- it means alot to me to hear that!
Excellent video, thank you!
You’re welcome! Glad you liked it!
Great tutorial, Sarah! I’ve never tried this method, but I will now!
oh good! I know you’re getting into sewing activewear, so hopefully you can put it to good use soon!
Thank you so much for this tutorial. I have done this type of binding on other items but never thought of doing it on a tank or tee. I can hardly wait to try it because I struggle so much with my necks not lying flat. I’ll let you know how it goes.
I really hope it’s helfpul- please do keep me posted!
I always prefer photo tutorials to video because I usually look at this while nursing a baby to sleep.
That is me too, every time! I don’t know what I’ll do when she stops nursing- when will I have the time to sit and learn?
I like both methods, but you forgot the %age for binding length on pics and talked way too much at beginning of video. Otherwise technique is great, and thanks for sharing.
thanks for your feedback. Glad it was helpful.
I’m pretty sure I do mine the same way. But I also have a binder attachment and sometimes use that if I feel like finaggling it. I prefer photos…I have an aversion to sounds lol.
I’m not always able to listen to things either, so I agree having photos is a nice option. I still need to figure out my binding attachment- it just seems so scary!
Just found your blog! I learn best with video tutorials and seek them out whenever possible. Thanks so much for sharing your talent. I am looking forward to seeing more.
You’re so welcome- thanks for stopping by!
Great job, I love having the option of both but I know the work it takes for that which is why I am slow to jump on the filming tutorials side myself…I am trying to make it happen though
Yes, it does take alot of time to put the tutorials together, but it always makes me happy to know I’ve helped people!
Thanks! I’d love to share your blog/site on our Facebook Page, Discovery Trekking Specialty Fabrics. Great Post!
Leslie & Team
Of course- thank you for featuring me!
Hi. I learn best by Video tutorials but having both a Video and photo tutorial is just amazing…the best of both worlds. . Thanks for this.
You’re welcome- I agree having both appeals to a broader range of learning styles.
I agree I much prefer this method but find it difficult to trim the excess on the backside. Do you have any tips or tricks on that?
There are a kind of scissors called “duck billed” scissors that really help trim nice and close!
Thank you for the excellent tutorial! I personally like video, because I’m a monkey see monkey do kinda person. But I just love it when those videos have a photo tutorial (because sometimes you can’t get the camera at the right angle). I know it must be a lot of trouble to do both, but it is surely appreciated. I can’t wait for the movie sew a long!
I’m glad having both is helpful! I’ll try to include more posts with both when I can.
Hey! Thanks this is great! I will def be doing more binding this way! I just wondered if you’ve tried this on swim knit? I’m having a battle royale with the binding… I am going to try this method … #offtoseamripagain
Yes- It works great on swim too! Good luck with the seam ripper!
I have struggled so much with knit binding. I watched your tutorial and was still skeptical that it would come out that nice for me, but it worked! In the past two days I have made 3 Lille tanks. Also, I have been following your lead in modifying that pattern so that it suits my taste better. I have lowered the neckline and armholes and made the racerback more extreme. Now, I have a tank pattern I really love and the binding turns out great! All three were with a thin knit that was HARD to work with, but using some knit and stable interfacing and a bit of spray starch, they turned out great! Thanks so much for the video! I enjoy your blog.
This makes me so happy to read- I’m really glad you gave it a try and found success!
Thank you so much for this tutorial. It made such a difference! (and it is great not to have to use fold-over elastic every time) I hope you don’t mind that I placed a link to your tutorial on my blog for future reference.
I don’t mind at all- I’m so glad it was helpful to you!
Oh Sarah, my my my , I do believe I owe you an apology . I knew no matter what video I saw and tried , I would never be able to make a decent neckband. I am proud to say you made me a neckband master! Well maybe not master, but you get what I mean. I can’t thank you enough.I have used your method 3 times and it works beautifully each and every time. Thank you so much as I had given up on making tops because they all looked like I was attempting a cowl neck ! LOL Thanks again for your videos and know they make alot of people happy!
This makes me SO happy, and you should be proud of yourself for your persistence! Thank you for taking the time to share your victory with me!
This is great! I haven’t tried this method before. I don’t own a coverstitch but I could certainly try it anyway. I prefer pics since I am reading this while my littlest is sleeping.
A fabulous binding method and a great alternative to the one I like to use
https://picperfic.wordpress.com/2018/07/17/binding-a-jersey-neckband/
Thank you so much for this video. I am going to try that on two Love notions shirts that I still have yet to bind the necklines. I love all your videos and I hope you keep making them.
Great tutorial and I think it’s wonderful that you offer both a video and photo version! I do my bindings similar to yours and I have two suggestions. First, I measure the flat pattern instead of the garment, in case any minor stretching occurred during handling. That way, I can use the binding to help draw things back in to the original size. Second, if I want a wider binding, I start with a wider seam allowance. This allows me to completely fill the binding with fabric for support when wrapping it over, and the binding doesn’t get floppy on the edge.
I recently followed the Power Sports Bra sew along and I really enjoyed it. I’m looking forward to see what you do next!
Really great suggestions- thank you! I can tell you’re an accomplished seamstress!
[…] If you prefer the look or feel of single fold binding or have a coverstitch, you can see Sarah’s SINGLE fold binding tutorial here. […]