Playing with length: The Cape Cod Capelet
![]()
![]()
We made it through the beginning of school, the overabundance of September birthdays, and the mad-candy-dash of Halloween, which means its time to settle down a bit into November, and enjoy the calm before the storm. The very fact that I survived all these events and lived to blog about them is more than enough evidence, in my opinion, that I deserve a little time to sew some fall basics for myself.
The release of the Itch to Stitch Cape Cod Capelet was timed perfectly for this little bit of sewing “downtime”- with only four pattern pieces and a simple shape that doesn’t require much fitting precision, it seemed like just the instant gratification project I needed to rejuvenate my sewing and help me stay cozy as the temperatures start to drop.
The Cape Cod Capelet also isn’t very demanding in terms of yardage- it takes less than 1.5 yards of fabric, which is perfect for those no-project-in-mind sweater knit cuts I’ve been holding onto since last year, and dying to make into something (new plan = always buy with a pattern in mind!).
This little capelet was a great choice- it’s extremely versatile, and adjusts to fall temperature variations with ease- on a warmer day, I can layer it over a tank top or cami (like the Cartagena cami, blogged here), and on a cooler morning, I can throw it on over a long sleeve tee or chunky sweater and curl up by the fire.
![]()
![]()
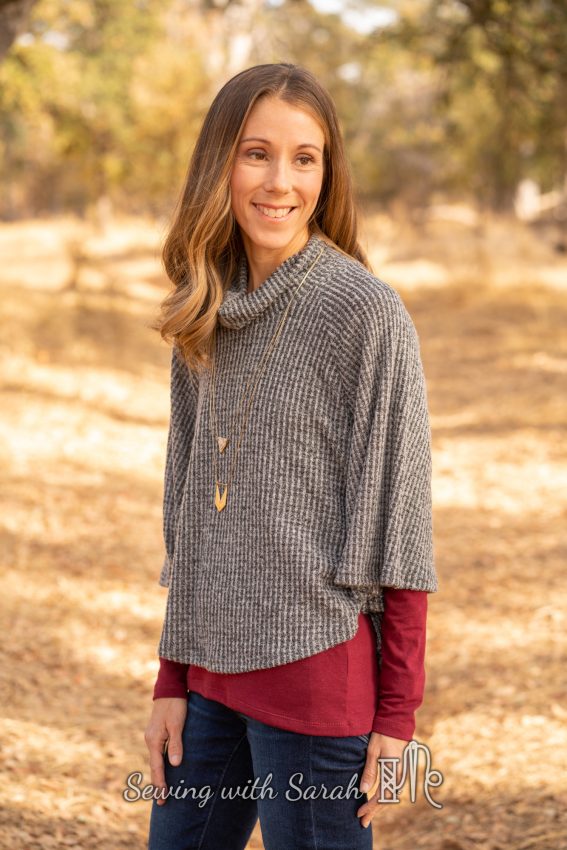
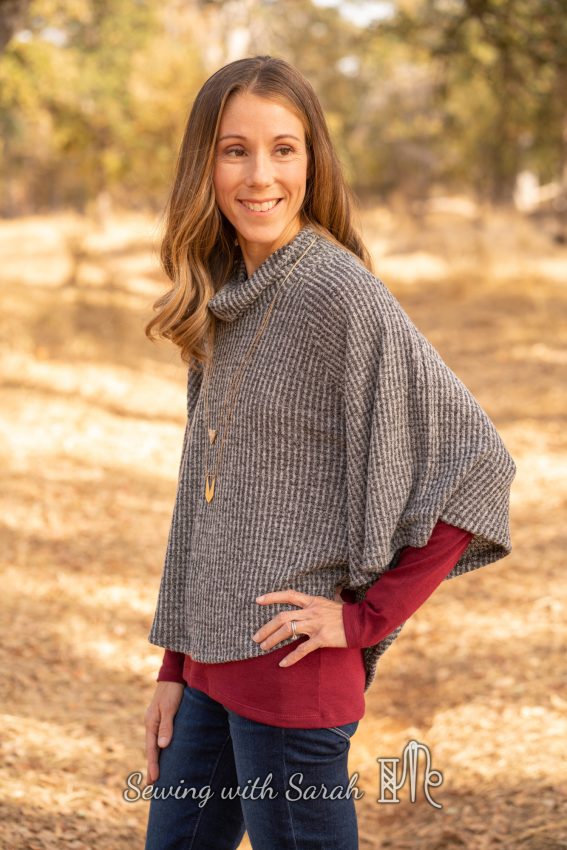
The short, floppy cowl keeps my neck cozy without being restricting, and is made from a single rectangular pattern piece- no tricky cowl folding here (am I the only one who always manages to fold them the wrong way every. time. ?)
![]()
![]()
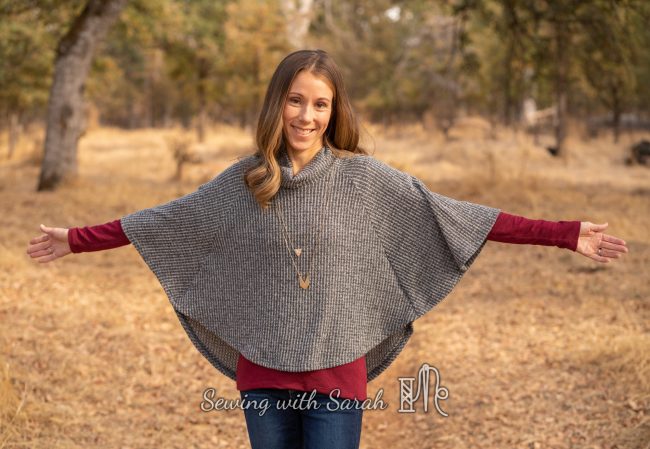
The sleeve openings are made by sewing the raglan pieces together at the underarm for several inches, and end at elbow length, so there’s no danger of dipping them into your turkey soup (I love the bell sleeve trend, but always manage to get my sleeve ends messy!)
![]()
![]()
Here’s what they look like spread out- I highly recommend using a piece of wonder tape for this last part of construction, where you stitch in the ditch to create the sleeve openings. By this point, I had lost the notches that were used to mark how far up to sew, so I just “winged” it, and sewed for 6-7″. I could have double checked the pattern piece for reference, but I was going for instant gratification, rather than precision, and it worked out just fine.
![]()
![]()
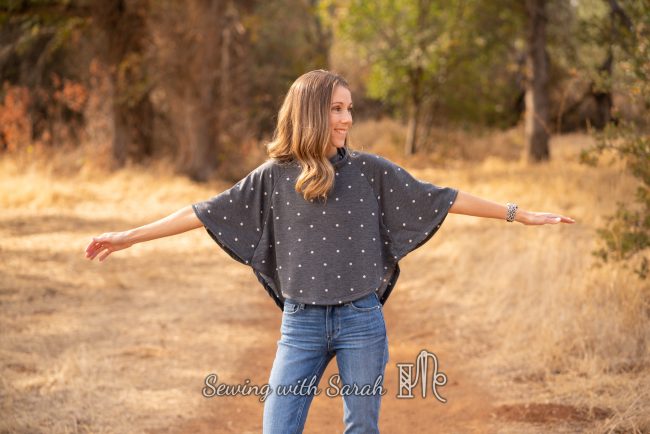
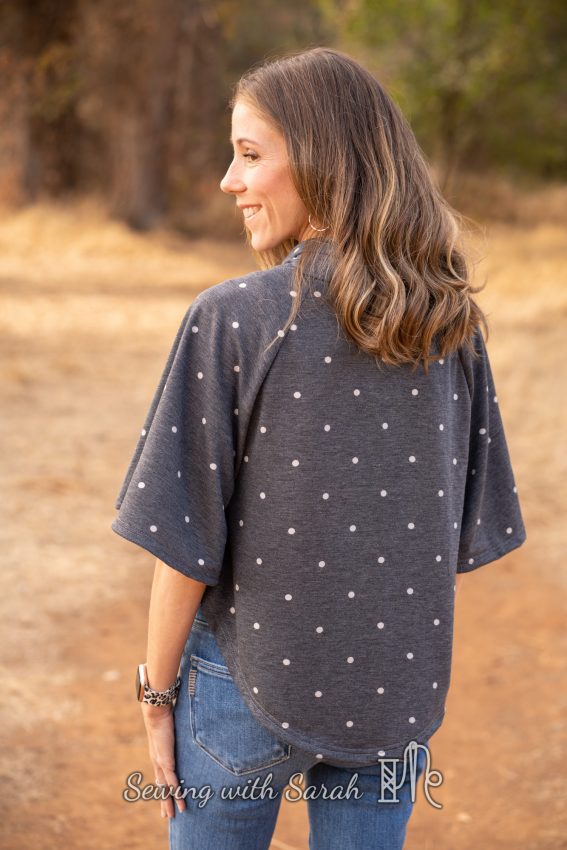
The front of the Capelet is slightly shorter than the back, for a lovely hi-low effect that keeps your bum covered, and adds a little flirty swing to the shape.
![]()
![]()

Capelet #1:
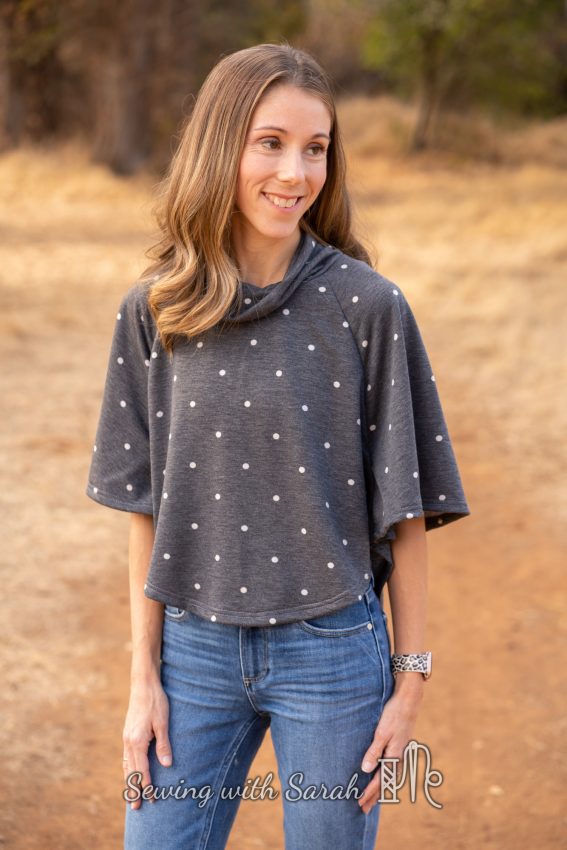
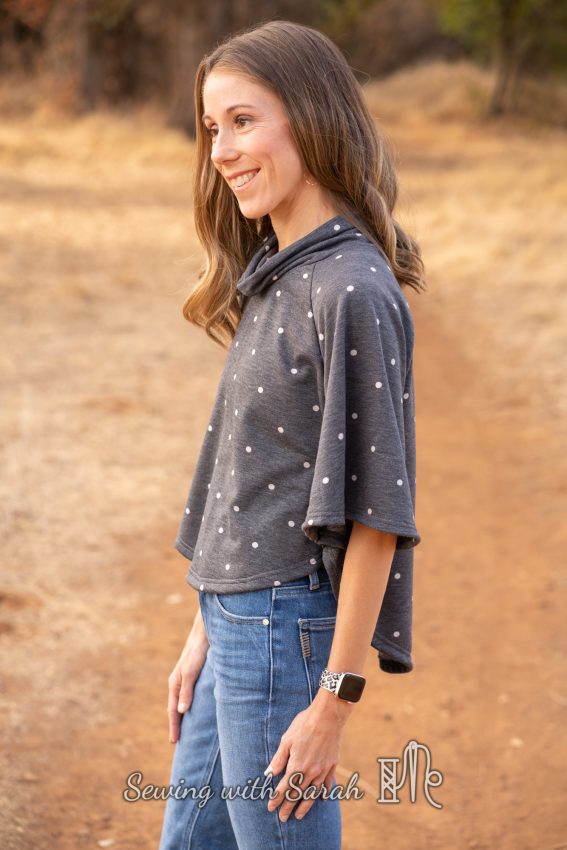
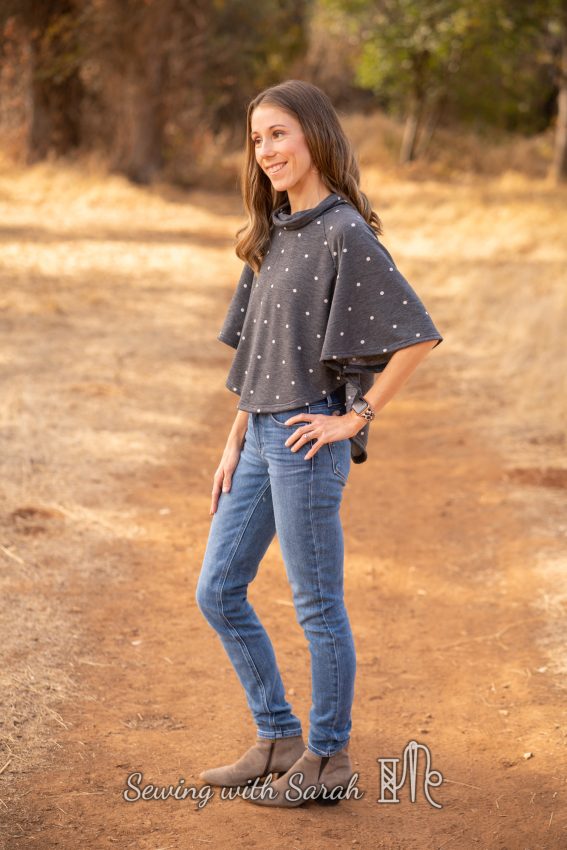
My first version was sewn from a poly-rayon-spandex french terry knit from So Sew English. I’ll be honest- this isn’t always my favorite base to work with, because it snags easily, but this print jumped out at me, and I couldn’t resist sewing it up. It was initially purchased with my daughter in mind, but I’m glad I appropriated it for myself- every girl needs something with polka dots, right?
![]()
![]()
This fabric has some drape, but holds its shape more than a looser sweater knit, so the collar stands up a bit more.
![]()
![]()
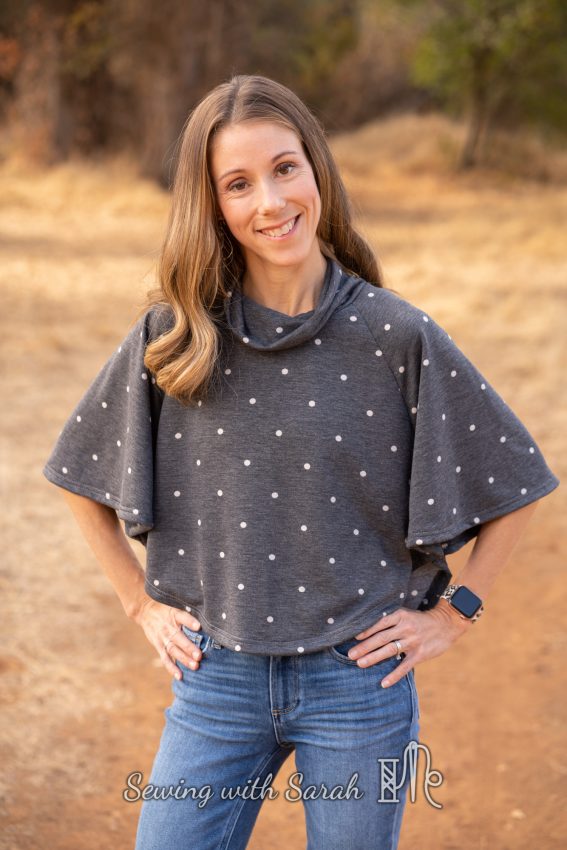
The polka dot print is a bit more “whimsical” than I typically wear, but in the grey colorway, it feels doable, and I really like how it looks over a pair of high waisted jeans.
![]()
![]()
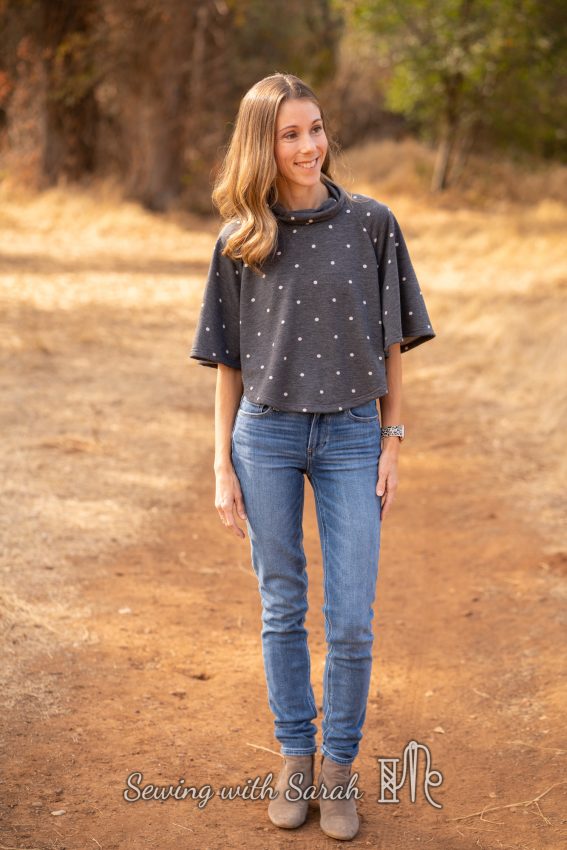
I’ve been playing around with proportions more in my sewing lately, and I found that this shorter length gave the illusion of longer legs (which I most certainly don’t actually have!), especially when worn with heeled boots (the savior of short women everywhere).
![]()
![]()
Capelet #2:
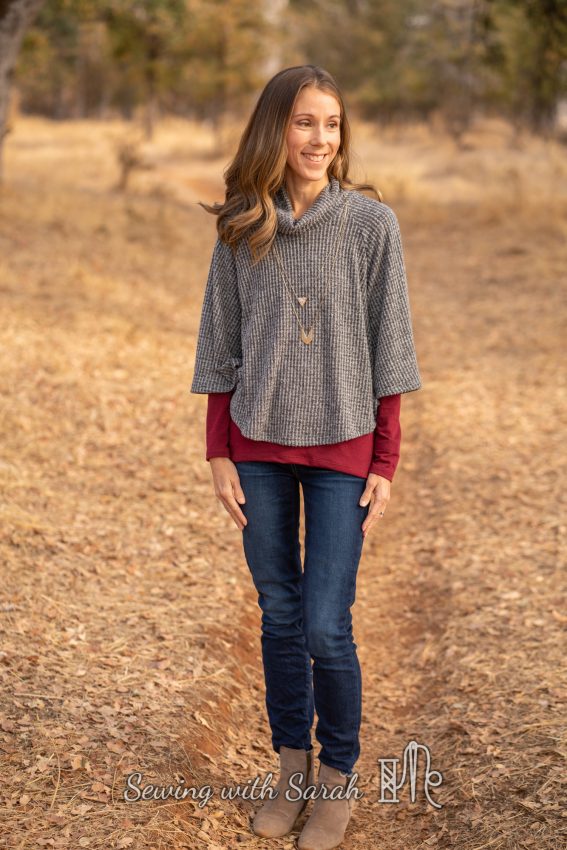
After sewing up this version, I decided I wanted to see what would happen if I lengthened it, so I added 2″ all around (to the sleeves, front and back), and I fell even more in love.
![]()
![]()
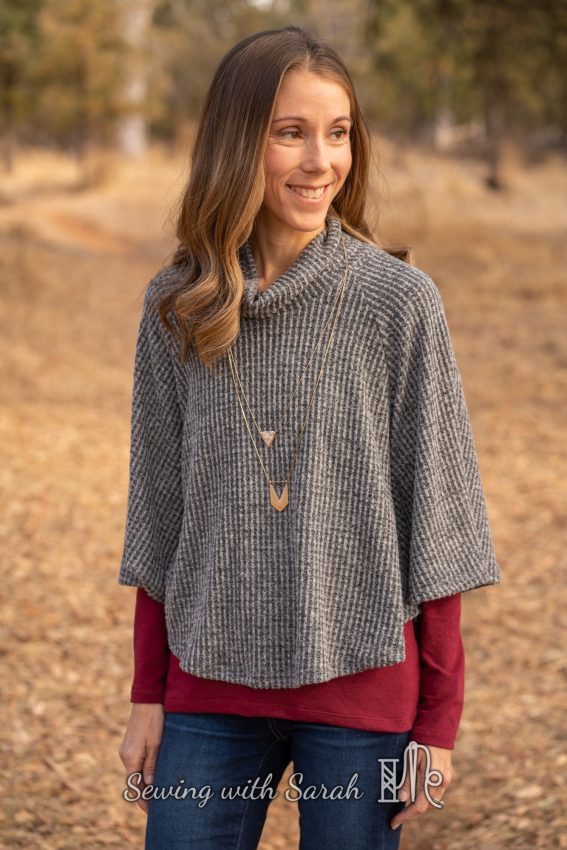
This may legitimately be the first time I’ve EVER lengthened a pattern, but in this case, I think the longer version is also quite flattering. This length feels more “elegant” to me, though I think the fabric ( a brushed waffle knit) also plays a big role in the formality of the capelet- I have some crushed velvet that would make a very fancy topper for an evening dress (if I ever wore those!), or you could use a lightweight bamboo for a more casual look. I even think it would be fun to sew one from an athletic fabric, for a warm-up/cool down layer- the possibilities are endless!
![]()
![]()
After the pattern testing was complete, Kennis went back and added 2″ to the front of the Capelet, so I’ll be sewing another version soon to demonstrate that effect- I’m curious to see what I think of a longer front and shorter sleeves with my proportions. It might be the perfect happy medium between the two versions I’ve shared today!
Here’s a quick video of the Capelet, for a more dynamic view:
In case you’re curious, the wine red tee I’m wearing underneath is the Jalie 2805 women’s tee, one of five I’ve sewn in the past week. I’ve mentioned being more intentional about my fabric purchases and projects, and a thoughtful evaluation of my closet revealed too many statement pieces and not enough basics- so you’ll be seeing more simple tees, hoodies and solid colored leggings around here soon.
![]()
![]()
Despite the fact that I could easily buy these staples from a big box store for cheaper than I can make them, I get a deep sense of satisfaction from having a self-sewn wardrobe, and find that I can achieve a better fit with higher quality fabric by sewing for myself.
I’ve heard this referred to as sewing “cake” as opposed to “frosting”. I think its important to sew the most of what you love, and while that can change based on your lifestyle and goals, I enjoy wearing at least one handmade item daily, and sewing basics is a great way to achieve that goal.
As a bonus, the capelet comes in 5 basic sizes- meaning it makes the perfect gift. Just approximate the recipients size (in this case, I think going by RTW sizing is acceptable) and sew- no need for a precise measurement, which might give away your surprise (and often makes people uncomfortable. Nothing says “I love you” like a request for a waist measurement around the holidays. LOL).
Real Life…
In other news, I completed my race last weekend! I’ve been training for this seriously since we returned from our summer road trip, and I was really excited to have the chance to race again after taking 5 years off.
![]()
![]()
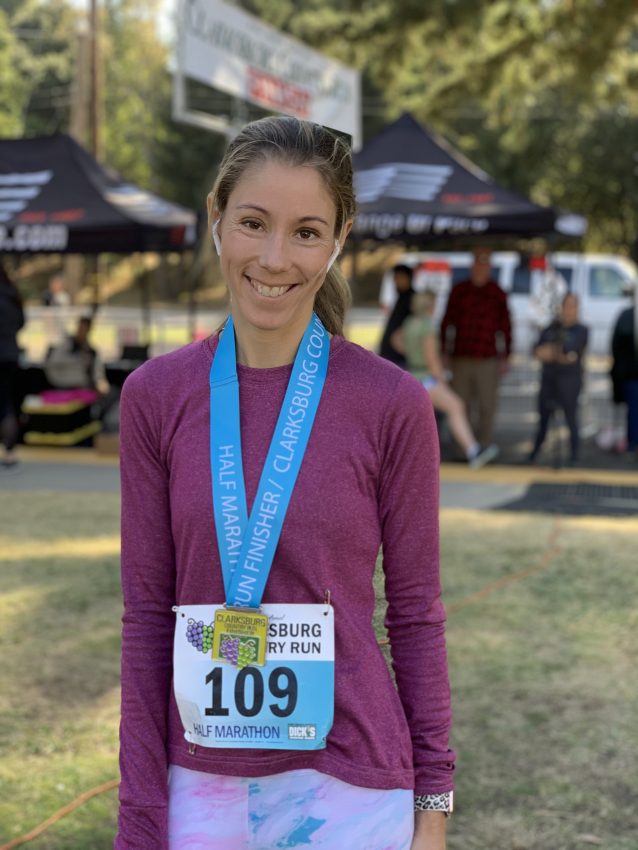
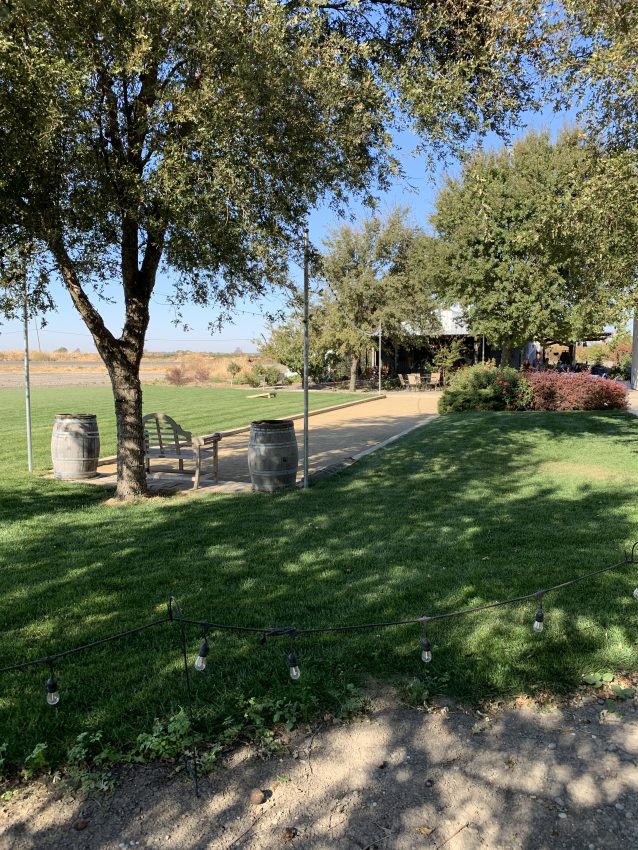
I really surprised myself with my time- 1:50 for the half marathon- which was much better than I expected. We stayed at the beautiful Julieta winery in Clarksburg, Ca, as a part of the Harvest Hosts program.
![]()
![]()
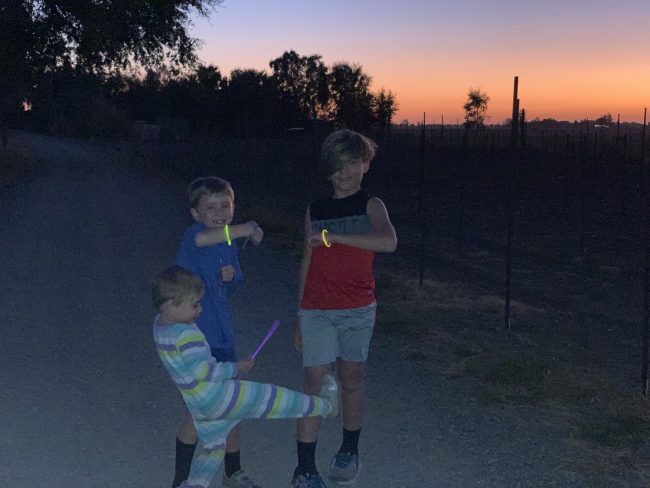
We had a wonderful time visiting with the other patrons, enjoying a few glasses of merlot, and playing hid and seek with the kids among the vines the night before the race.
![]()
![]()
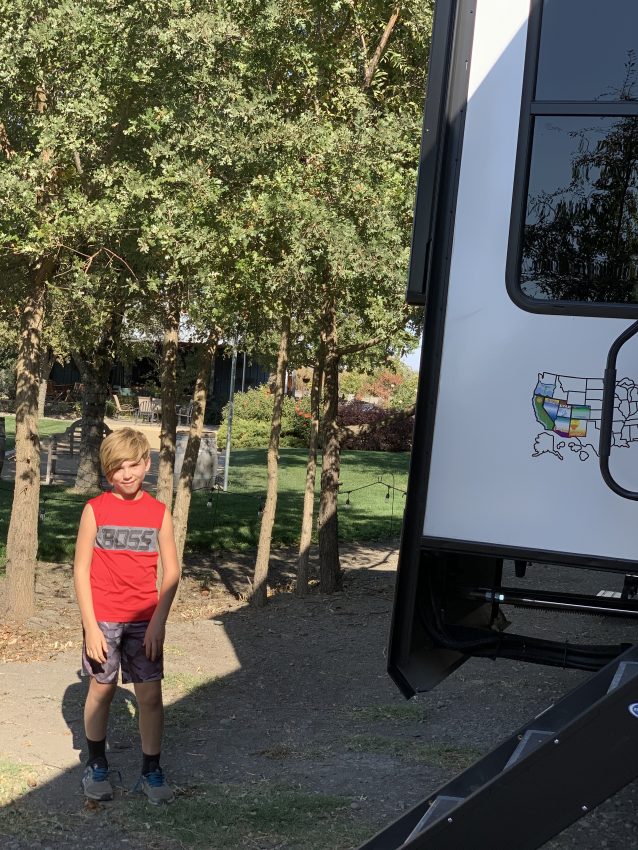
This was the perfect antidote to the race-that-didn’t-happen this past summer in San Diego, and renewed my enthusiasm for running. I think the key is to find small, local events- they’re less pressure, more friendly, and offer a great opportunity to take the RV out for shorter trips when we don’t have time for a longer jaunt.
We’re still committed to filling in that map, but smaller trips are fun too.
![]()
![]()
Cake for the Kids (the sewing kind…)
Oh, and amidst all the pattern testing and Halloween hub-hub, I managed to finish up a couple of outfits for the kiddos.
The first is this pair of Halloween Pajamas for Miss 3, made from the New Horizons Portlander Pants and the Jalie 2805 women’s tee:
![]()
![]()
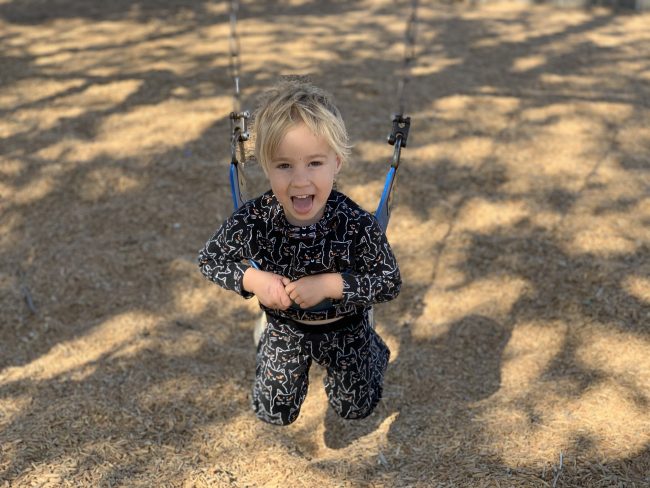
I keep telling her they’re for night-time, but she’s adamant that they make perfectly acceptable daywear. Her brothers have a set cut out as well….but I’m updating my timeline for those to Thanksgiving!
I also made this cute set, using the girls Portlanders pattern and the Peekaboo Bonnie Knot Tee.
![]()
![]()
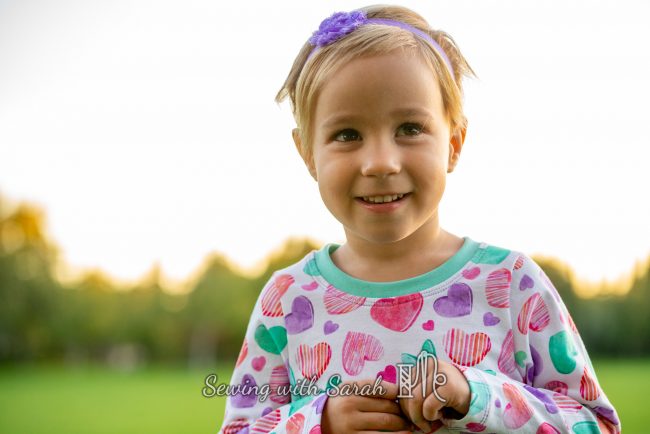
The Knot tee only comes with short sleeves, but I used a sleeve from another Peekaboo pattern to adjust their length, and make them slightly looser for fall.
![]()
![]()
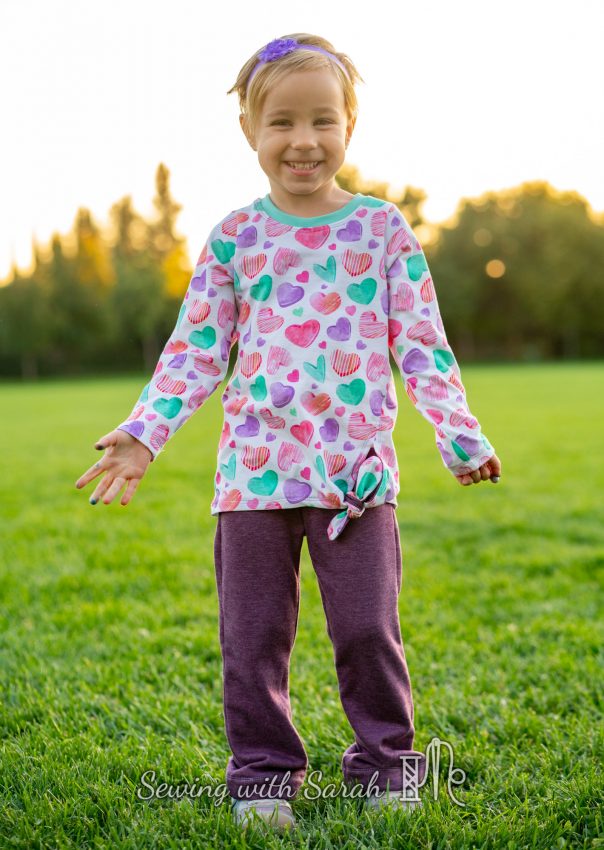
She loves this set!
![]()
![]()

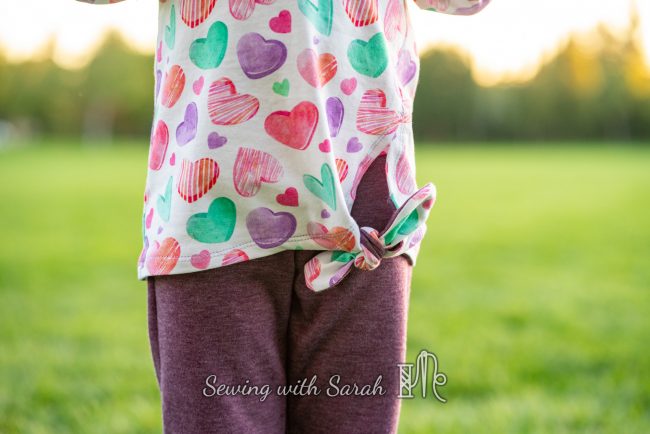
The little knot detail is so cute, and I love the way it’s finished (with a facing, rather than a binding)
![]()
![]()
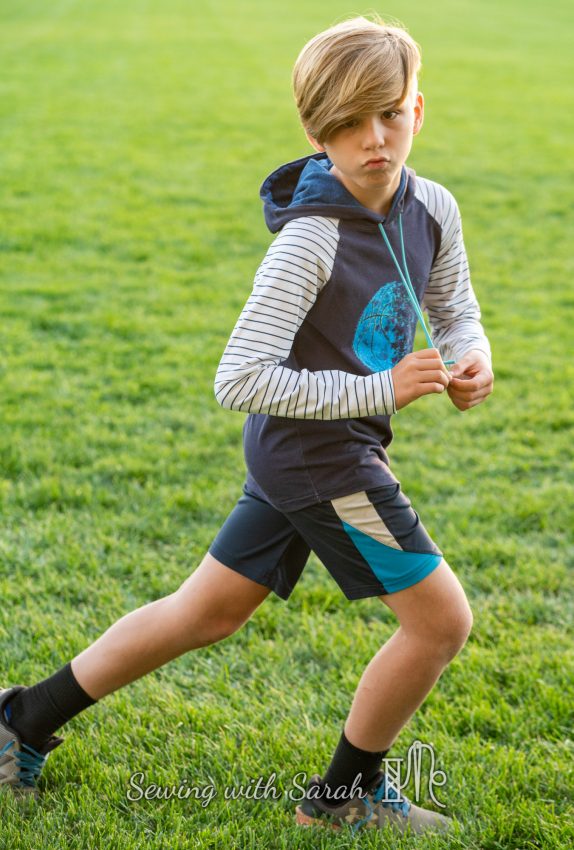
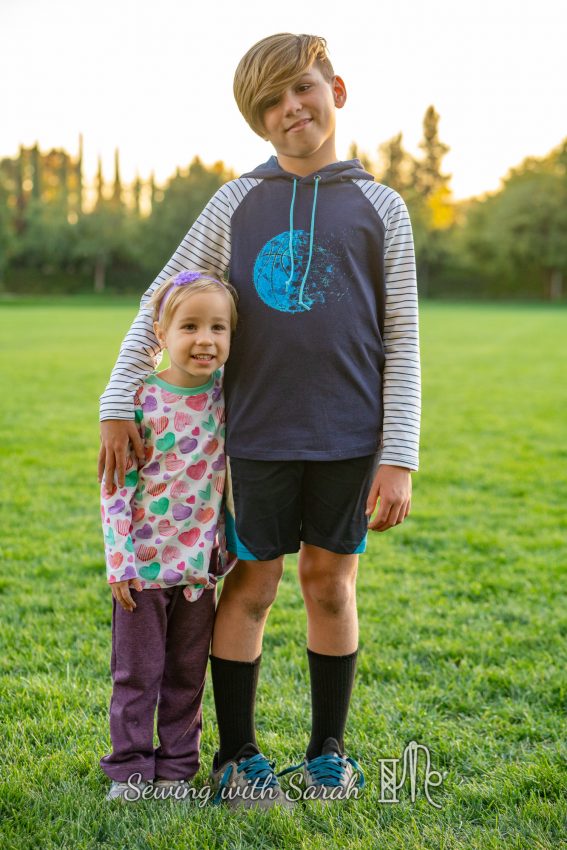
I also made my son Noah a long sleeved tee- this time taking the Jalie Nico Raglan and adding in the hood from one of my women’s patterns, which happened to fit perfectly on his size.
![]()
![]()

He’s been wearing this nonstop, and immediately pointed out the lack of cool weather clothing in his drawers, so I better get busy making a few more of these!
![]()
![]()
I’ve got the new Jalie Henri Joggers on my list for the boys as well- ready to wear pants never fit them right, and I have plenty of sweatshirt fleece leftover from last year to fulfill their needs!
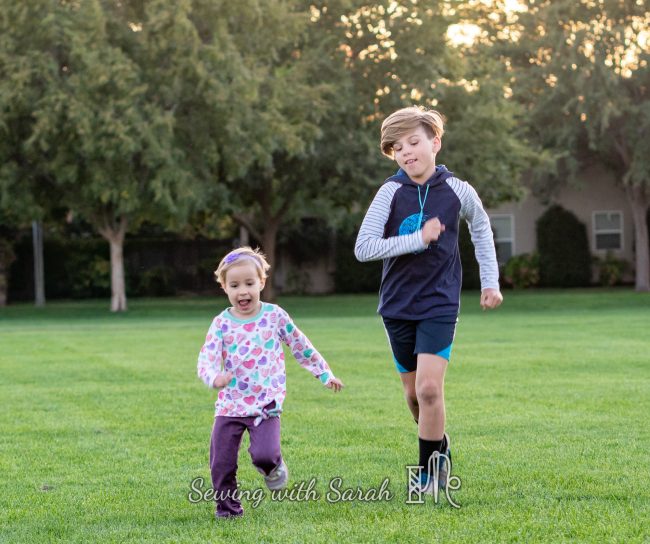
These two have a really sweet bond, that’s enhanced by all the time they get to spend together. Noah has a really nurturing soul, and it warms my heart to see how close they’ve grown over the past year.
![]()
![]()
He never says no to playing with her…. ![]()
![]()
She loves to copy him, which includes reading chapter books to herself during their silent reading time. She doesn’t have any idea what the words say, but that doesn’t stop her from making up her own stories and whispering them to herself on the couch.
![]()
![]()

Well, that’s it! An instant gratification sew, and plenty of cake for myself and the kids (figuratively speaking of course. I threw out the birthday cake 5 minutes after the party- no sense in prolonging that sugar rush!)
What have you been sewing lately? What would you say your ratio of cake to frosting is at currently? Are you happy with that? Drop me a note- I love to hear about what other sewists are up to!
Note: This post contains affiliate links. Thank you for your support!
I so enjoy your informative and thoughtful bogs- start to feel like I know you! I need to pay more attention to proportion- thanks for the reminder.
Thank you so much Janet!
I do love your blogs. I need to pick your brain re hemming the curve. I assume you used a Coverstitch machine to hem your Capelet. Yesterday I tried to hem a top and it was twisting. I pressed 1″ hem tape first then pressed up 1″. I only sewed 12″ and will unpick. I am reluctant to try this pattern but it looks like you had no problem. Any advice?
I used a basting stitch to help me see where to turn up the hem, but I didn’t press it or use tape at all. I find that works best for me- the basting stitch pulls it in a bit, which gets it to lay flat! I hope that helps!
Hi Sarah,
I very much enjoy your informative blog posts with so many sewing techniques and suggestions. I am also amazed at how prolific your are. My own children are all grown up now, and I have two little grandsons, ages almost 6 and 3. Unfortunately, I don’t live near them, making sewing for them a little harder, but your comments about what kids like these days are welcomed. Also, your posts regarding sports wear sewing are really appreciated. I have finally “almost” mastered my coverstitch machine, so am anxious to start sewing my own leggings and tanks with your helpful tutorials.
I know in a recent blogpost you were pretty disheartened by your little girl’s self-haircut, but I just wanted to say that I think she looks absolutely adorable with her new pixie cut. And lastly, thank you for the suggestion to use the Cape Cod Capelet as a gift item. I am really going to try to make them for my “Jazzercise” friends. It will be great to utilize the very forgiving sizing requirements.
Keep up all your great posts. I enjoy them so much!
Thank you so much Sally! Your comments really warmed my heart!
Since I do not sew bindings too often I refer to your tutorial each time and find it so helpful. I always enjoy seeing the pictures of your darling children too. Thanks for creating these tutorials.
This makes me so happy martha! I’m really glad the tutorial is useful to you.