Marbella Tank Nursing Hack
![]()
![]()
![]()
![]()
You know I’m a pretty big fan of nursing hacks on this blog, and today I’m delighted to have Sheryl, a fellow mom and New Horizons patterns fan, sharing about how she hacked the Marbella tank for nursing access!
Her method is genius, and she does such an awesome job walking us through, step by step. Whether you’re nursing or attending your bizillionth baby shower, you’ll want to make a dozen of these- every mom needs one (or two, or three….)
Take it away Sheryl…
Hey everyone!!!
I’m Sheryl, stay at home mom to 3 beautiful girls, with a new addition arriving in July….a boy this time!!! We are pretty excited! I am a lover of New Horizons patterns, and all things sewing and fabric related.
When I was pregnant with my first daughter I purchased a few nursing tanks and was very disappointed in the fit and quality, and I never tried them again with my other babies. This time around I told myself I would make the ultimate nursing tank, something that was cozy, and had an amazing fit.
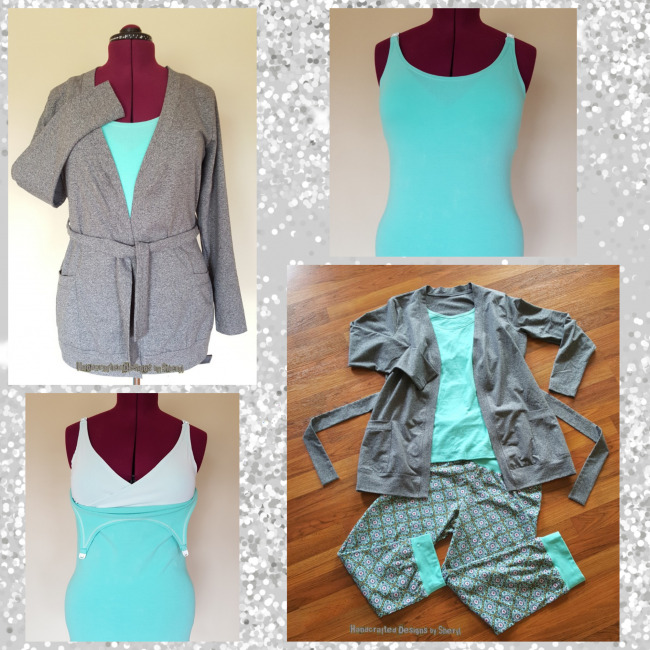
I was on the hunt for the perfect tank top, and then along came the Marbella Tank! After I made my first Marbella it was pure love, everything about it was just perfect. So I decided I would use this tank and somehow come up with a nursing hack.
![]()
![]()
It took hours of brainstorming (and with 3 little ones running around and 1 on the way……my brain power is somewhat limited these days!! Haha) but I came up with a plan and began my first attempt. It turned out ok, but I swear my seam ripper was smoking from overuse!!!!.
I made a few tweaks and changes and my second attempt was amazing. It was everything I had hoped it would be, even better!!
![]()
![]()

I am so so excited and happy to be able to share this info with all of you! And I have to say that none of this would have been possible without all the help and guidance from Sarah! I’ve never written a blog hack/tutorial before…..and my “technology skills” are somewhat lacking. So thank you so much Sarah for offering to help me out, and to have me as a guest on your blog!!
Now let’s get started!!
Supplies:
What you will need:
- the awesome Marbella Tank pattern from New Horizons Designs
- extra paper to draw out the cross over bra pieces
- 3/8″ clear elastic
- Fold over elastic (FOE) I used 1” (½” folded in half)
- 1 set of ½” nursing bra clips
Instructions:
Step 1: Designing the front cross over bra
Here is a picture of the front cross over bra piece I designed (outlined in red), with the original front tank pattern piece underneath it. (Straps and armscythe on both pieces are identical and lined up together).
![]()
![]()
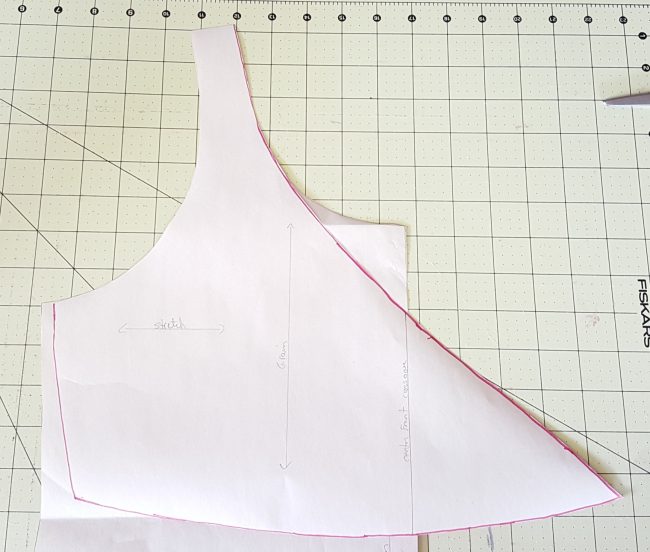
Now that you somewhat have a visual of what I’m going to describe here…..lets begin!
In order for me to make this fancy cross over piece, I did 2 things:
- I traced out an extra copy of the front pattern piece, but only about half way down (you don’t need the whole front piece)
- I dug out my favorite cross over bra and traced out the curve of the cross over onto the front pattern piece, and I also marked the center front of the bra (where each of the bra pieces cross over each other)
The length of your bra part (from the “armpit” down) will vary depending on your bust size. I’m a D cup, and of course that will increase once baby comes! The length of mine is about 5”.
Looking at the bottom of the bra, it can be curved, like mine, or straight across. I prefer a curve because it gives me a better fit, but a smaller bust would be fine with a straight line there. I made both styles, both fit, but the curved version just seemed to hug the girls better!
I also made this piece a little narrower on the side than the original front pattern piece of the tank top, and gave it a slight curve from “armpit” to bottom. I found that this also gave the bra a bit more support. This would be another option that I’ll leave up to you, depending on bust size. You can just stick with the original design of the front tank pattern and that will work too!
Once you’ve drawn out your front bra piece, cut 2 mirror images out of your fabric.
Step 2: Back Bra Piece
Now onto the back bra piece! Here’s what mine looks like:
![]()
![]()
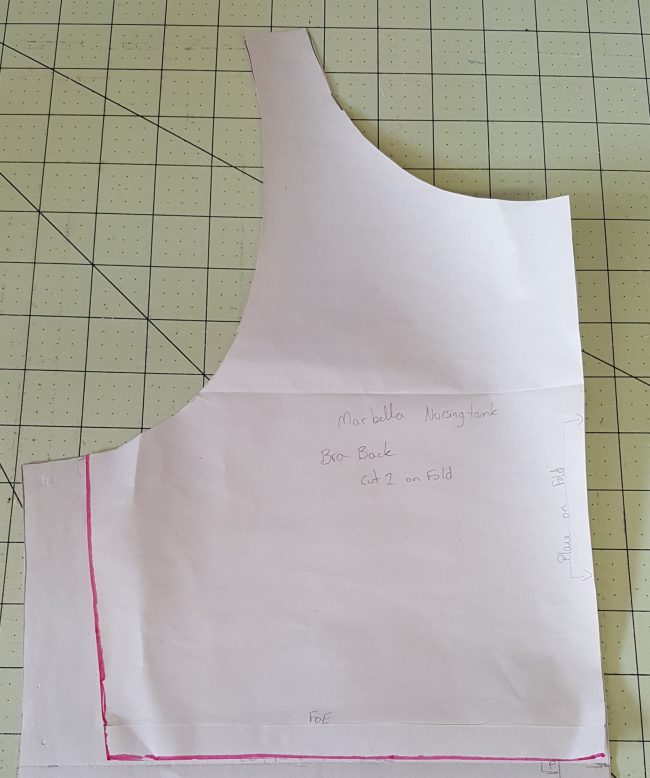
Here I have my bra back (outlined in red) overlapping the original back tank top pattern piece (straps, back neckline and armscythe are all identical to the original pattern, and all lined up ).
It’s the same length as my front bra piece, about 5” from “armpit” to bottom, and the side is slightly curved, just the same as the front bra piece. I also took in the side of this piece like I did to the front, just to give a bit more support.
The bottom of the bra back is straight, unlike my front piece. So you can trace out your bra back just like this, or keep it simple and use the original pattern piece! Both options will work! Once you have it drawn up, grab your fabric and cut 1 on the fold.
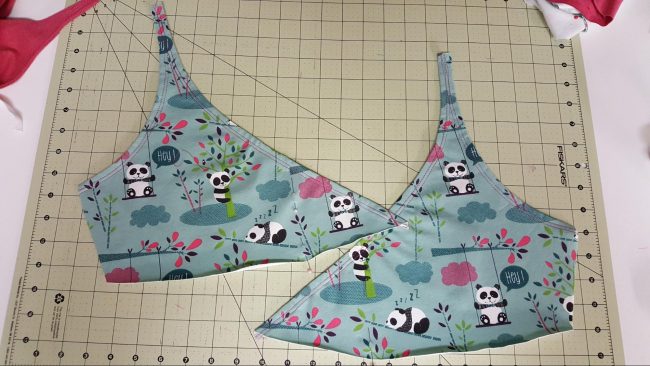
At this point you should have the following cut out of your fabric: 2 front cross over bra pieces, 1 back bra piece, 1 front tank top piece and 1 back tank top piece. Now let’s begin putting them all together!
Step 3: Main Construction- Finishing/Hemming the edges
Let’s start with the cross over bra pieces first. Take your ⅜” clear elastic and cut a piece that is just a tad shorter (about ½” ) than the distance from the top of the strap to the bottom of the cross-over curve.
Fold this edge over to the wrong side by ⅜”, sandwiching the elastic between the layers, stretching the elastic ever so slightly (and evenly) as you go.
Pin/clip in place and top stitch using a stretch stitch or a cover stitch machine. Repeat for other bra piece.
Fold over the armscythe ⅜” to the wrong side on each piece and topstitch.
![]()
![]()
Take the front tank piece and fold over the neckline and armscythes ⅜” to the wrong side and top stitch in place.
Now for the back piece: take your back bra and tank piece and repeat this for both armscythe.
Then place the bra back right side up, lay the back tank on top of that, right side up, and fold over the neckline on both together, ⅜” and top stitch.
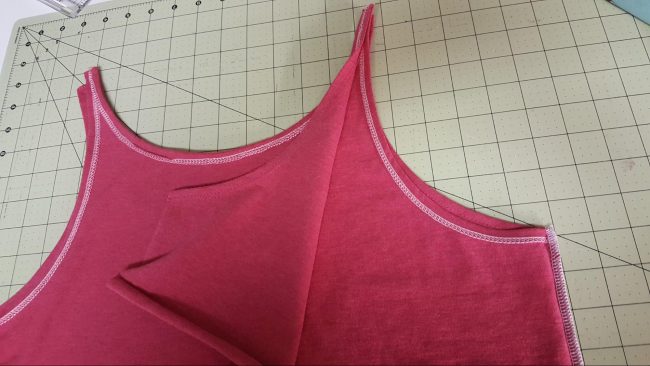
Step 4: Sew the Side Seams
Now that all the edges are finished, place front and back tank top pieces right sides together and sew the side seams, but DO NOT catch the bra back in the side seams!
![]()
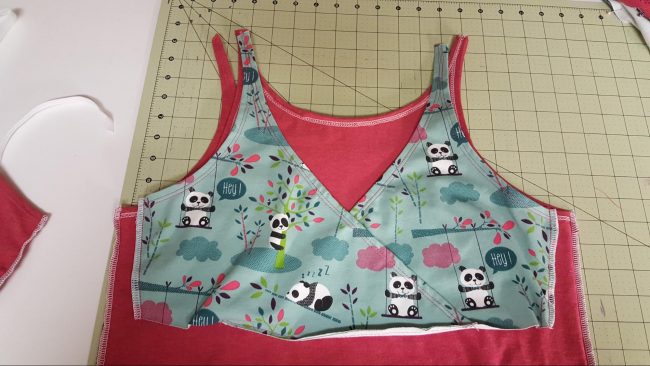
![]()
Take your 2 cross over bra pieces and line up the center front mark on each piece. I’ve drawn a line on the picture to show my center front. Pin/clip it in place and just baste the area that overlaps on the bottom, I’ve underlined this area on the picture, (basting this together will make it way easier to put on the Fold Over Elastic)
![]()
![]()
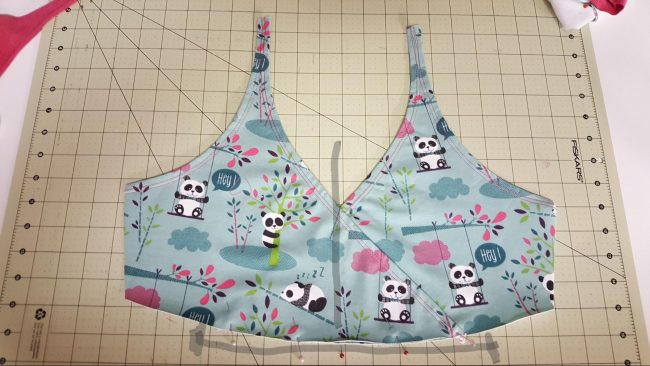
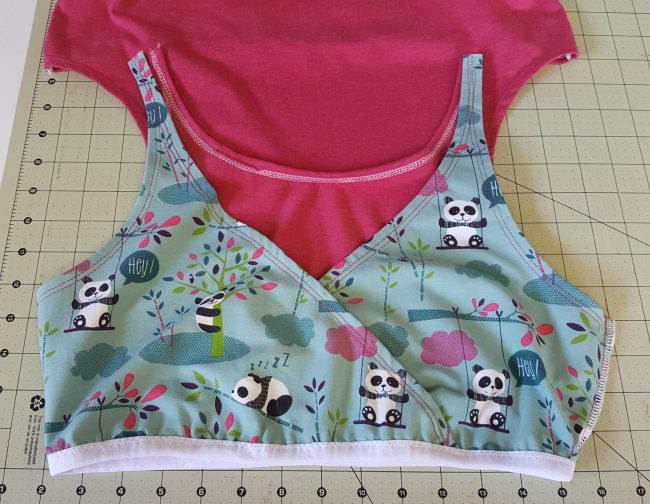
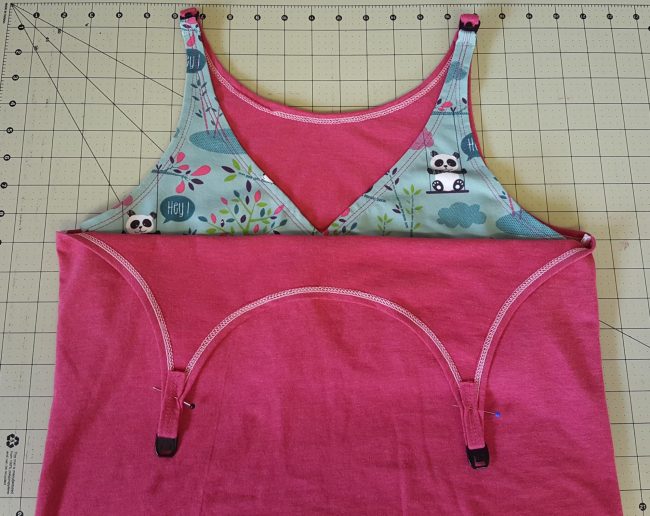
Step 5: Attaching the Front and Back of the Bra
Next you will attach the bra back and front together.
![]()
![]()
Place the bra front on top of the bra back, wrong sides together and sew up the side seams. Now we are ready to attach the fold over elastic!
Step 6: Attaching the FOE to the bra
Determine how much fold over elastic you will need by wrapping the elastic around your under bust (where your bra band sits). You want a snug fit, but not too snug.
Cut the elastic at the desired length.
Overlap the raw edges you just cut and stitch together using a zig zag stitch. Now your FOE forms a circle.
Where you joined the raw edges will be center back- go ahead and mark the center front and sides as well. Quarter your bra in the same way.
Match up the quarter points from the elastic to the bra and stretch the elastic to fit around the bottom of the bra. Be careful not to stretch the bra itself. Stitch in place using a zig zag stitch.
![]()
![]()
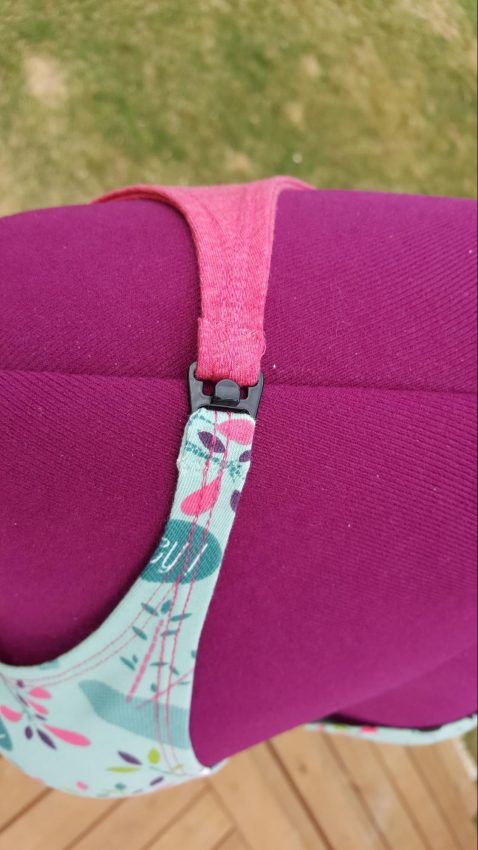
Step 7: Attaching the Nursing Clips
Take the part of the clip that has the “hook” on it and place the back tank/bra strap through the top slot (it will be the wider slot on the clip).
![]()
![]()
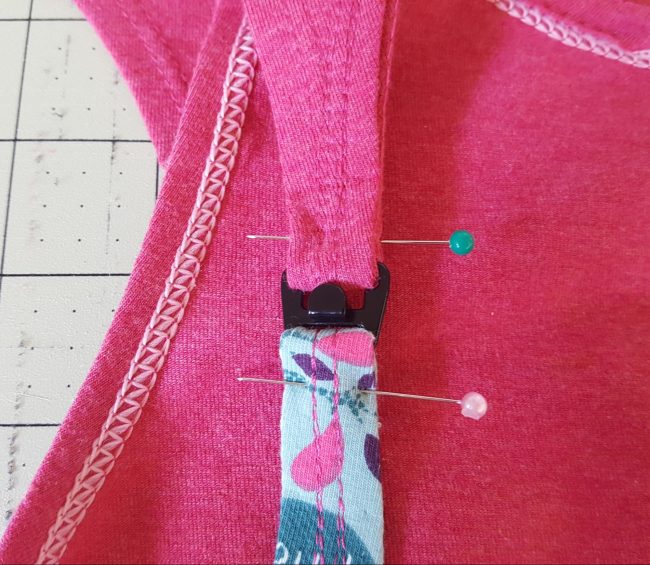
Fold the strap over to the wrong side about ⅜” -½” at the most. Then take the front bra strap and place it through the bottom slot on the clip, folding it over the same amount as before. Repeat this for the strap on the opposite side.
Here is a picture from the wrong side of the fabric:
![]()
![]()
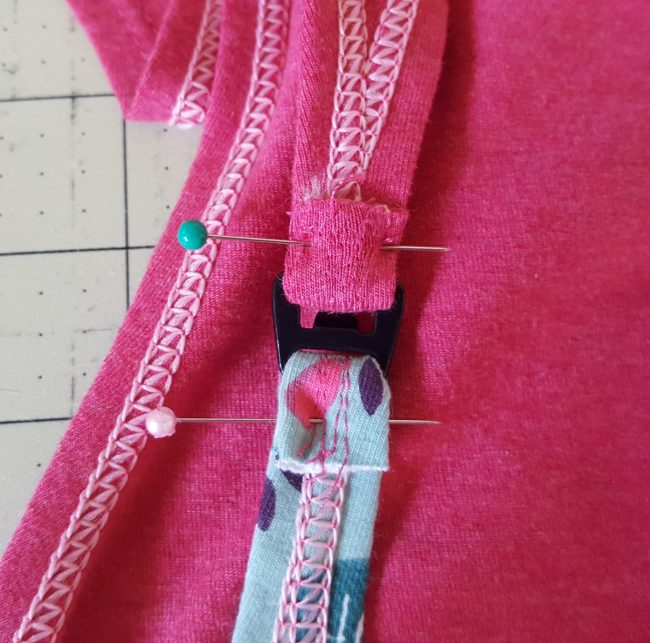
Stitch in place using a narrow zig zag stitch.
Now we are ready to put the other part of the clips on the front straps of the tank top. Make sure the clips are the right way (I put 1 on backwards the first time and it didn’t clip in properly!)
Put the front strap through the slot on the clip and pin in place, repeat for other side.
![]()
![]()
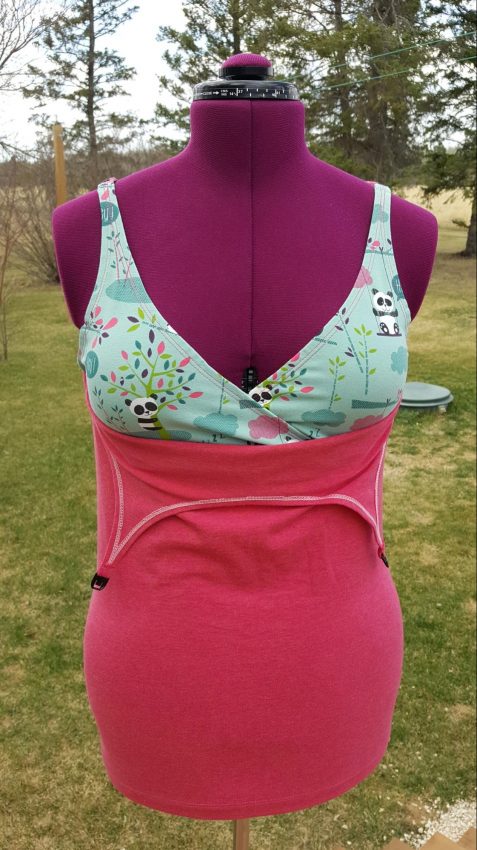
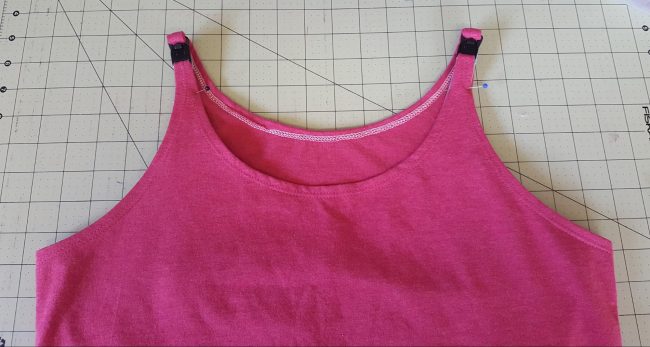
Fit Check!
Now is a good time to try it on to figure out how much of the front strap needs to be folded over before you sew them in place. You want to make sure that when the front is clipped up, it covers the edges of the bra that’s underneath, giving your top a nice clean/finished look, like this:
![]()
![]()
Once you have figured out the length to fold over, you can stitch them in place and trim any excess strap fabric there may be left over.
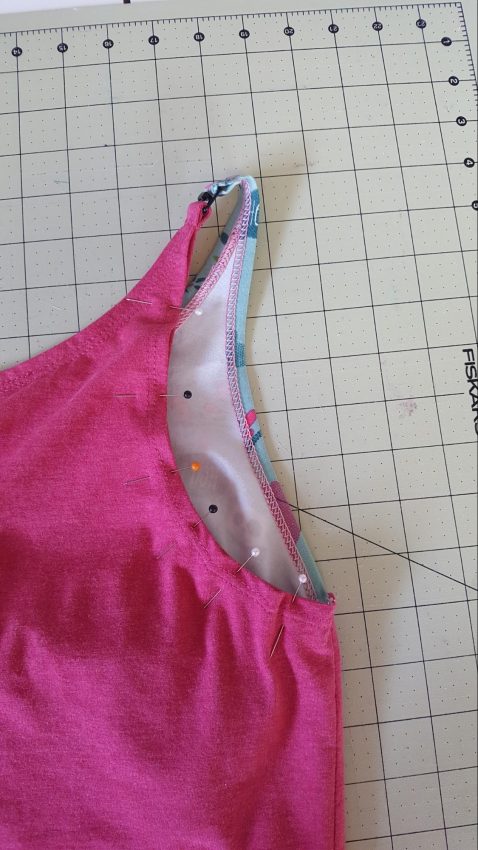
Step 8: Finishing touches!
Now for the final three finishing touches!
First you will want to tack down the side seams of bra to the side seam of the tank top. This keeps it together, and makes taking the top on and off super easy. (I didn’t do these steps on my first one and I got tangled in the shirt and needed help getting out….haha)
Line up the side seams and stitch in place, just a small area will do, like I’ve circled in this picture.
![]()
![]()
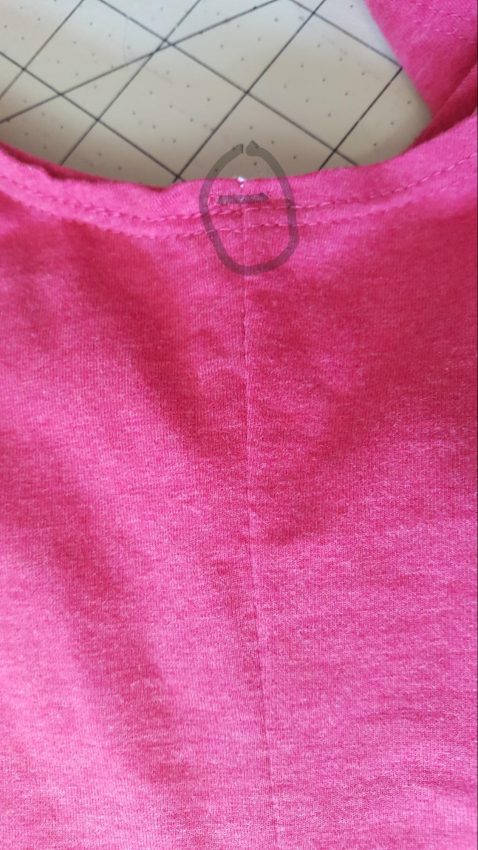
The second finishing touch is done for the same reason as the first, because getting tangled in your own shirt is not fun! Haha. You will stitch the back armscye edge to the back bra armscye edge.
![]()
![]()
This holds them in place and gives a nice neat look when you are wearing it. Make sure you use a stretch stitch or coverstitch machine for this step.
Your final finishing touch would be to hem your new nursing tank as per the original pattern instructions!!!
That’s it, you’re done!
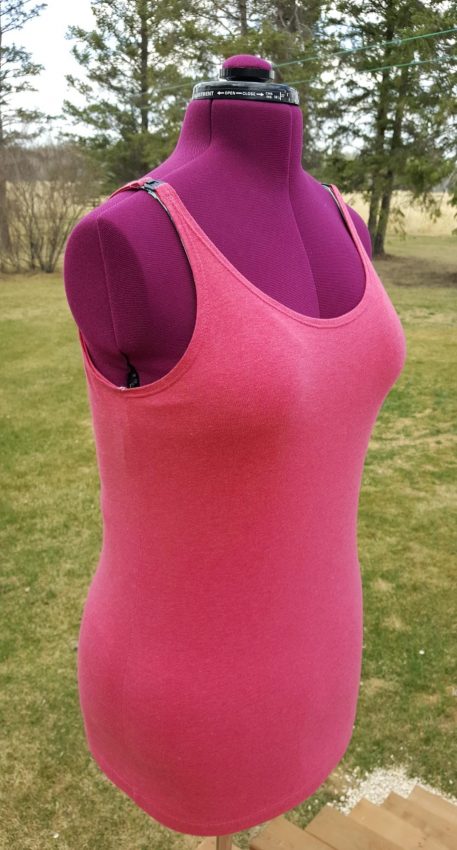
Give yourself a pat on the back and enjoy your awesome new nursing tank top!!!
![]()
![]()

![]()
![]()
If you have any questions, or would like to share your new nursing top with me, feel free to send me a message on Facebook or Instagram @sherylaffleck. ♥️
Note: This post contains Sheryl’s affiliate link. Thank you for your support!
Great nursing hack! I’ll have to pin this one for later 😉 nice to have you here on the blog!
I was so happy to have her as one of my first guest bloggers- and she did such a great job! Thank you!
Thank you!!! I hope you enjoy it as much as I do. I’m so excited to be a guest here on the blog!
I’m so happy to have found this post! I cannot wait to buy the tank pattern and attempt this hack. I may make a new nursing bras for myself using the method too lol
Yay! I’m so glad you found it too, and let me know how your project turns out!