Pattern Hacking: Button Front Havana Cami (& bonus tutorial!)
![]()
![]()

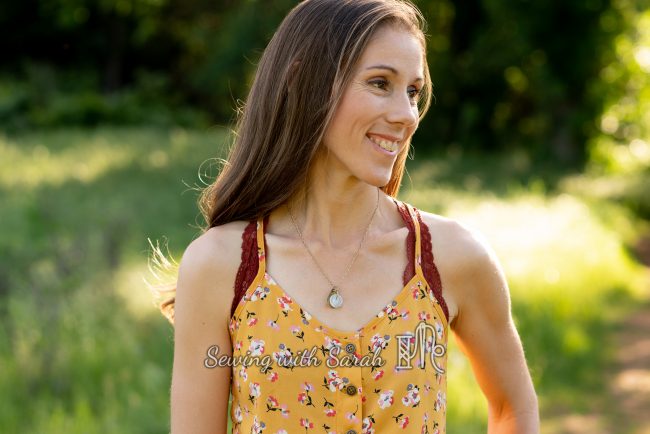
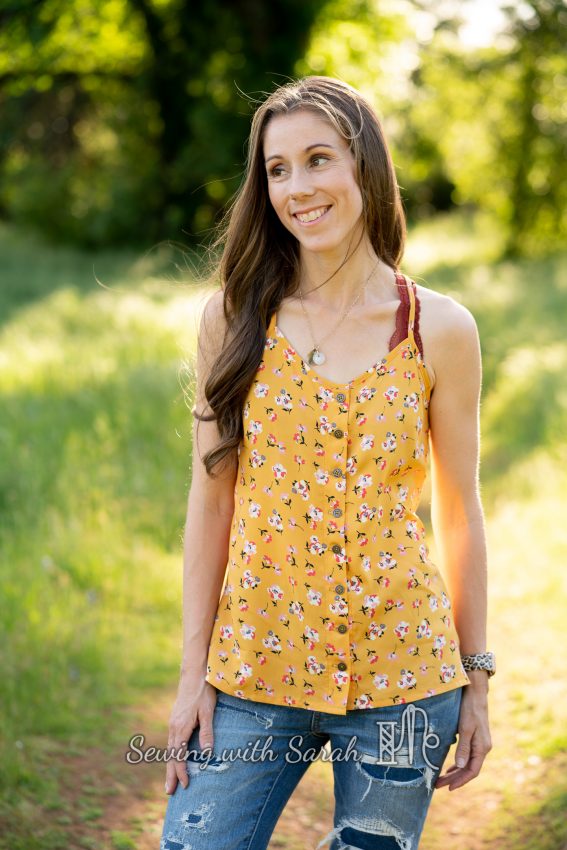
Hey friends! It feels like we were just hanging out here yesterday, and while I don’t want you to develop, you know, expectations about when I post (I love to be random like that!), I just had to circle back to share my new favorite cami, and a tutorial for getting this look yourself!
This little number started out as the Havana dress/top from Greenstyle Creations. I made a couple versions of this pattern last year during testing, and loved it so much I went out and binged on a few more yards of rayon challis so I could make more…and then nothing. I put the fabric on a shelf, got distracted with other patterns, and never came back around to it until now. Shameful, but them’s the facts- I’m a pattern magpie, always jumping at the chance to make something new, often neglecting old favorites in the process.
![]()
![]()
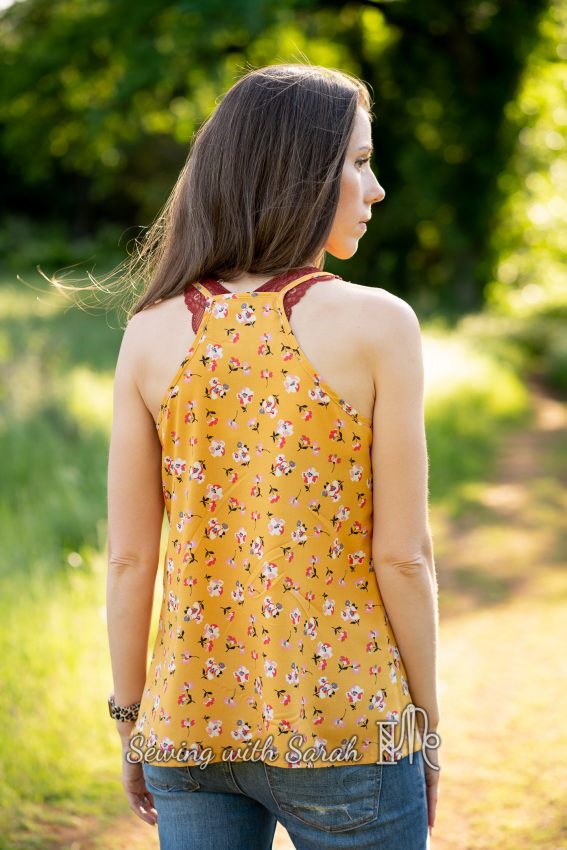
Recently though, I’ve been rediscovering my love of wovens (they are SO satisfying to press!), and this fabric jumped off the shelf at me. While I love my original Havana top, I decided I wanted to do something a little different this time, and since I’ve been seeing button plackets everywhere recently, a little button-down tank seemed just the ticket.
My fabric is a rayon challis from JoAnns- not always an easy beast to tame, but the print was too perfect not to give it a try. This time, I decided not to pre-wash, since that always seems to do a number on challis, coming out of my dryer like an angry hedgehog who ran into a yarn factory.
I’m counting on the ease in this pattern to make up for any post-construction shrinkage, but when you think about it, most ready to wear items are not pre-washed, and we all cope just fine with a little shrinkage here and there. I’ll be sure to come back and update you if this plan goes south, but it did make the cutting and construction much easier, so I’m a happy sewist thus far.
![]()
![]()

My buttons are also from JoAnns- I posted in the Greenstyle group about whether to use bronze or shell buttons, and the votes came out so overwhelmingly in favor of bronze, I didn’t even feel like I had a choice. Somehow though, between cutting and button-time my second set of four went missing, so I was forced to make a late night pilgrimage back to the store to procure more, which thankfully, were at hand.
I’m sure the original set will turn up soon, just like that hamster I lost when I was 7, that we found 6 months later chewing its way through a suitcase, happy as a clam (but that’s another story…). Just don’t be surprised if these pop up again somewhere!
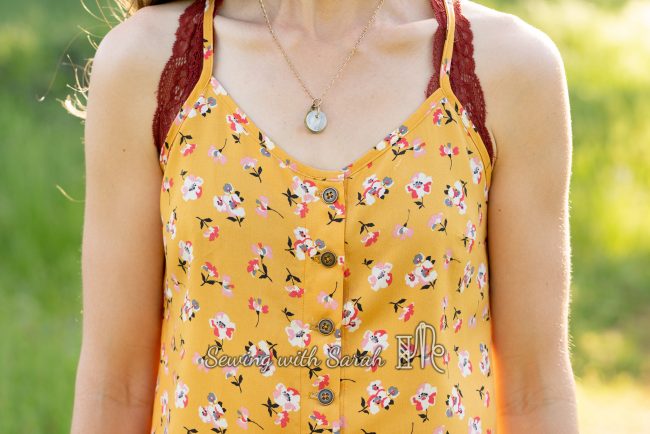
Before beginning my top, I searched the internet high and low for a tutorial on how to add a button front. I found a few, but all were done with facings, and I was determined to keep the bias tape edges on my Havana (mostly because I was too lazy to draft my own facing). So, I made up my own method, and it seems to have worked out quite well- you’ll have to let me know what you think!
![]()
![]()
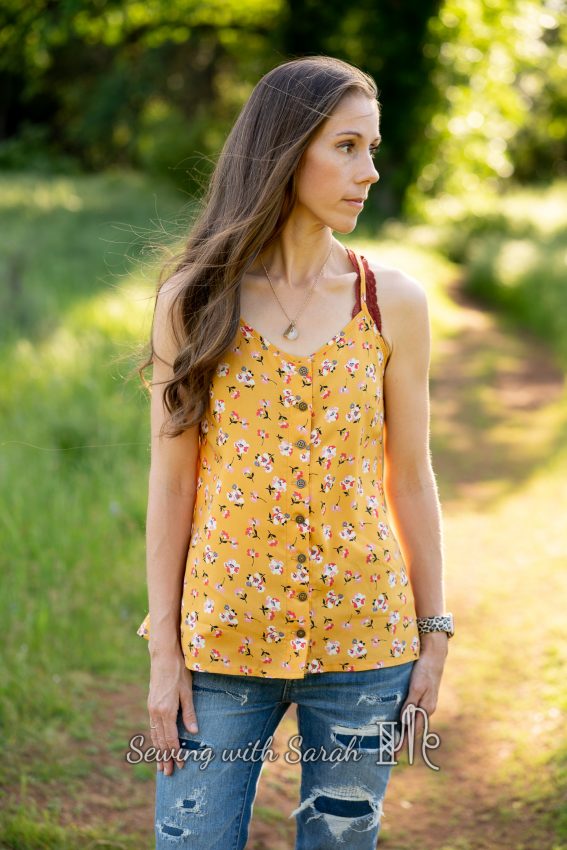
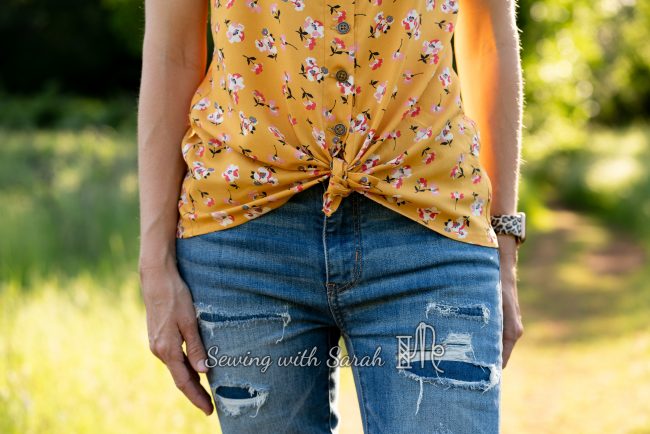
I love how the button front allows me to create a couple different looks by tying up the bottom, keeping it straight, or doing a half tuck- I’m leaning toward the tie as my favorite.
![]()
![]()
And….If you’re interested in creating your own button-front Havana, I’ve put together a little photo tutorial for you to make it easy.
![]()
![]()
I’ve also included a few tips for sewing darts- not something we’re used to doing with knits but a must for sewing wovens!
Dart Tips:
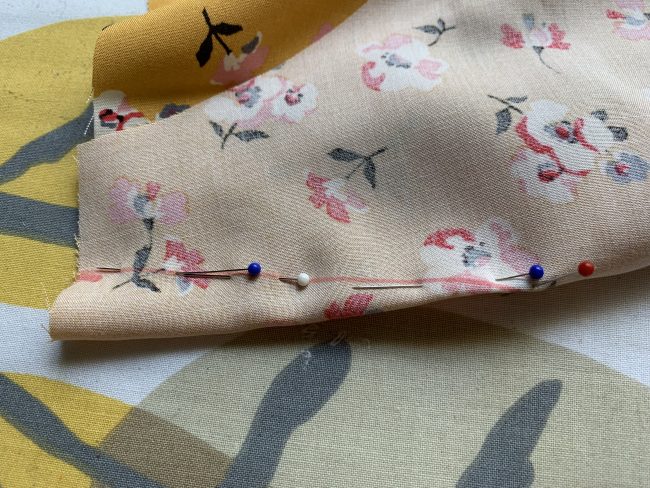
My dart tips are simple. I start by marking the dart on the wrong side of my fabric with a heat-erasable marker.
When I’m ready to sew, I bring the two lines of the dart “legs” together, and pin them with pins, pointy end toward the edge of my fabric. As I sew, I’m able to pull them out smoothly, and keep the fabric in place.
![]()
![]()
![]()
![]()
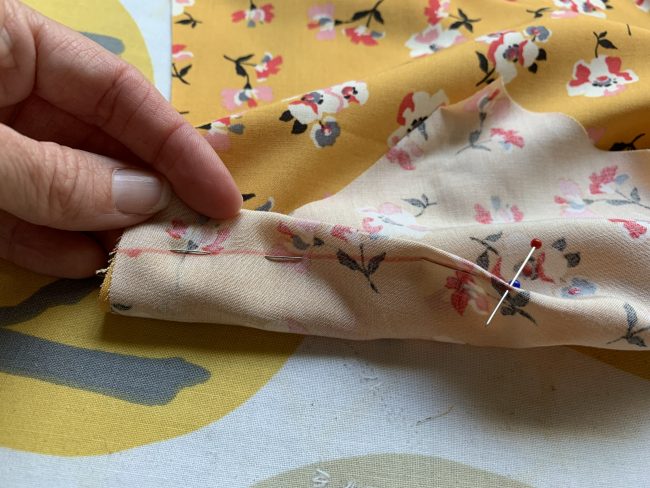
I used a microtex 70/10 needle on this fine challis, and Gutermann polyester thread (it shreds less than the Coats and Clark brand). My stitch length was set to 2.5mm, but as I neared the “apex” of the dart, I decreased my stitch length to 1.8mm.
I did not back tack at the end of the dart, instead pulling my fabric out and knotting the threads lightly by hand. This helps prevent puckers!
![]()
![]()
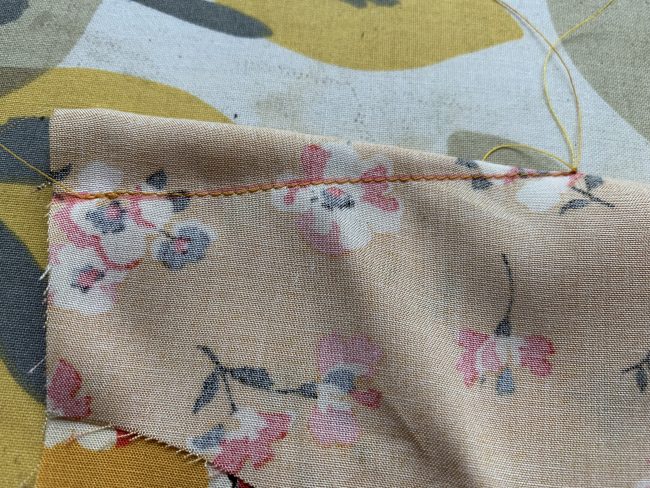
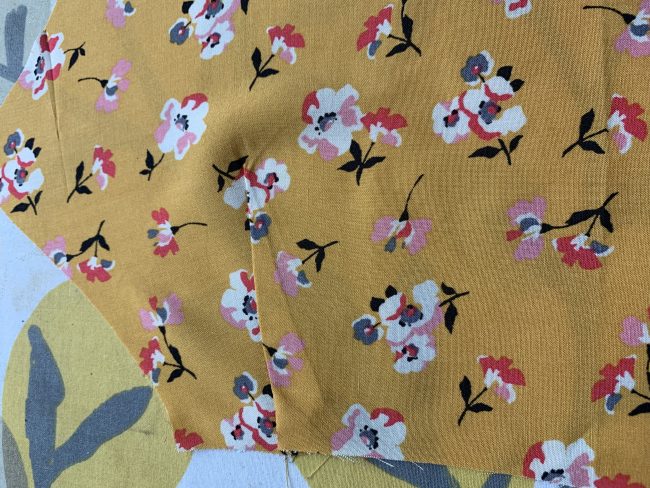
Finally, I gave my dart a good press over a pressing ham, to retain the curvature there- after all, it’s meant to curve outward to accommodate your chest, so you don’t want to flatten it too much!
![]()
![]()
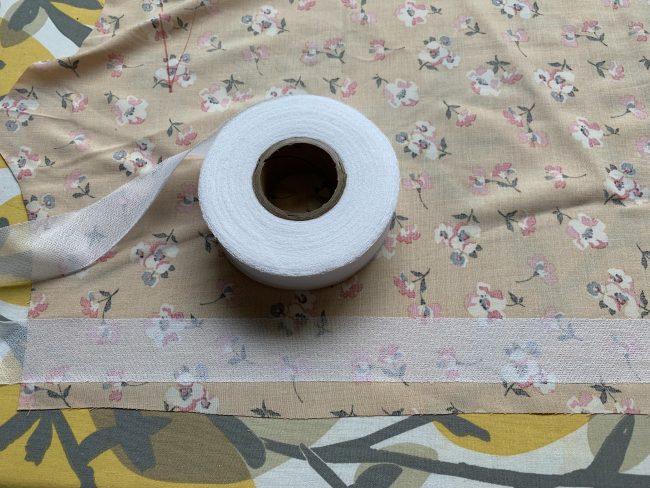
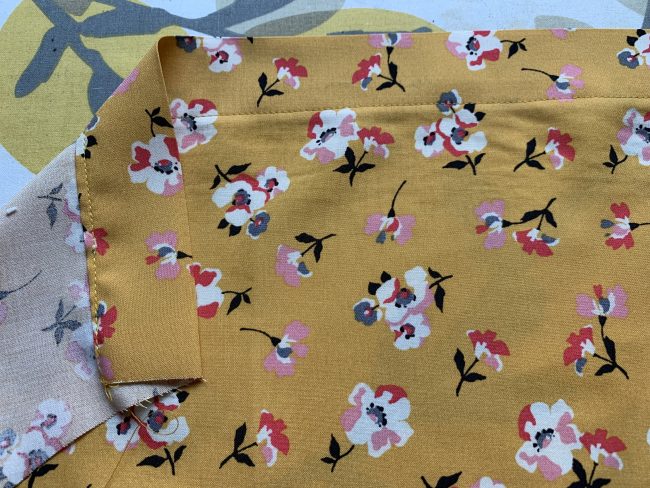
Button Front Tutorial
This tutorial is designed to work with a cami using a double fold bias tape finish. I made my own bias tape, and applied it in the same manner as the Moxi shorts (I have a video tutorial for that here).
If you need a quick refresh, here’s how:
![]()
![]()

Unlike knit binding, which can be done on a single fold (my favorite method for knits is here), I like to use a double fold binding for wovens, so to keep all the edges enclosed and prevent fraying. If you’re new to sewing wovens, make sure to check out my wovens 101 post before beginning!
Step 1: Pattern alteration
Before I could start sewing, I had to alter my pattern to allow for the button placket and overlap. I decided (somewhat arbitrarily, I’ll admit) to have a 1″ wide button placket. I also needed to account for a 1″ overlap, and a 1/2″ fold at the front, so I increased the front of my pattern by 2.5″. I’m sure I missed some minor detail with my math here, but it all worked out, so I’m calling it good.
![]()
![]()
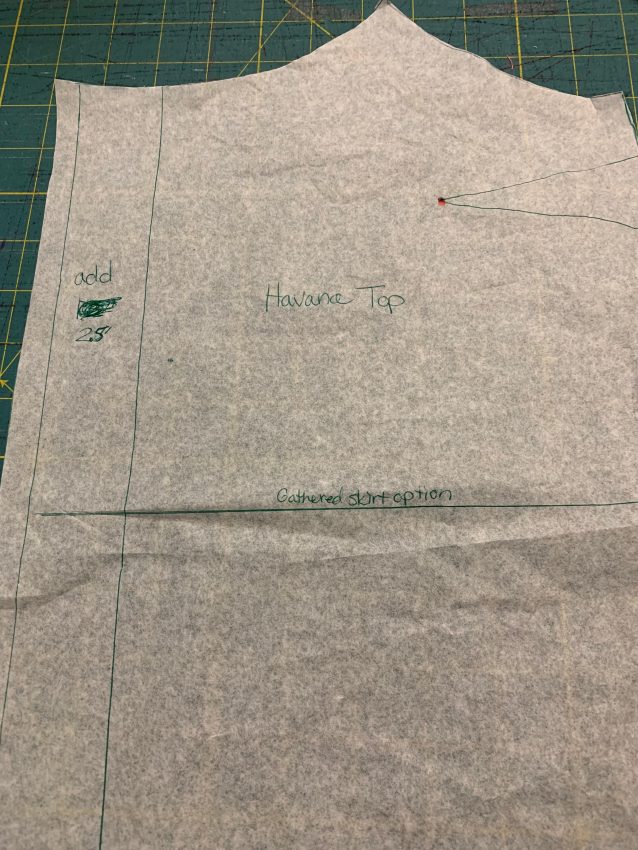
Cut two mirror images of this new front piece. For your bias binding, cut the shoulder strap lengths as indicated in the pattern, plus a back bias piece (depending on your option), and two front bias pieces slightly longer than your new front neckline.
Step 2: Interfacing
Applying buttonholes and buttons to a fine, blouse weight fabric would be a nightmare without interfacing. I used this 1″ lightweight fusible interfacing, and applied it 1/2″ away from the edge of my fabric.
![]()
![]()
Step 3: Creating the placket
To create the placket, I folded over 1/2″ at the front, and then folded that in 1″, so that my edges were hidden.
![]()
![]()
![]()
![]()
I topstitched this down, right along the folded edge.
![]()
![]()
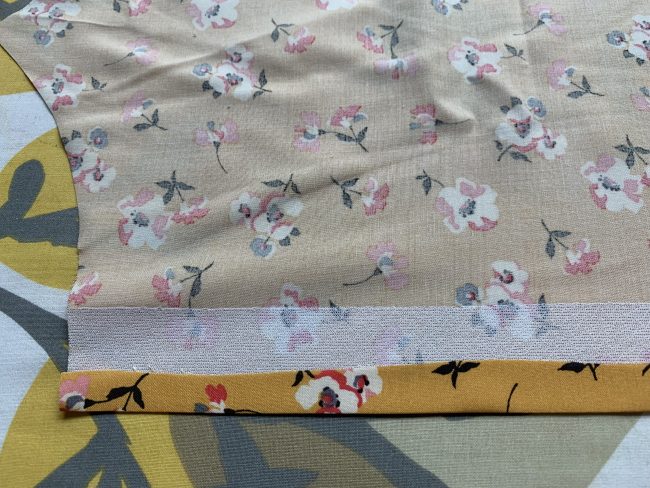
Step 4: Apply the bias binding
It’s time to finish the edges of your tank with bias binding.
Apply the back bias binding per the pattern (depending on your option), and then turn your attention to the front. Prep your bias binding strips by folding and pressing, and then sewing the binding to your top along the first fold, right sides together.
![]()
![]()
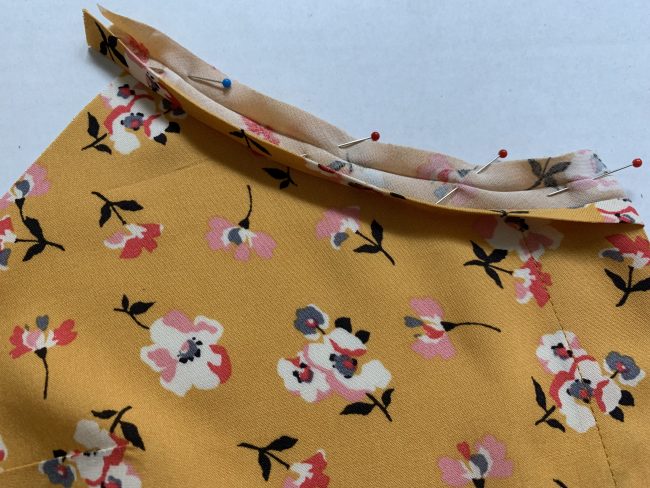
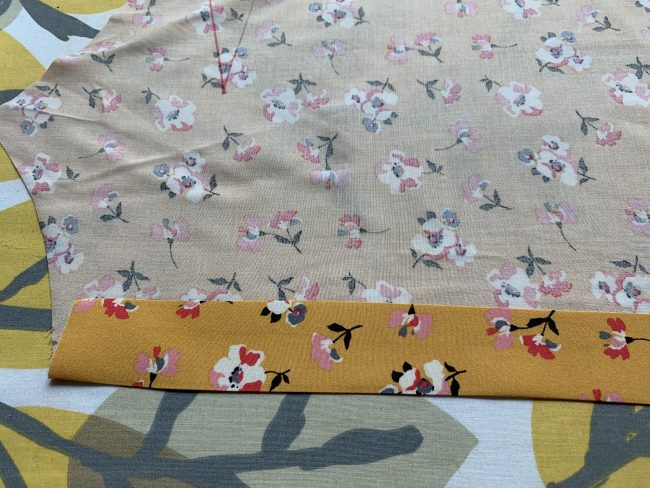
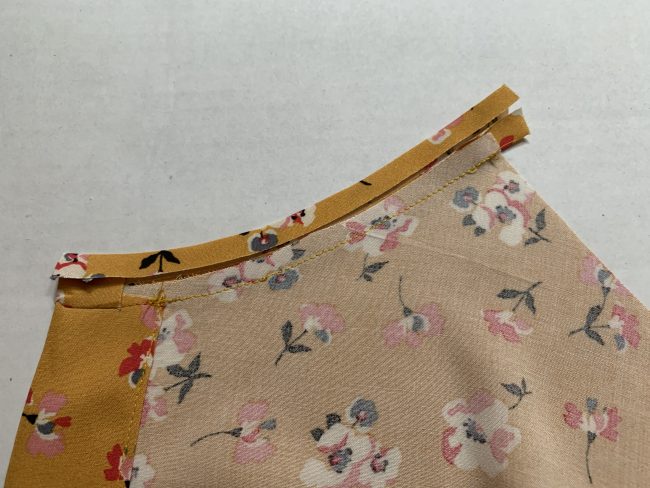
When you get to the front placket edge, wrap your binding around the front, toward the back, like this:
![]()
![]()
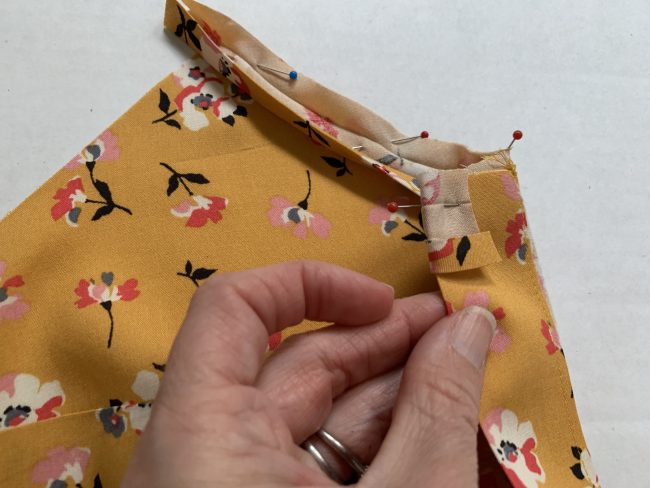
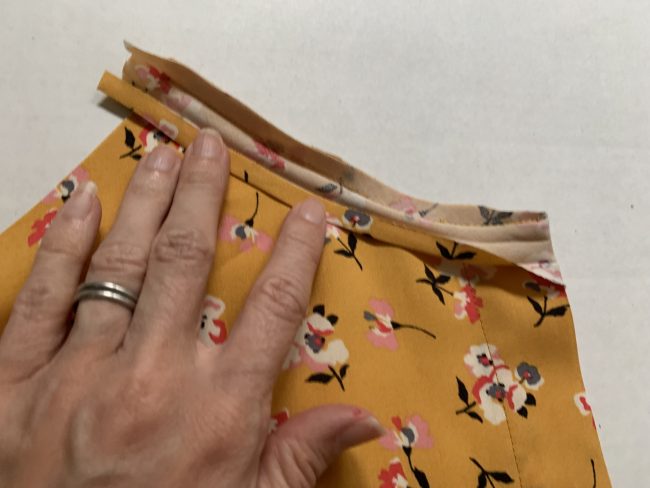
Press the binding up, and over the top to the back side, clipping the front corner at an angle if needed.
![]()
![]()
![]()
![]()
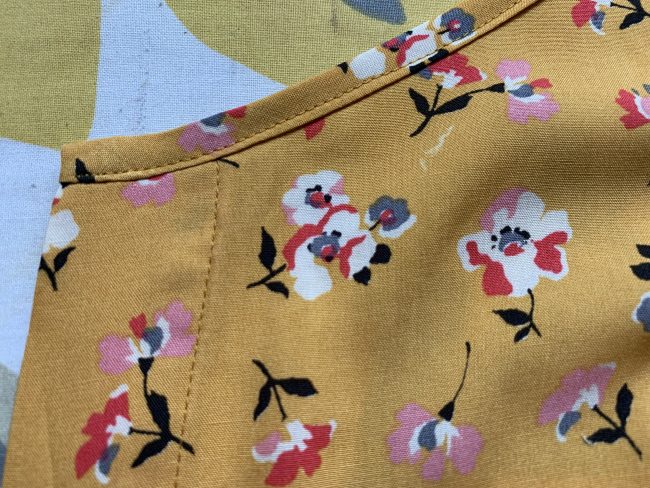
Fold again, and then topstitch down, so all edges are enclosed. Trim any excess binding at the armscye.
View from the front:
![]()
![]()
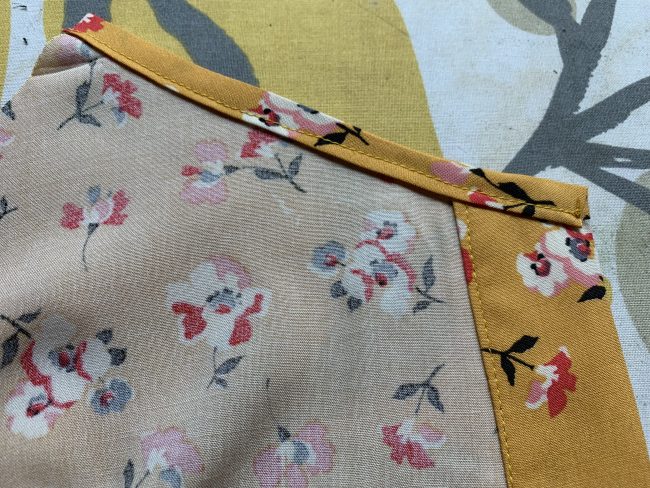
View from the back:
![]()
![]()
Continue with the other side, and the straps, as instructed in the pattern.
Step 5: Make buttonholes/Sew Buttons
![]()
![]()
I’ll admit- this is the hairiest part, and I even stuffed up one of my buttonholes as proof. But once my top is buttoned (and it’s likely to stay that way, so I don’t have to worry) you can’t even tell. Still, I recommend sewing a test buttonhole on your fabric first, and grabbing your favorite good luck charm (or a glass of wine) to hold while your machine does its work. I don’t have any photos here, since I was biting my nails the whole time (not smiling blithely, as this photo would suggest).
That’s it! You now have a beautiful button front cami to ejoy for summer!
![]()
![]()
Note: This post contains affiliate links- but only for things I really love! Promise!
If you enjoyed this tutorial, please consider subscribing to my blog or following me on Instagram!