Luck O’ The Irish
![]()
![]()
You know I can’t resist a good raglan (see my comparison post here), so when Kennis of Itch to Stitch revealed her plans for a raglan to add to her own pattern line-up, I couldn’t take a back seat. Kennis is know for her excellent drafting and attention to detail, and I was really looking forward to seeing how I could up the ante on my pattern skills with this deceptively simple style.
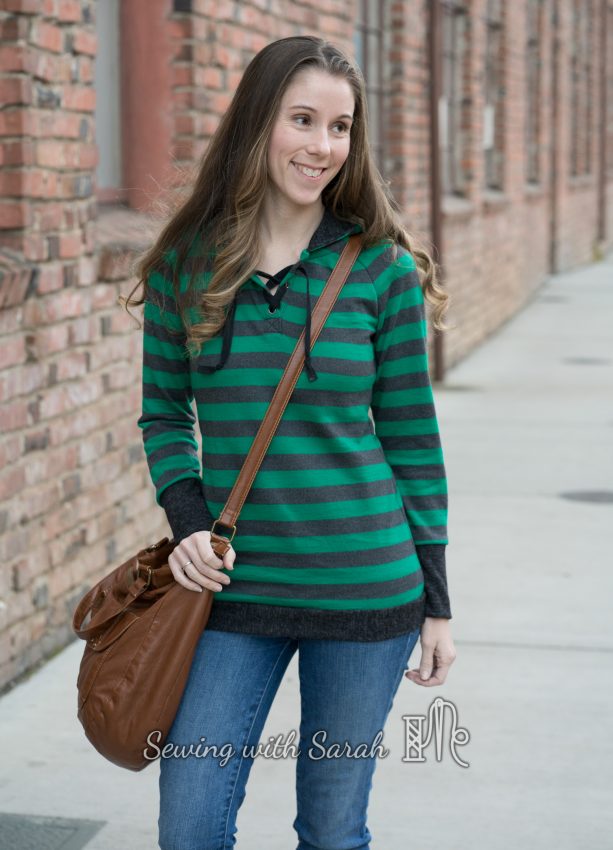
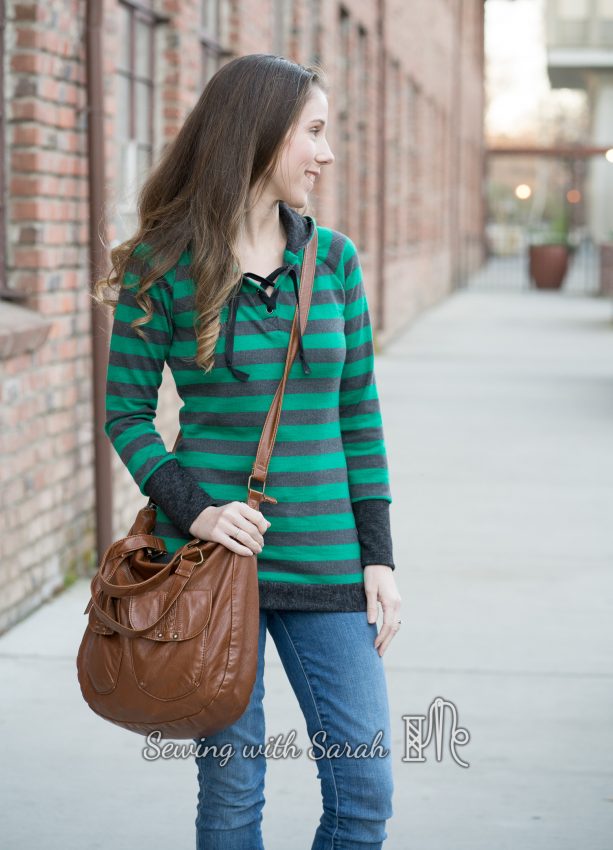
The Visby has three views: a basic crew neck banded view, a hooded henley view, and a crew neck henley view. In case you aren’t familiar with the term, a henley refers to a pattern that has a short half button placket in the center front. One of my ready to wear tops from Gap has the same detail with a hood, so I was itching to try that view and see if I could recreate (or improve!) upon it!
![]()
![]()
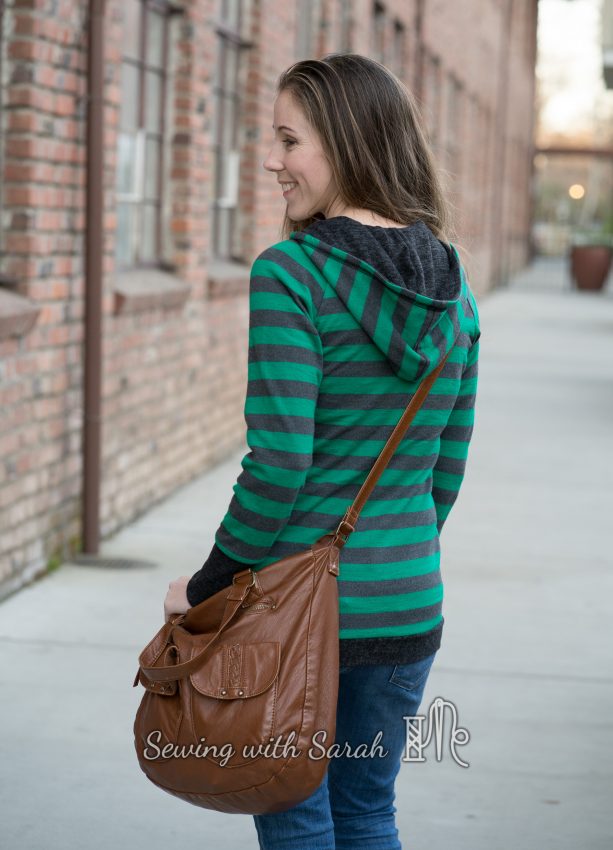
I made a size 0, my usual in I2S patterns, using a wool blend jersey knit from my stash. I’m not certain, but I think it may have come from Fashion Fabrics Club years ago ( I really should develop some sort of tracking and labeling system!). It’s high quality, almost like a merino in that it isn’t itchy at all, and has perfect recovery. I anticipated that the placket would need a good amount of pressing to achieve a good finish, so I wanted a fabric that would press well and not get all melty in the face of my iron (rayon spandex, I’m looking at you).
![]()
![]()
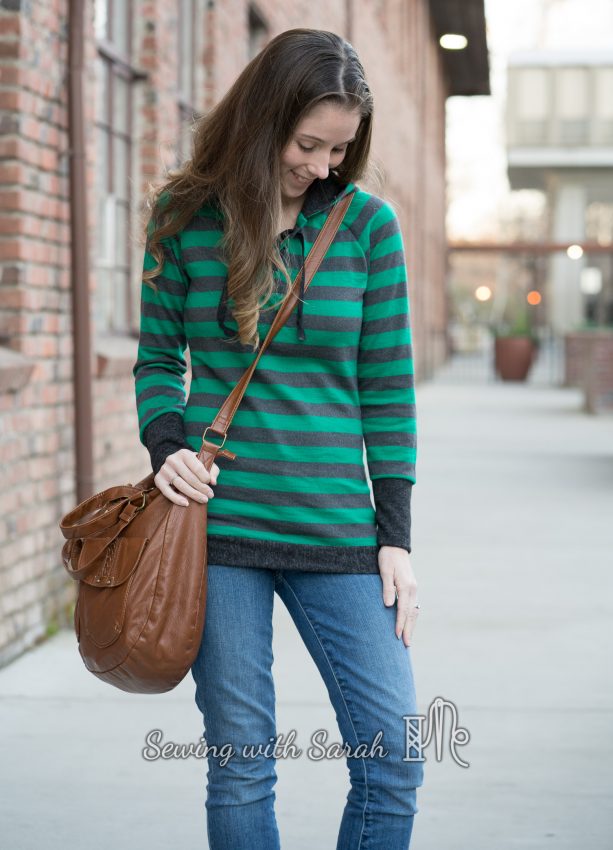
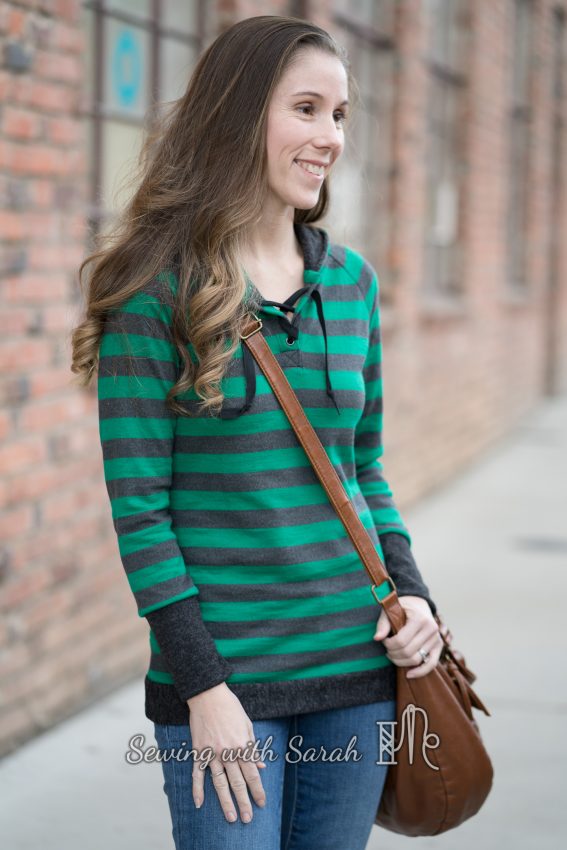
The wool jersey turned out to be an excellent choice, and in honor of #sewstripes month on the Sewcialists blog, I spent extra time matching up my stripes. At least, during the cutting phase. By the time I got to constructing the top, I was so excited to see how my henley was coming together that I used a very slapdash, but still pretty effective method of matching my stripes as I sewed: instead of basting before serging, which I normally do, I simply off-set one layer by the tiniest amount, so I could see the layer below it, and kept the two even at the seam allowance (peeking every so often) as I serged.
Either I’m getting better at this technique, or sewing with green stripes gave me the Luck O the Irish, because everything matched up pretty well! I lined the hood in some grey hacci from the scrap pile (yay for scrap-bustin!), and also used the solid for my cuffs and band. As expected, the instructions for the placket were great, and walked me through the process without an issue.
![]()
![]()
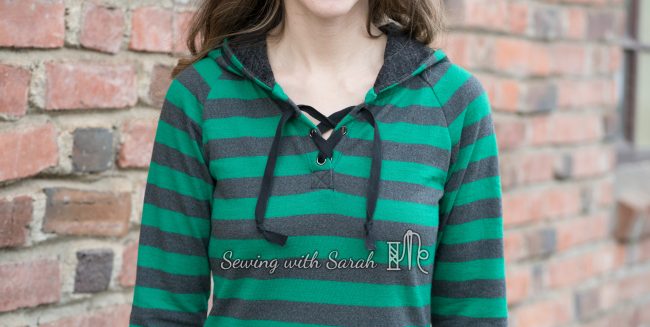
I finished it off with grommets and twill tape, rather than the traditional buttons/buttonholes, because I loved this top too much to play Russian roulette with my automatic buttonhole setting on the machine. The clean finish on the inside of the hood is especially nice- and it wasn’t hard at all!
![]()
![]()
The end result is a top I know will hardly touch a hanger- because I’ll be wearing it every time it comes out of the dryer. For my next iteration, I do plan to narrow the sleeves a by about 1″ (they are a little too wide for my preference, especially at the bicep) and lengthen the placket to about 8″, to make it more nursing friendly. This is a simple matter of lengthening the placket and interfacing pieces to the desired length, and proceeding as directed. I’m also thinking a kangaroo pocket wouldn’t be amiss…
![]()
![]()
What are your favorite methods for matching up stripes? How do you get a good buttonhole on your machine? Inquiring minds want to know!
When I’m not blogging, you can find me on Instagram and Facebook!
Grab the pattern here
Note: This post contains affiliate links! Thank you for your support!
I line up stripes just like you did, just making sure they are together as I’m sewing! I think it’s harder to figure out matching stripes when you’re cutting.
Yes- I ended up with one sleeve that matched better than the other, somehow. Glad to know you do it this way too!
This looks very nice! Both the fabric and the pattern looks great. One question; is this a straight size 0, or did you alter the fit? It looks slightly shapen (?? taken in is maybe a better word?) at the waist, I really like that – the other versions I have seen of this seem more boxy.
The fit in the waist was not altered at all- My measurements are 24.5 waist, 34.5 hips, if you want to compare them to the pattern. I think other testers may have sized up in the waist, or wanted more room there. As drafted, it is a pretty close fit in the body. I did find the arms a bit loose and took them in a tad.
This was such a cute hack Sarah!
Thanks!
Great job on this top! It looks super professional and ultra-comfy!
Thank you! The wool is nice and warm, and washes well!
So cute on you! I love the stripes!
Thank you! I’m addicted to stripes lately!
Love it! great trick on the stripes! Now I just need to learn how to cut the pattern to match .. LOL!