Tested: Greenstyle Cavallo Leggings
![]()
![]()
I haven’t been a part of the Greenstyle team for a while (nothing to do with them- just needed to focus more on #momlife), but I still jump at their testing calls, because not only are they a great group of people, I don’t know of another company that does a better job designing functional, attractive activewear.
It’s a rare week that doesn’t see an assortment of Inspire Tights, Super Gs, Strides, and Tempo Tights, so I knew the Cavallo’s were sure to be another hit, and I wasn’t disappointed!
Which is awesome, cause I really needed a pick me up this week- we had a couple home renovation projects fall through/get stalled out, and I desperately needed to forget for a minute that I was living in a half demolished house with a single bathroom and 5 people that are home 24/7. I know we’re supposed to be all grateful all the time on social media, but #realtalk- it was getting to me, and I desperately needed a break.
So, I begged hubby to take the kids out for a while (ANYWHERE, just OUT) and waded through the sea of boxes, hammers, flooring, and paint cans to find myself a little corner of sewing bliss.
The result? Not only did I whip up three new pairs of the best leggings ever, but I regained a tiny part of my sanity. NOW there’s something I can genuinely smile and be thankful for!
Note: don’t forget to read all the way to the bottom for a new coverstitch tutorial on how to do a reverse coverstitch inside the sewn leg of these tights!
What makes the Cavallo’s so special (in addition to their role in restoring my faith in the universe?…
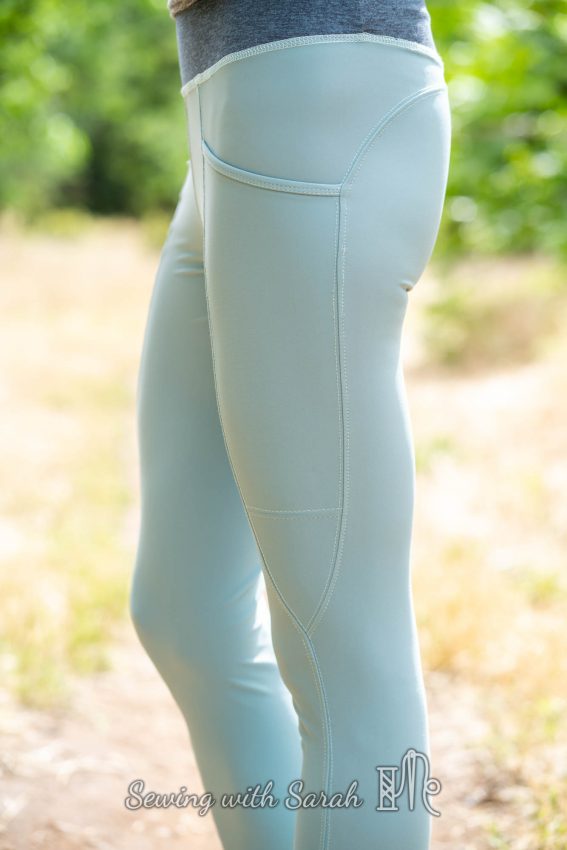
THEY DON’T HAVE AN INSEAM! Yes! You read that right- no pesky seams along the inner leg, no gusset to attach, just a few very ingenious pattern pieces and a the same great fit I’ve come to expect from Greenstyle.
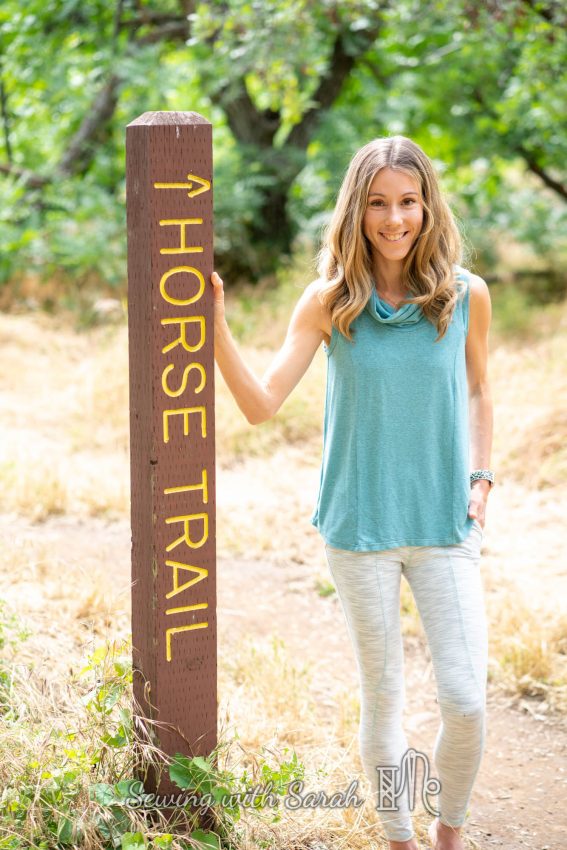
Despite almost daily begging from my son, we do not own a horse- but I’m told these are wonderful for equestrian activities, because there’s no chafing along the inner leg. I stood by this sign for an hour hoping a horse might stop by so I could give that aspect a go, but no luck.
![]()
![]()
I can say, however, that they are awesome for running, yoga and spinning- three activities to which I’m devoted. I worried that I might miss the gusset, but I really don’t find a difference at all, even in my deepest yoga stretches.
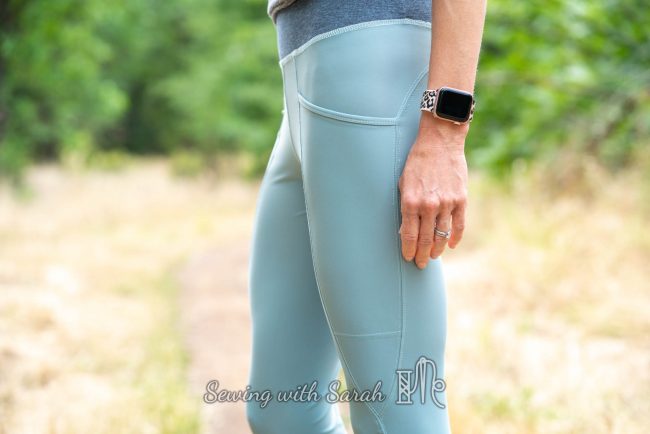
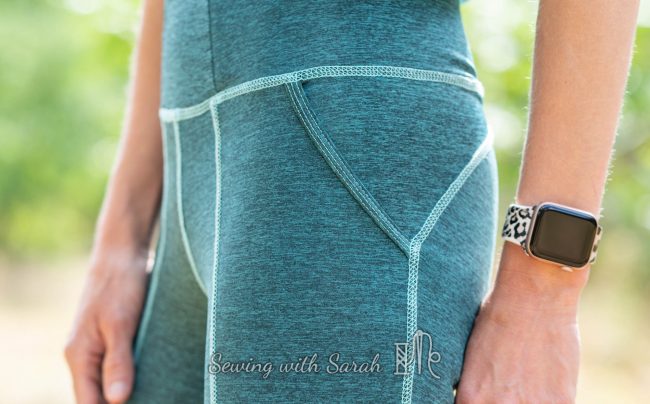
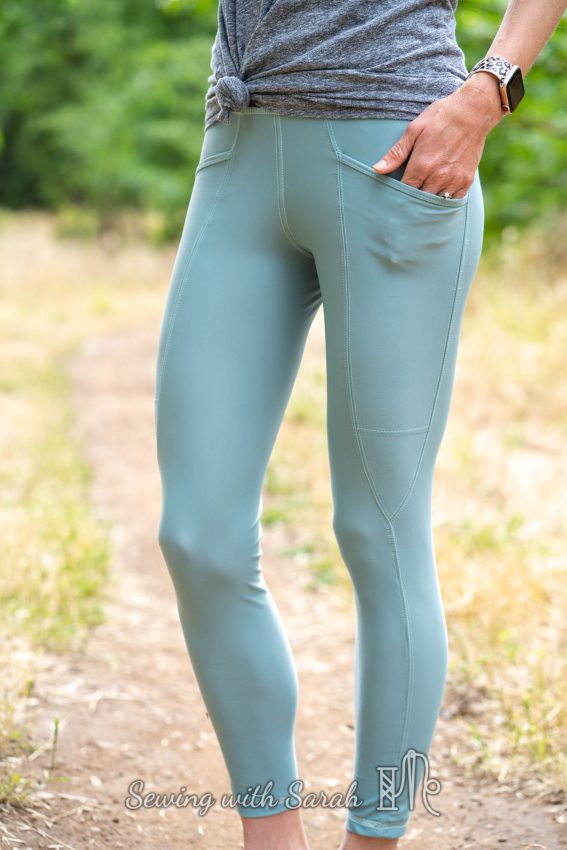
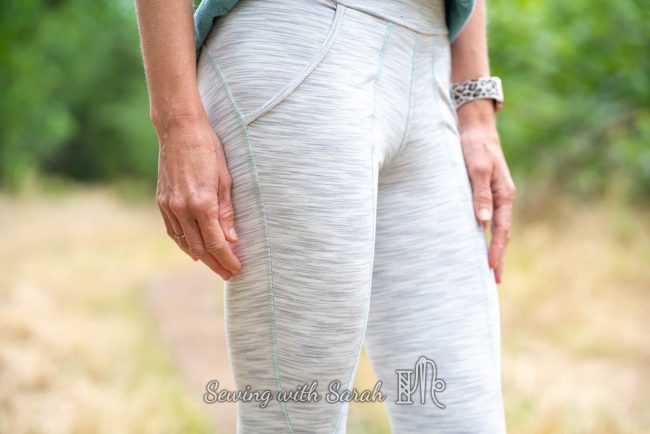
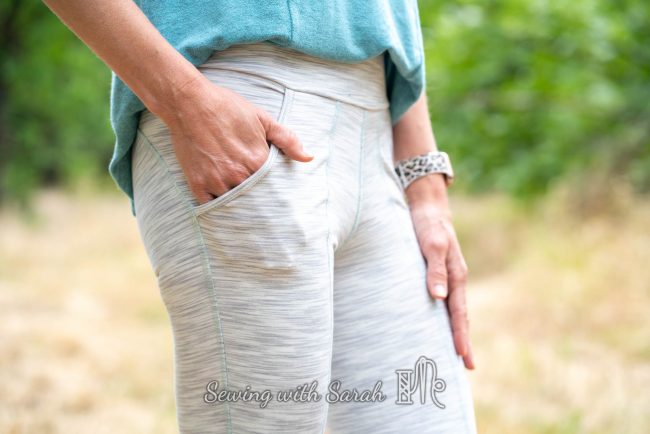
The other thing that sets the Cavallo’s apart is the pockets- there are two options, one for a scoop “logger” style pocket (checkout my Inspire hack tutorial for another way to create this pocket with a side seam), and another for a slanted pocket. I tried out both, and prefer the scoop pocket for the aesthetics, but both are pretty easy to sew. (worried about the binding? check out my foolproof binding tutorial here)
Pro-Tip:
If you plan on running in these, I would advise doing the stitching partway down the pocket, so your phone doesn’t migrate down toward your knee during your activity. I find it stays in place just fine during walks and bike rides, but tends to head down south during more vigorous movement.
Fabric & Fit Details
![]()
![]()
I made three pairs of Cavallo leggings during testing. I don’t plan to stop there, especially now that there’s a shorts cut line calling my name.
With all my leggings, I made my usual Greenstyle measured size, and removed 1/4″ from the front rise, as I do with the Stride and Inspire Tights (but not with the Super Gs).
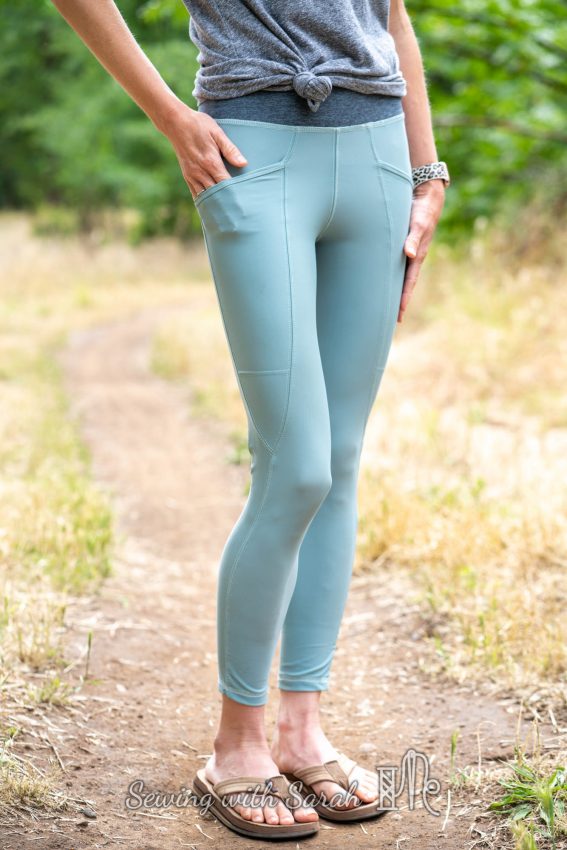
I cut the “cropped length”, and find it the perfect fit on my shortie legs- they hit just above the top of my ankle bone, a nice mix between a capri and a full length legging.
I do feel like the legs in these are looser than the Super G tights, and more along the lines of the Inspires/Strides/Tempo tights, so if you’re wanting a compressive fit, you could even size down a bit in the legs.
Pair #1
![]()
![]()
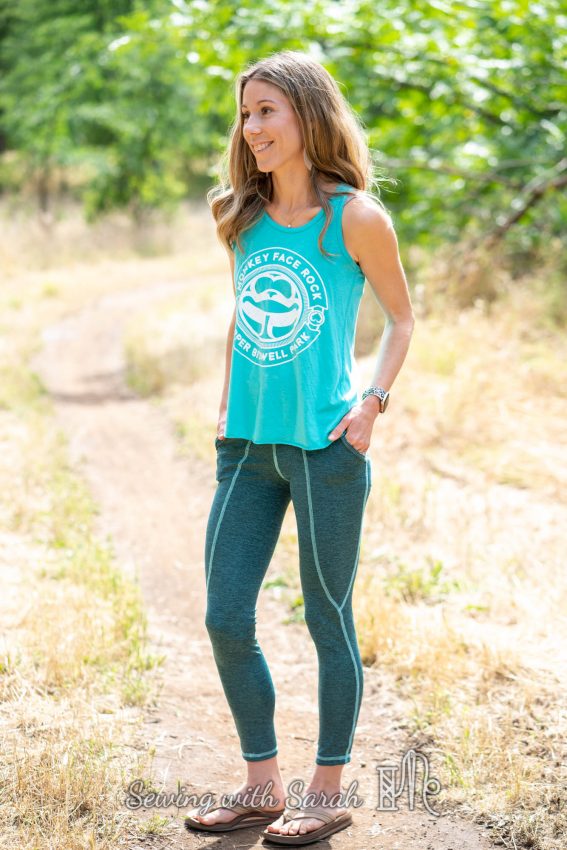
The first was from this double sided heathered teal print from the Styled Magnolia that I’ve been holding onto for quite some time, waiting for just the right project.
I debated at length about whether I should color block this pair, because the fabric just seemed to beg for some type of color blocking, but in the end, my more “boring” side won out, and I went for the classic look.
![]()
![]()
The pattern includes options for a symmetrical or asymmetrical waistband- these feature the asymmetrical view, but I didn’t accent it with any topstitching, so it almost looks solid if you don’t look too closely.
![]()
![]()
To be honest, I didn’t love how the tiny front piece looked on me when I emphasized it, but I think that was just a failure of my sewing imagination, because now that I’ve see it on other testers, I think it looks amazing when the back waistband and the pockets are cut from one color, and the front waistband and main tights are cut from another.
![]()
![]()
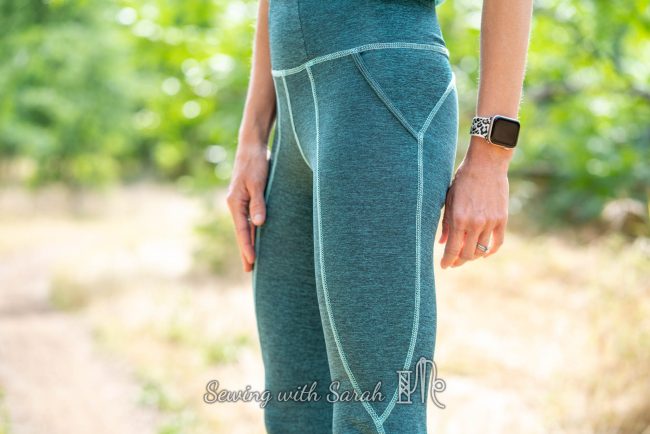
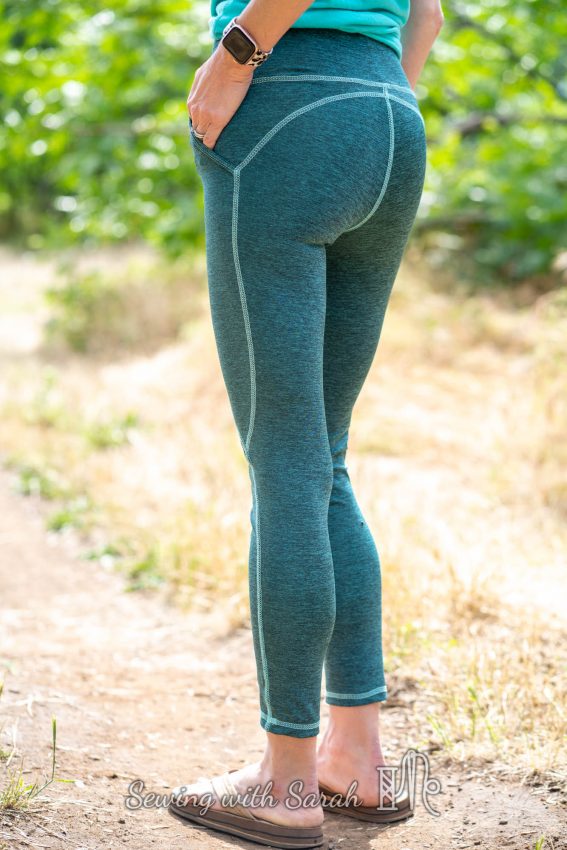
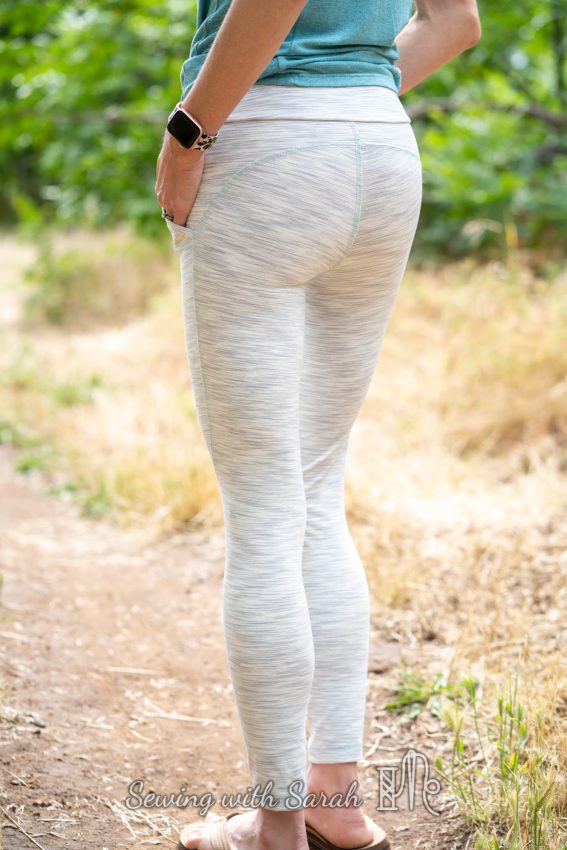
One detail I really adore is how the curve of the pocket adds some subtle glute shaping- no squats needed! Sorry for the butt shot, but I had to demonstrate. I tend to not be really well endowed in this area, so any pattern that give me a little uh…enhancement….is welcome!
It’s the best of the Super G pockets and the Stride Tights shaping all rolled into one pattern!
![]()
![]()
The only downside to this fabric is that it tends to really show the sweat when you workout…in some areas more than others. I’m glad I realized this while social distancing and not while at a steamy spin class, so I’ll be sure to keep this pair for casual wear, or less intense activities.
![]()
![]()
Pair #2
![]()
![]()
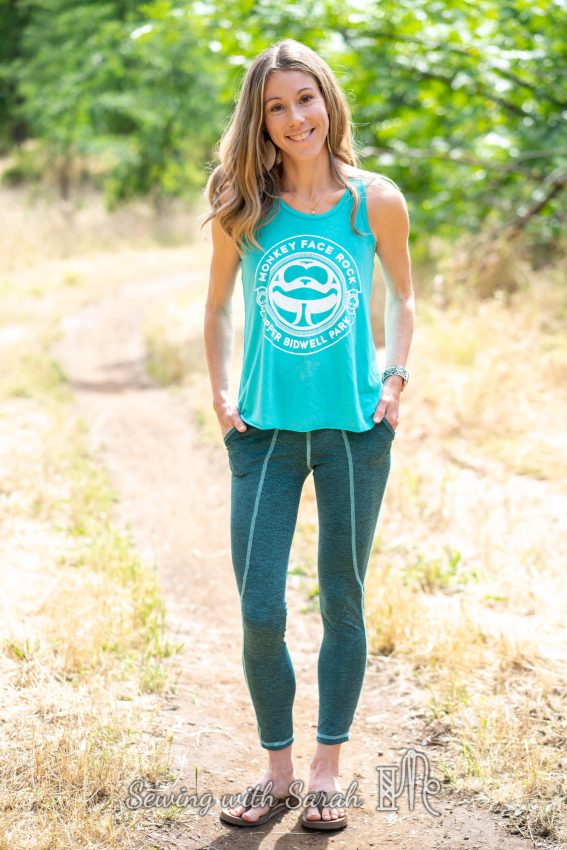
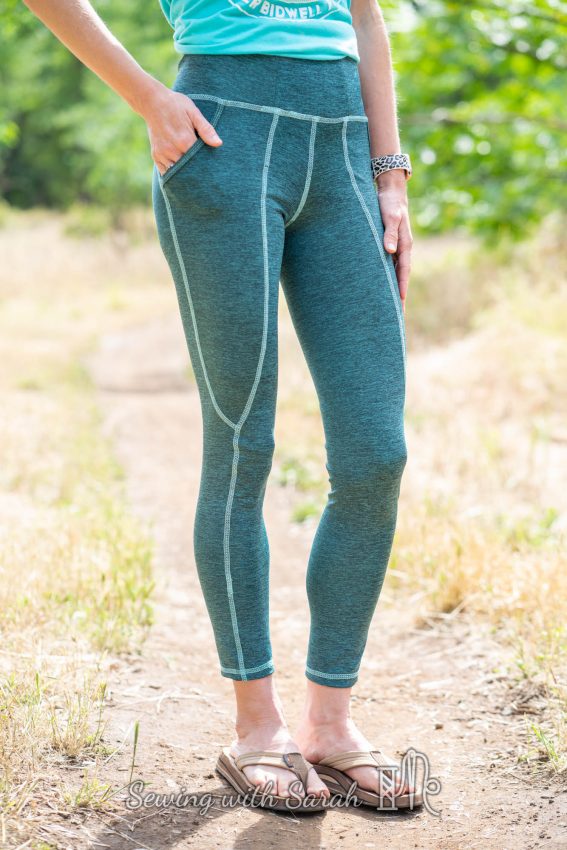
My second pair was made from this fern green athletic knit from Fabric Fairy- its a nice medium weight fabric with a cool hand, perfect for our hot summers. This pair features the slant pocket option, with the line of stitching across the bottom.
![]()
![]()
At this point in testing, the symmetrical waistband had just been added, and I wanted to try it, but I was running short on fabric due to a cutting error, so I wound up with this matching heathered athletic fabric for the waistband, recovered from my “scrap” bin. (one benefit of moving has been the opportunity to re-fold and re-sort all my fabric, scraps included, so I was happy to find this match).
![]()
![]()
Speaking of which, these tights only took a yard of 60″ wide athletic fabric- with a bit leftover for a matching future sports bra, assuming you don’t get distracted by a 4 year old while you’re cutting them out, and end up a bit short. That’s a total win for me, because most of my athletic cuts are 1 yard or smaller, and colorblocking could easily make use of smaller scraps, especially for the pockets, binding and waistband.
I used a double, wide needle topstitch on most of this pair, except for the pocket binding, where a narrow topstitch was needed, and the waistband seam, where I did a full reverse coverstitch with all three needles. Thankfully, my machine makes it really easy to switch from 2-3 needle mode!
![]()
![]()
Pair # 3:
![]()
![]()
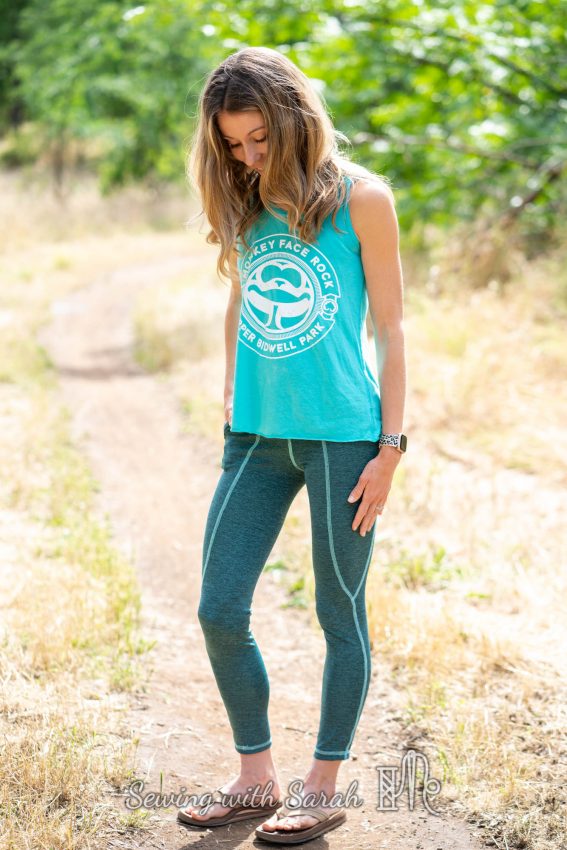
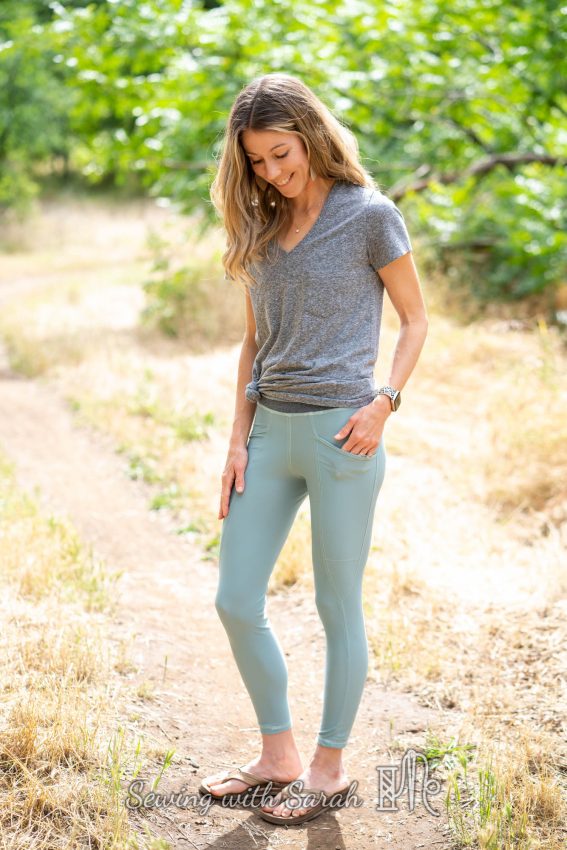
My third pair of leggings was sewn from the this “snow grey” performance fabric from Greenstyle- my first official order from them, but certainly not my last.
![]()
![]()
It shouldn’t come as any surprise, but they sure know their athletic fabric, and they give detailed descriptions and links for which patterns are best suited to the different types of performance knits on their site.
![]()
![]()
The fabric has a really beautiful aqua/moss undertone, that matched perfectly with this thread I found in my stash.
![]()
![]()
I tend to wear muted colors the most, so I knew this fabric would become an instant favorite once it was sewn up, and I wasn’t wrong.
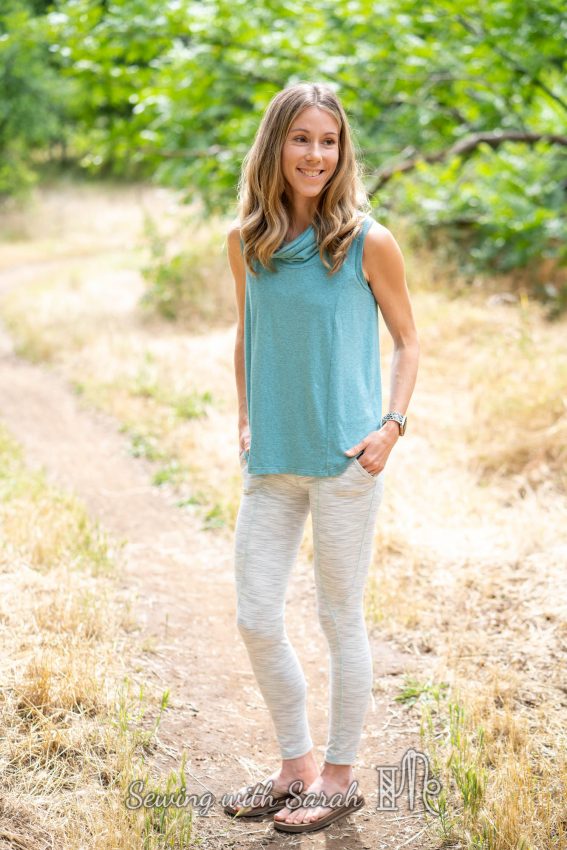
I’m wearing them here with my Taos Top from Threadbare- I could have sworn I blogged this last year, but I simply can’t find it, so it must be one of those that I forgot to write up. The fabric was from Surge Fabrics, and I just love this little top- the princess seams, the loose fit, the drapey cowl… I’ve worn it plenty, even if I did forget to tell you about it!
Coverstitching Tutorial
I decided to do a reverse coverstitch on all the seams, including the outer leg seam. I did a little video for you on that, in case you’re wondering how I got all the way up in there. The key is starting from the waistband edge of the fabric each time, going slowly, and pounding down those lumpy parts before you begin if your machine tends to skip stitches over bulky areas.
In the video, I do it all in one go, but you could also start and stop from different ends of the tights, if you were having trouble getting your presser foot all the way down the leg.
Still, if I can do it on the smallest size, it should be possible for anyone! (If you’re curious, I’m using a Babylock Coverstitch machine, and I absolutely adore it).
Sewing Tutorial Mom + Web Developer/Photographer Dad = Tech Saavy Kids!
On another note, my boys did something really awesome this week that made their web developer/amateur youtube videographer parents proud- they created a website and a youtube channel!
![]()
![]()
They came up with this idea all on their own (after watching their parents pour hundreds of hours into this blog), and went to town on it.
![]()
![]()
They created a video schedule, came up for a name for themselves, and shot and edited their very own video.
Honestly, we had very little to do with the process- we just gave them a phone, some guidance about cyber safety, and a little encouragement- and they were off!
It would mean the world to them if you had a minute to check out their video and “like” it- we’ve discussed how the intrinsic reward is in the process, but a little social reinforcement (especially during this time of extended separation from family and friends) is always welcome.
You can find their website is here: https://www.ideasparkers.net/
And who knows- it might spark some creativity in your kids as well! I’m convinced they wouldn’t have tried this out if they hadn’t had a lot of time on their hands- all that boredom (I’m a big fan of saying “I’m here to parent you, not entertain you…”) coalesced into something really creative and cool.
Stay tuned for the official “Idea Sparkers” T-shirts!
Note: This post contains affiliate links. The small commission I earn from them goes into purchasing local coffee to keep me fueled up and ready for anything these kids throw at me!
Awesome review. Thanks!
Glad you enjoyed it!
nice!!!!
Thank you so much for putting our website on your blog! Its helping a lot!
You’re welcome Oliver! I’m so proud of both of you!
that is so cute! I love it.
Thank you Cheryl!
Lovely sews as usual, Sarah!! And I will definitely be checking our the new Idea Sparkers site with my girls!! How fun!!!
Oooh, that would make the boys so happy! I’m kind of amazed they’ve taken this on, but I guess creating your own Youtube channel at 9 is just par for the course for this younger generation!
Love your leggings! I ordered my first Greenstyle patterns a few days ago and can’t wait to get started! Thanks for the inspo.
You’re so welcome- and welcome to the Greenstyle fan club!
Hi Sarah. Love your boys creativity. I have not seen that building toy before and have some grandsons who would like it. What is it?
They are magnatiles- we have several sets and they are always a favorite- they are pretty sturdy too- these are over 8 years old!
wonderful tutorial – thanks Noah and Oliver!! Looks like a fun project!