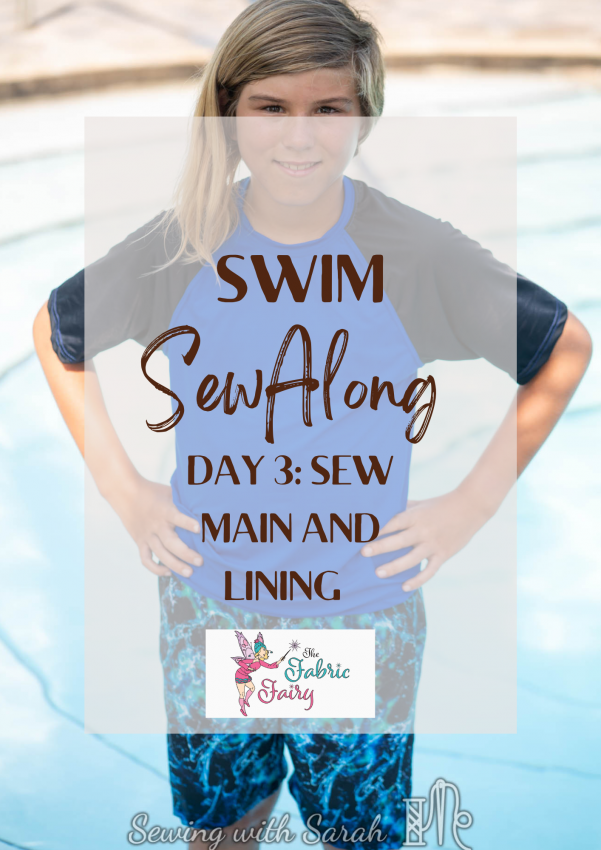
Swim SewAlong Day 3: Sewing Main & Lining, Bonus Greenstyle Moxi Shorts stack!
![]()
![]()
Hello friends! I’m back with Day 3 of the Swim SewAlong!
Every day this week, I will be walking you through the construction of the Greenstyle Cami Tank and the Jalie Gigi Swim Bottoms, through video tutorials, blog posts and support in the Fabric Fairy Facebook Group. You can use any patterns you’d like, but those are the two I’ve chosen to demonstrate through video, because they include alot of techniques common to many swim patterns.
I also have some prizes to offer at the end! What’s not to love?
If you need fabric and supplies, you can get 10% off through 3/27/22 with the code “MarchSAL” at the Fabric Fairy.
Sew-Along Schedule
- YouTube Video link HERE
Day 2: Assemble Pattern and Cut Fabric, bonus Edgewater Tegan Pattern Review
- YouTube Video link HERE
Day 3: Sew Main and Lining, Sewing Binding (YOU ARE HERE), bonus Greenstyle Moxi Shorts Stack!
Day 4: Inserting Swim Elastic
Day 5: Hemming/Topstitching
Sewing Main & Lining
Today we are going to be sewing our main and lining fabrics together!
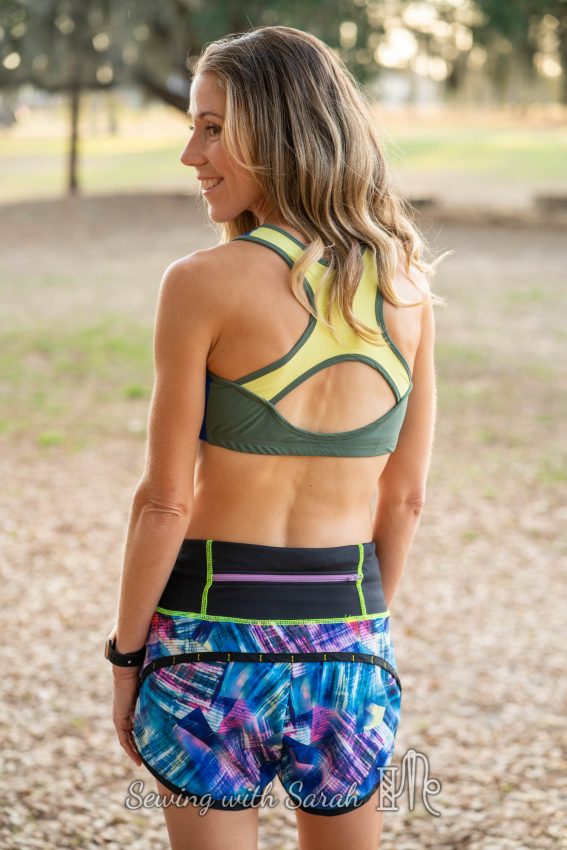
A quick note about lining: Most swimsuits have a lining layer, at the front if not also in the back, to prevent show through. Some women’s suits also have an additional layer for adding cups, or like the Cami tank, give you options for inserting removable cups into your lining.
The Jalie Victor swim shorts I shared the other day (in this post) have the option of a “briefs” layer, as do other shorts patterns, such as the Greenstyle Moxi shorts, that can be adapted for swimwear.
There have been swimsuits for my daughter that I have left unlined, but in general, I find that lined swimsuits provide better wear over time, and look more professional than unlined suits. I have one boy who prefers a briefs layer in his swim trunks, and one who does not, so some of this also comes down to personal preferences.
Whatever choices you’ve made, lets take those cut out pieces and start to turn them into something amazing today- a custom fit swimsuit for you (or a friend/customer/eternally grateful family member)
Construction Stitches:
I will be using my serger for most of the construction. If you are using a standard sewing machine, you’ll want to use a triple step zig zag or lightening bolt stitch for construction. I point out what these stitches look like in the video.
Check out the video below! (note, there is a light flickering in just this video due to the low lighting in my RV, which I was able to fix in tomorrows video, but wasn’t able to change in this video. If you are sensitive to this, please proceed with caution)
Sewing Binding
The Cami Tank includes binding along the edges, as do many other great swim patterns. I begin sewing the binding on at 16:30 on the video, so if you’re curious about how to bind the edges of your swim top, you’ll want to check that out! Today, I’m only binding the center front, so you’ll also want to watch tomorrows video for my demonstration of how to insert elastic as you create the strap binding.
I have another detailed binding tutorial on single fold knit binding on the blog HERE if you prefer a photo tutorial version.
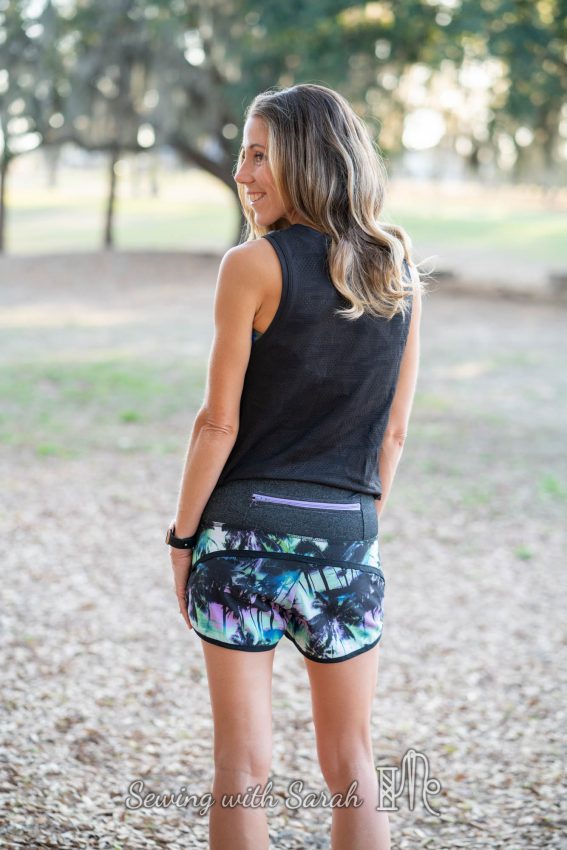
Moxi Shorts Stack
![]()
![]()
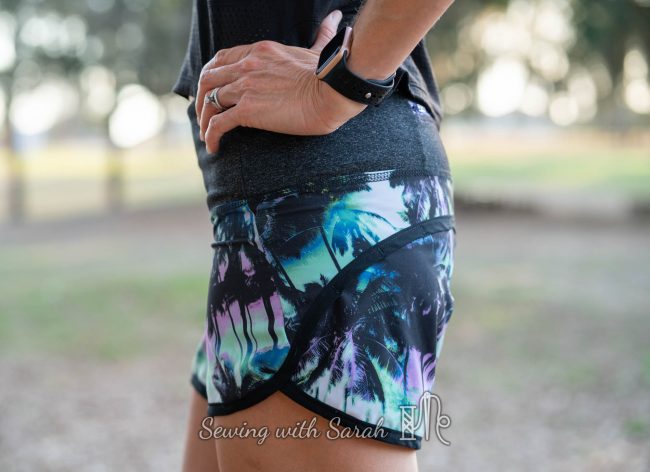
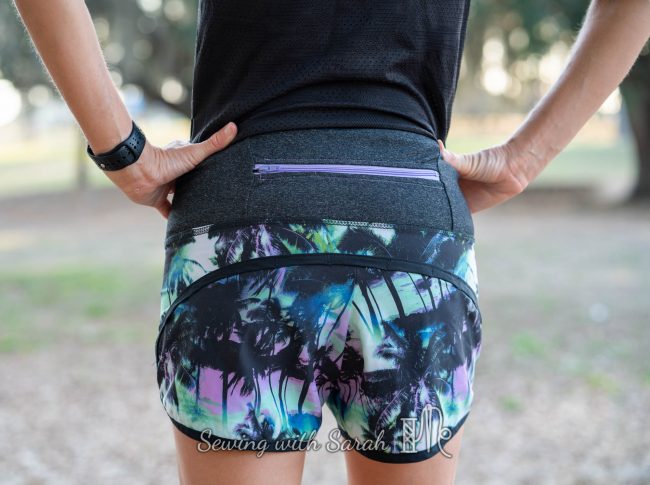
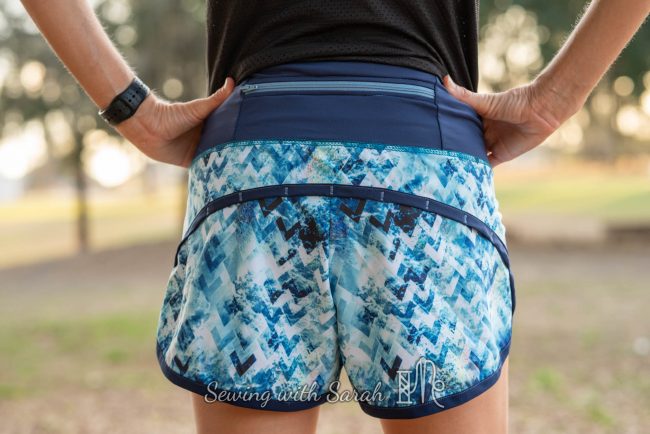
The Greenstyle Moxi shorts are hands-down my favorite summer short pattern. I’ve done a SewAlong for them (check it out on my YouTube channel here), hacked the back pocket to add a zipper for all my essentials, and spent a bit of time perfecting the fit so that they feel just right on my body.
![]()
![]()

When the Fabric Fairy came out with a few new prints on their stretch flow board short fabric I knew I had to make up several more pairs to get me through south Florida’s version of “spring”.
![]()
![]()
I used the “batch sew” method on these, meaning I was able to create all three pairs in sequence, saving quite a bit of time and effort, especially since sewing in the RV often means moving piles around the house as I go.
I’ll admit that making binding is not my favorite thing to do, but it wasn’t so bad when done all at once- I made black and navy binding from the Fabric Fairy’s stretch woven, and then used one of those two colors for all 4 pairs. The stretch woven and stretch flow board short fabrics are very similar and coordinate well together. I’ve tried stretch woven from other companies, and I really appreciate the drape and lightweight feel that characterizes the stuff from Fabric Fairy- it’s perfect for hot, humid weather.
While I was at it, I also made a pair of plain black and navy Moxi shorts (not pictured, because they’re fun to wear, but BORING to photograph). If you want to make these but are intimidated by the binding, I have a video tutorial how to cut, press and sew it on my blog HERE.
It differs from the knit binding on my Cami Tank swimsuit, because it’s double folded, which is a pain in a knit, but really easy in a stretch woven that presses like a dream.
![]()
![]()
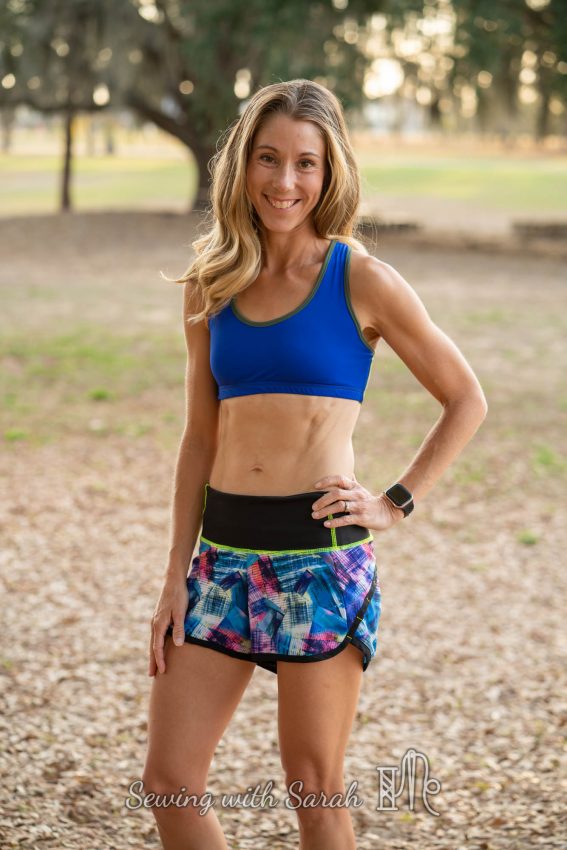
Since I kept my binding colors plain, I was able to spice things up a bit with contrast reverse coverstitching. I’m especially fond of hte neon yellow on this pair- I knew I was going to get use of that color somehow (thereby justifying its weight in our RV forevermore). The fabric for these can be found here.
![]()
![]()
All 4 pairs got a back zipper pocket (hack tutorial available here, just use the Moxi waistband pieces instead of the Super G)
![]()
![]()
I’m pretty excited to have all these new options in my wardrobe, and I’ve got a few more to share that coordinate with my swim tops coming up soon!
![]()
![]()
Well, that’s it for today! I’m really enjoying interacting with ya’ll in the group, and look forward to seeing all those swimsuits start to take 3D form, so please post progress photos! If you’re catching this later, you’re always welcome to drop me a line letting me know what you’re sewing- I love hearing about new patterns and answering questions!
I’d d also love it if you took the time to subscribe to my blog and my YouTube Channel– that way you’ll stay up on any new posts or videos, and I can connect with you on those platforms to answer any questions!
Note: This post contains affiliate links. I sew and share my tips for the joy of the craft, but a little extra affiliate encouragement goes a long way to helping fund these projects, so I really appreciate when you use them!