Flat Piping Tutorial and Shark Bait!
![]()
![]()
![]()
![]()

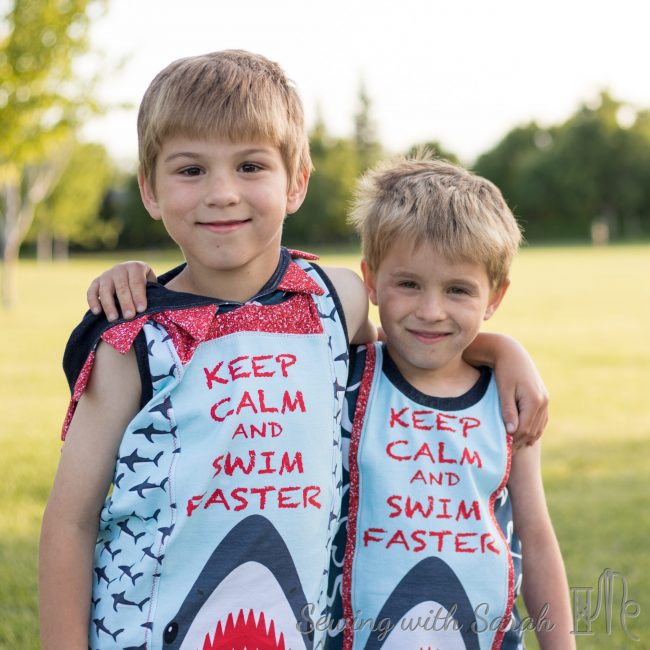
I had the opportunity to sew up a few more of the prints up for preorder from Max and Meena Fabric this weekend, and I just love how they turned out! The minute I received the fabric I knew it would be a big hit with my boys, but that I also wanted to show how it could work well for girls as well, because #sharksarentjustforboys.
![]()
![]()
![]()
![]()
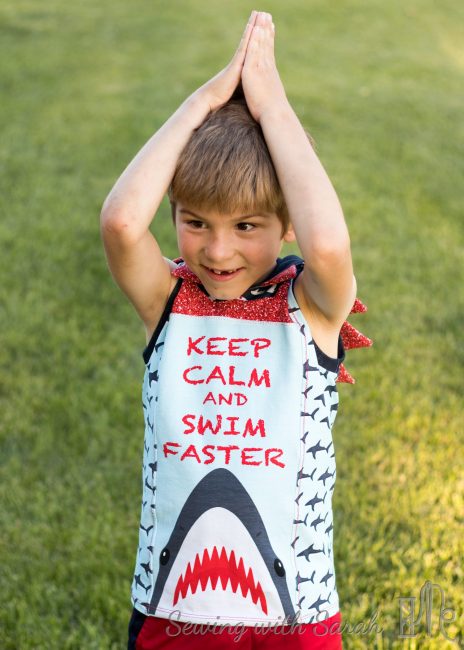
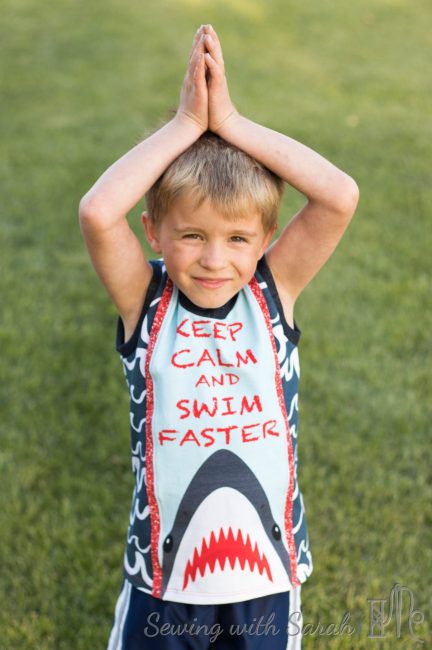
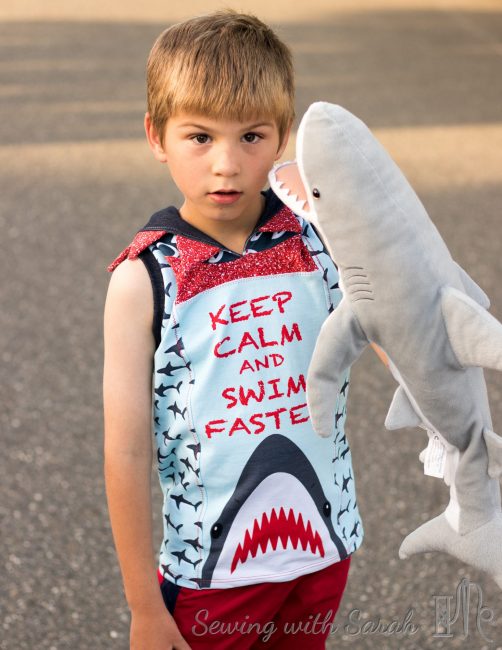
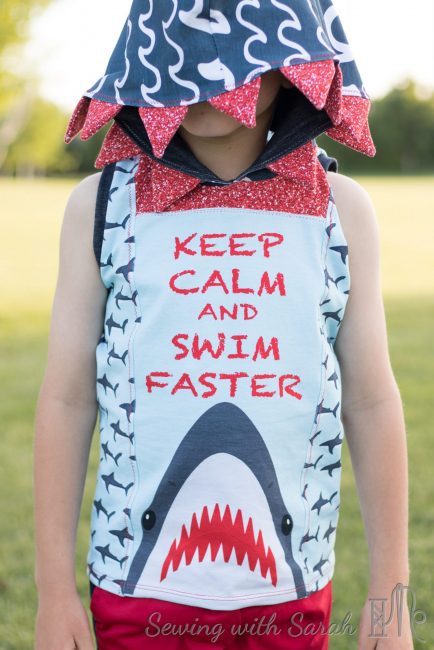
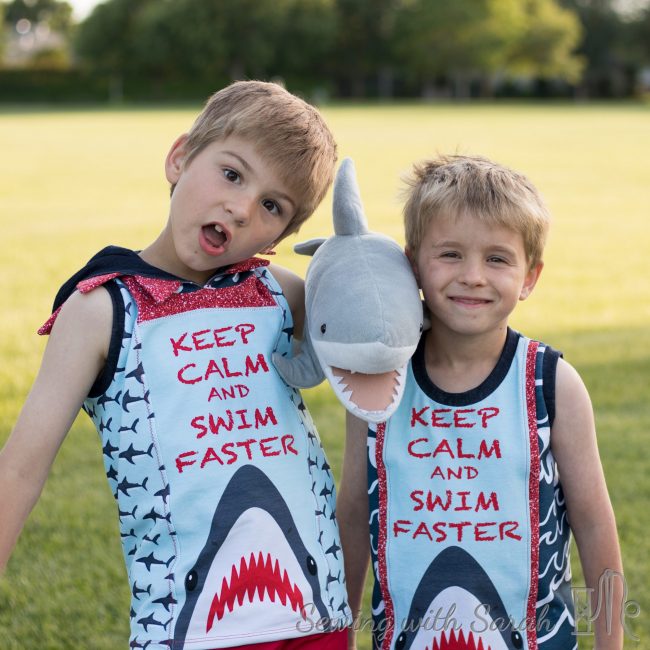
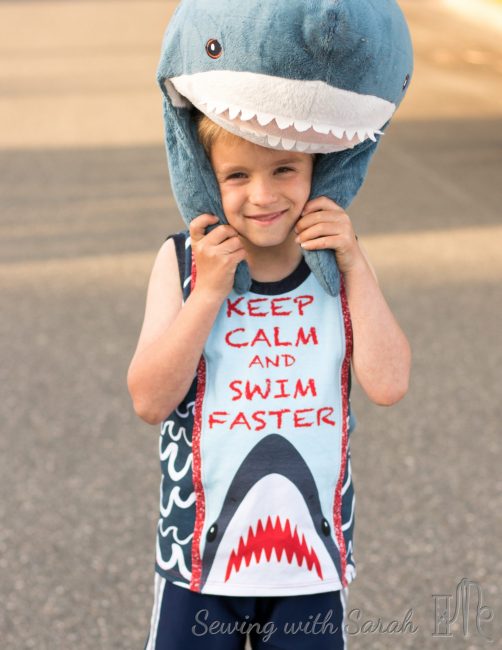
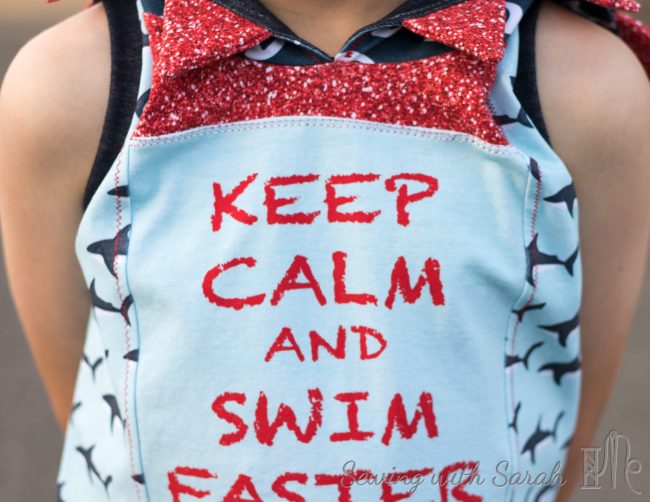
For my twins (yes, they are twins. No, they aren’t identical. Clearly.) I used the Duck Butt Designs Sideswipe tank (used before here). I’m really coming to love this simple pattern, and this time around I changed it up a bit by color blocking the front of N’s tank (to account for the size of the panel/his massive height which defies all genetic predisposition), and mashing the Duck butt add-on hood with the pieces from the Mega Max Raglan to create the illusion that a shark was eating his head, which I knew he would LOVE.
This is his super-serious a-stuffed-shark-is-eating-me face.
![]()
![]()
All eaten up!
![]()
![]()
But so happy about it!
![]()
![]()
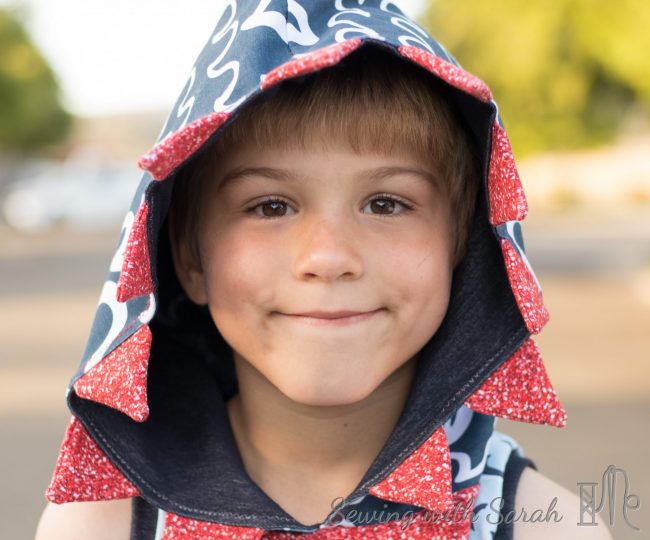
The red sparkles from Pink Zeppelin (not currently available) were a great coordinate (sparkles match EVERYTHING, amiright?) and I told my boys they were “blood” on the shark’s teeth to capture their imagination. They also had fun playing with their shark stuffies and scaring their sister during the photoshoot (Brothers!).
![]()
![]()
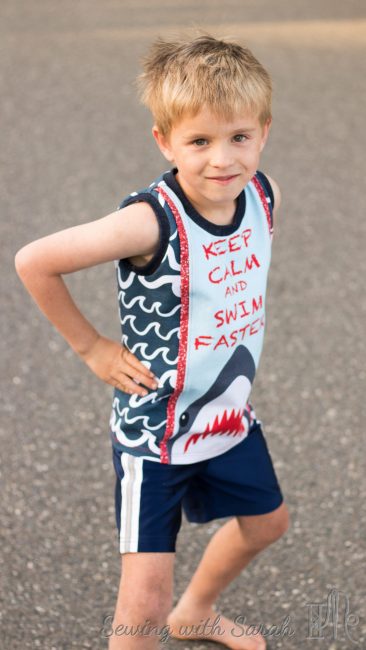
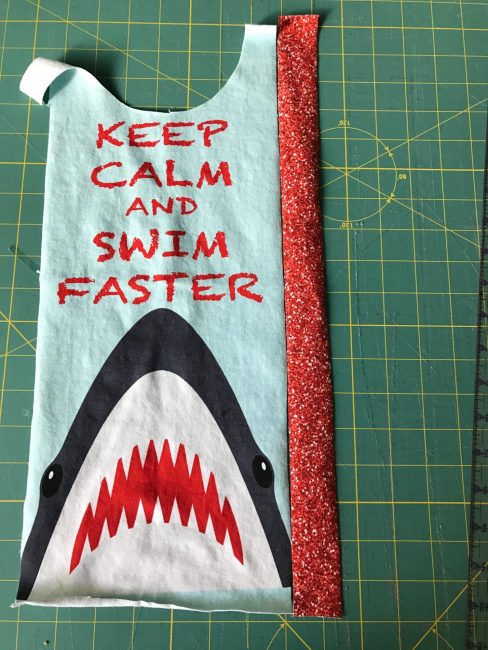
I was originally going to make two hooded tanks, but O is somewhat sensory sensitive (he wouldn’t wear socks AT ALL until he was 5), so when he cringed at the idea, I decided to use the same pattern but changed it up a bit to suit his needs. That’s where I added in the flat piping, and if you’ve never done it before, I’m going to give you a quick tutorial on how it’s done below.
![]()
![]()
![]()
![]()
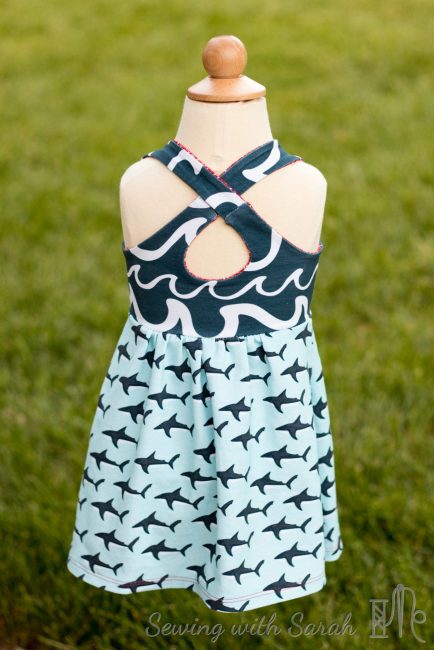
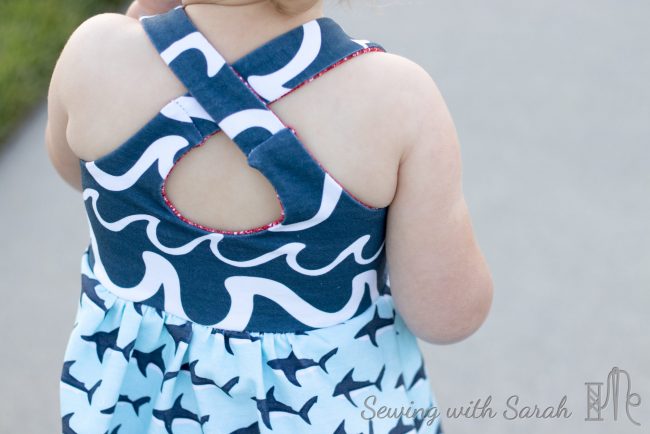
Before we get to the tutorial, I want to make sure to mention the dress for Princess. I used the Aurora Dress from Stitch Upon a Time, but left off the waistband. We could pretend I did that on purpose, but I’ll admit I simply forgot about it!
![]()
![]()
![]()
![]()
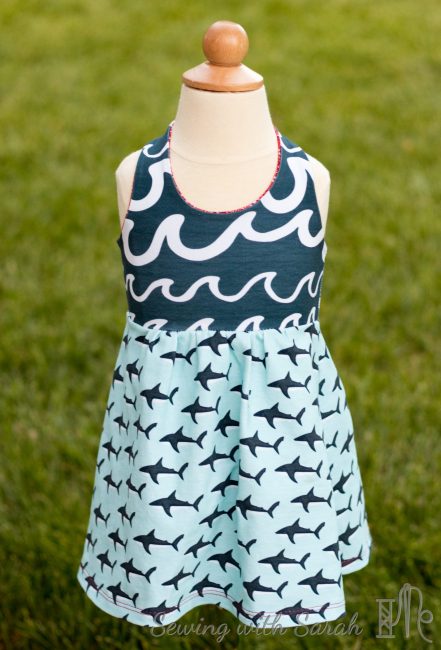
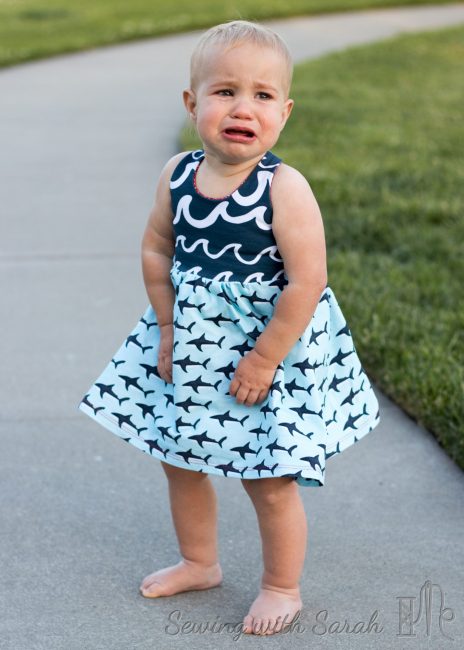
Regardless, I love how this dress turned out, and it fits her perfectly. I even lined it with the same red sparkles as the boys’ tanks, so they could all coordinate. If she looks less than perfectly thrilled in the photos, its because she has been sick/teething/changing into a full blown toddler, and was NOT interested in being put down. But she likes it. I promise.
![]()
![]()
![]()
![]()
Now that I’ve drowned you in images of my adorable children, are you ready for the Flat Piping Tutorial? Here it is!
You’ll want to start by cutting two pieces of fabric the same length as the seam you’ll be sewing them into- in this case, the seam between the front and back pieces of the Sideswipe Tank. I made my pieces 1.25″ wide, as I wanted it to be prominent but not overwhelming. Don’t forget to take into account the seam allowance of the pattern when you’re choose how wide to cut your strips. Since they’ll be folded in half, the finished width will be half of what you cut, minus the seam allowances on the top and bottom.
![]()
![]()

![]()
![]()
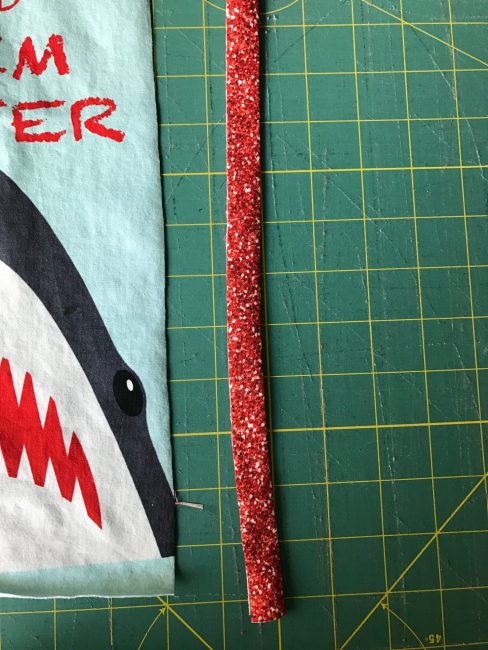
Fold your strips in half wrong sides together, and press.
![]()
![]()
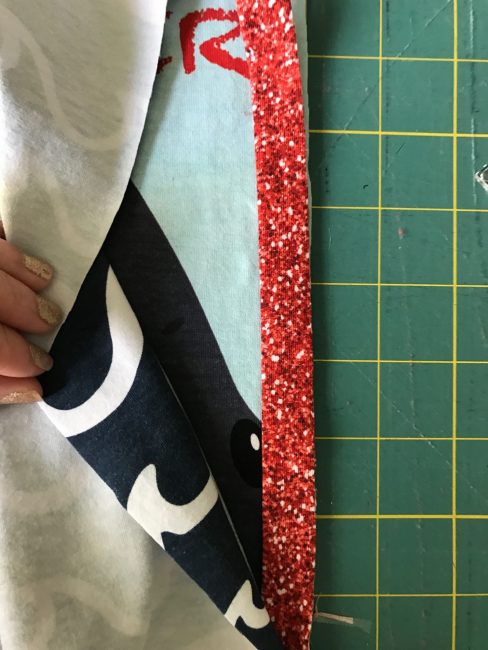
Pin or baste them to one of the pieces you’re going to sew together, and put the other piece on top, like this:
![]()
![]()
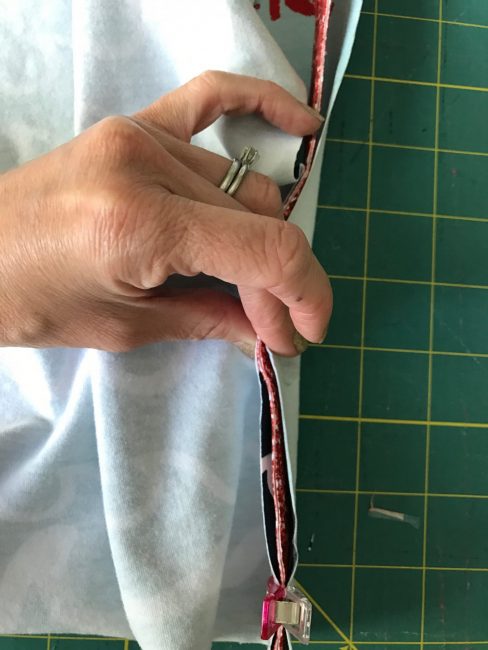
You’ll want to make sure all the raw edges are aligned- your piping will look wonky if you don’t keep it all nice and even. You can use wonder tape or baste the piping to one side of the seam first if you’re concerned.
![]()
![]()
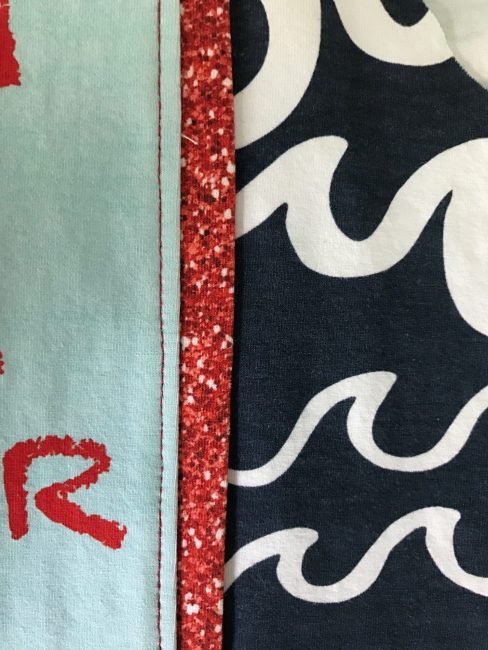
Sew the seam, with the piping sandwiched between the front and back. Turn right sides out, press and topstitch. Beautiful!
![]()
![]()
Do you have boys or girls in your life that would love to be #sharkbait too? Don’t wait- the pre order closes 5/16! Order HERE
![]()
![]()
Thanks so much for the helpful tutorial! Love the sharks!
I’m glad you liked it! Let me know if there are other tutorials you’d like to see in the future!
[…] used the Duck Butt Designs Sideswipe pattern again (sewn before here and here), with the hood add on, and the Greenstyle Creations Hampton Shorts ( made before here) to […]