Men’s and Women’s Forester Coats
![]()
![]()
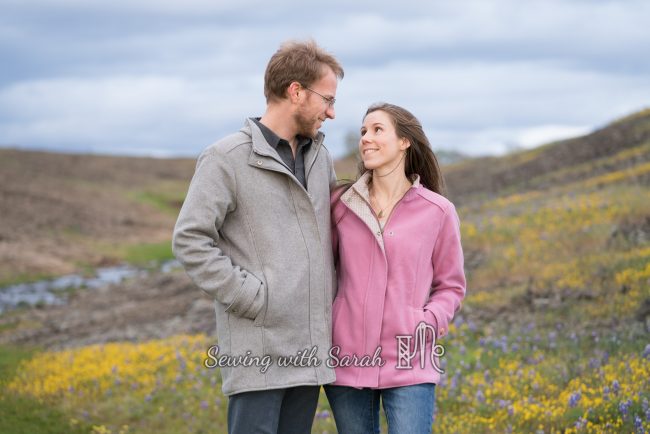
Late last year, when I tested the Trailblazer collection (mens, women’s, children’s and nestledown- whew! that was quite a project, you can read about it here), Lisa hinted that there was a coat in the works, and asked if the trailblazer folks would be interested in testing it.
I said yes, of course, because my husband was already begging me for a coat version of his favorite vest, and because I was starting to max out the number of layers I could wear under my Trailblazer- sleeves were needed!
Twig and Tale never rushes a pattern though, (this is a really good thing!) so by the time the final version was ready for me to sew, we were looking Spring square in the eye over here in the northern hemisphere. Honestly, there was a part of me that just wanted to sew tank tops and capris, and forget about the whole thing, but the opportunity to learn to sew a fully featured coat (one of my 2018 goals!) was too tempting to resist, and the wild swings in our weather further encouraged me that I’d be glad to have a nice warm coat during this season and in the seasons to come.
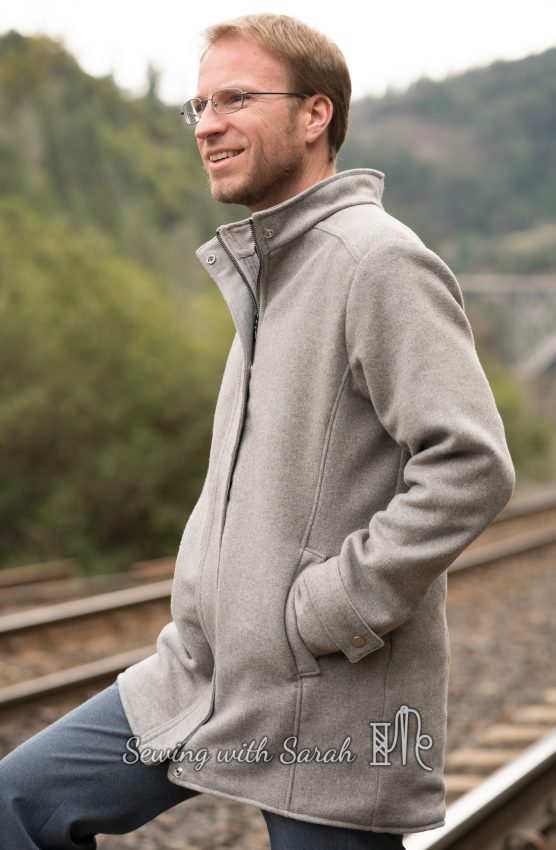
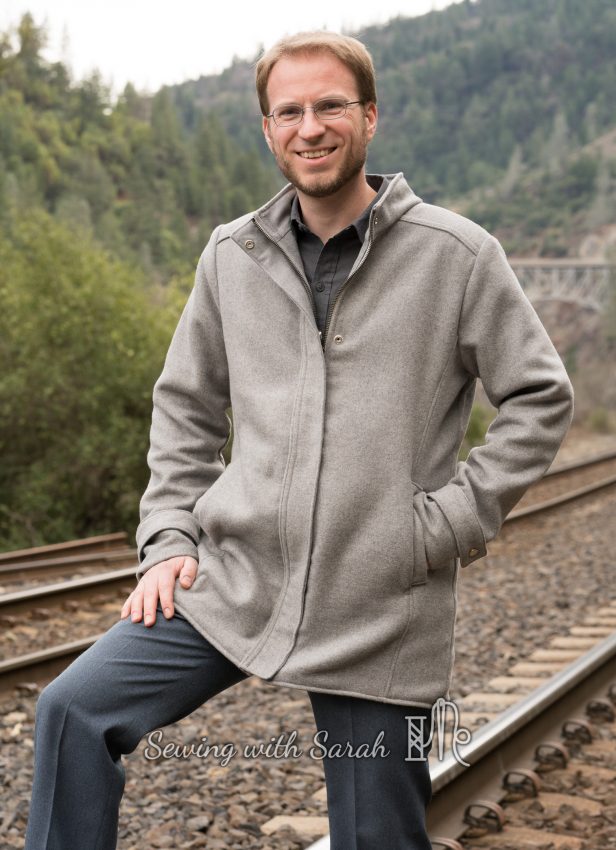
The Men’s Forester
![]()
![]()
![]()
![]()
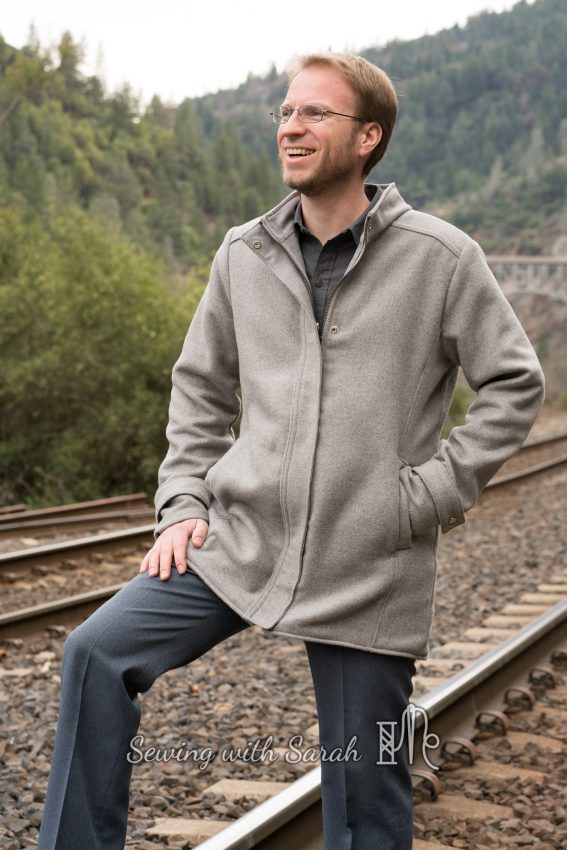
Stephen’s coat was first, and he honed in on the most expensive fabric in my stash- a double faced wool coating from Style Maker Fabrics. I had major plans for this fabric, but I channeled the deep love brought about by 15 years of marriage, and let him take it (major wife points here!).
The reverse of this fabric is a beautiful plaid, but he was interested in having a staple wardrobe piece that would match everything in his closet, so the heathered grey side was the best choice- you’ll just have to take my word for it that the plaid is under there!
![]()
![]()

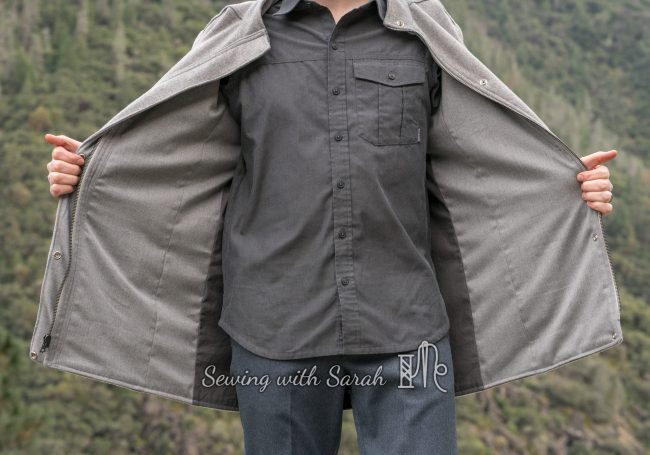
This coating is the thickest wool fabric I’ve ever felt, and I wanted a lining that would breathe a little, so I chose a stretch wool suiting from my stash for the lining, excpet for the sleeves, which I made in bemberg, so the coat would be easy to slip on and off. If you look closely, you’ll notice that the back lining piece is darker- I ran out of stretch suiting, and had to substitute a stretch sateen instead.
![]()
![]()
![]()
![]()
Having never worked with 100% wool before, I was a bit anxious about how to pre-treat it, but several ladies in the test group suggested soaking a towel in water, wringing it out slightly, and then putting it in the dryer with the fabric on high. This worked perfectly- I needed to steam and press every seam during construction, and nothing shrank out of place.
Like every T & T pattern I’ve tried, the coat came together seamlessly, and the sizing was perfect. Determined to make a piece that would stand the test of time, I added extra interfacing to the front, hem, and sleeves, and along all the seam lines of the lining, so the two layers would remain together as I sewed them, and not get stretched out, which is an issue I had when assembling my vests.
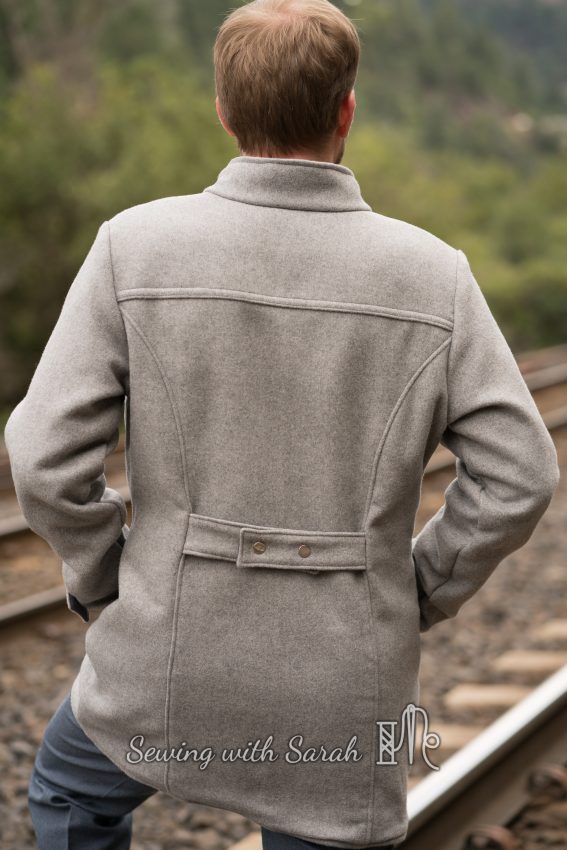
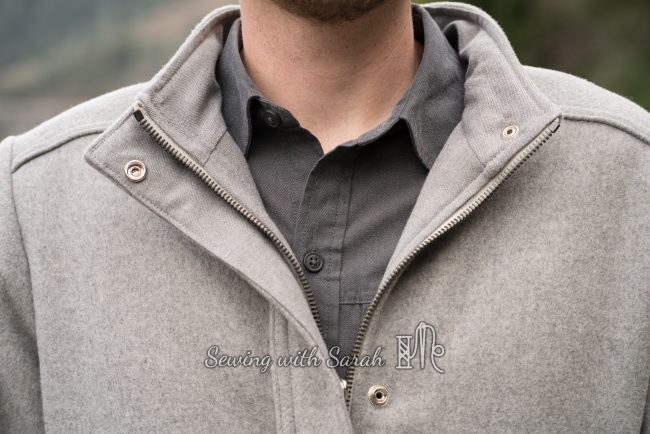
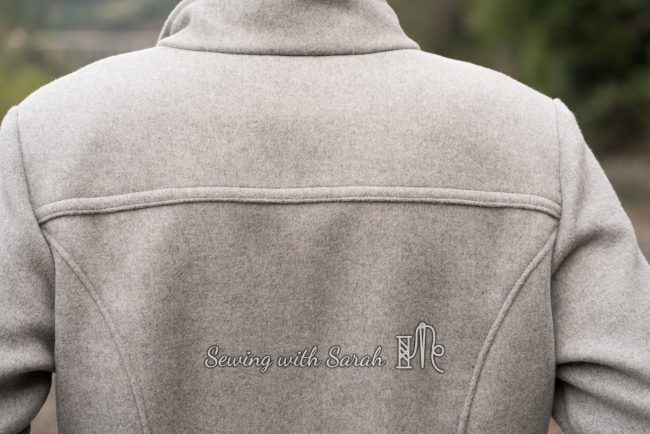
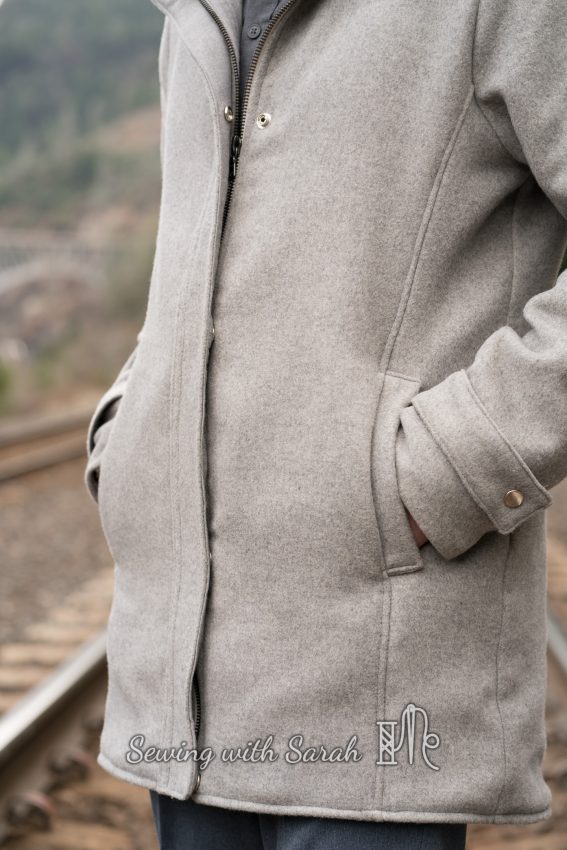
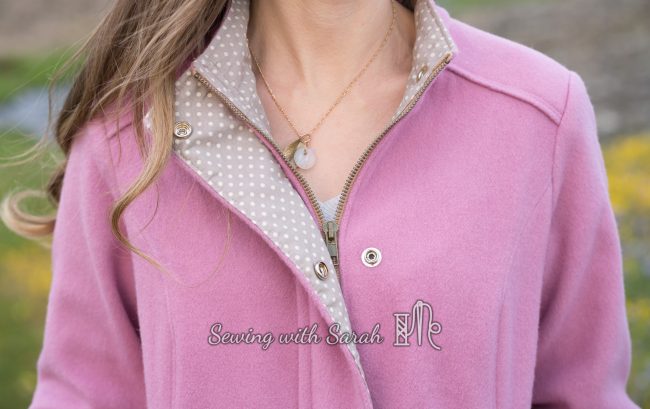
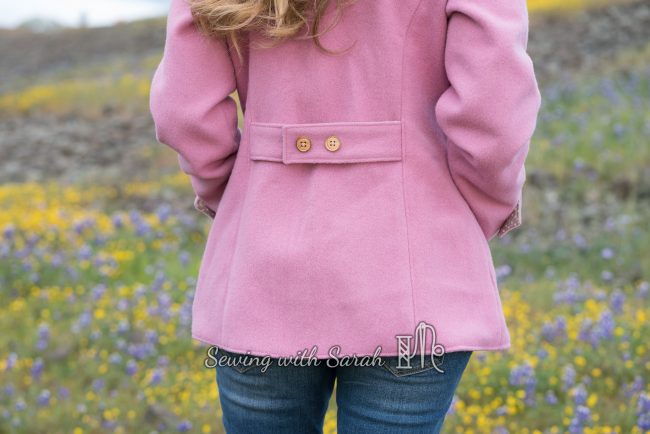
At Stephen’s request, I added all the extra details: wind flap, back yoke, back belt, sleeve cuffs, zipper and metal snaps.
![]()
![]()
![]()
![]()

![]()
![]()
![]()
![]()
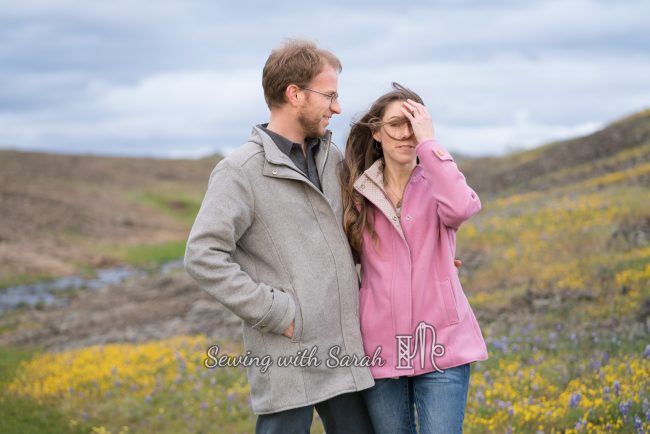
The result is a coat I can’t quite believe I made, and a very happy husband, indeed! Doesn’t he look handsome!
![]()
![]()
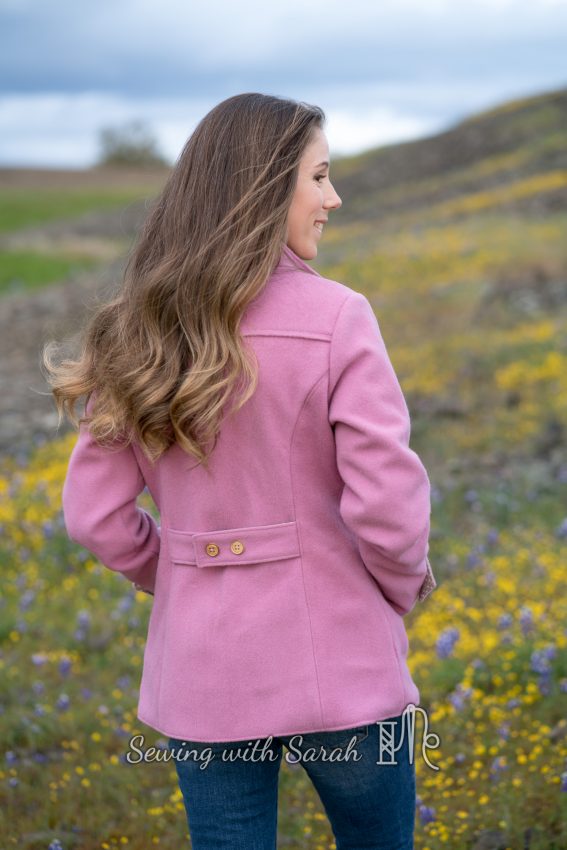
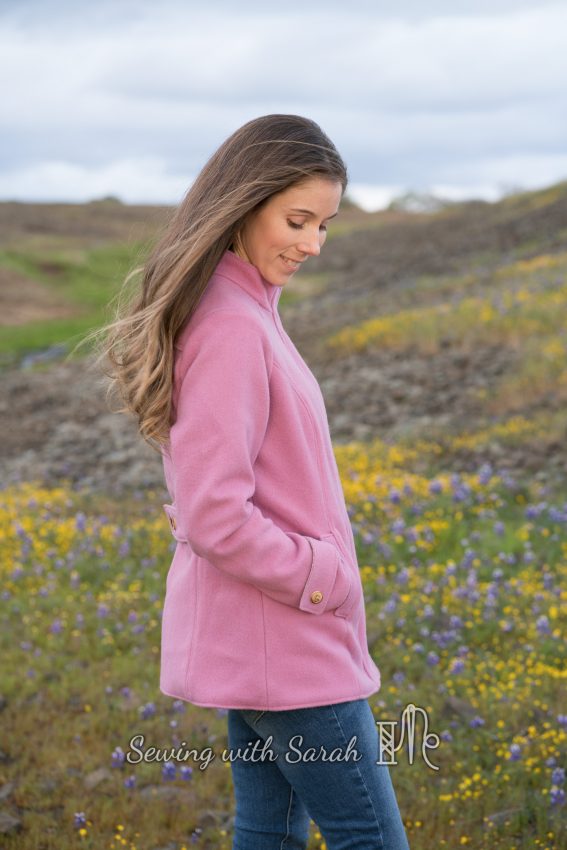
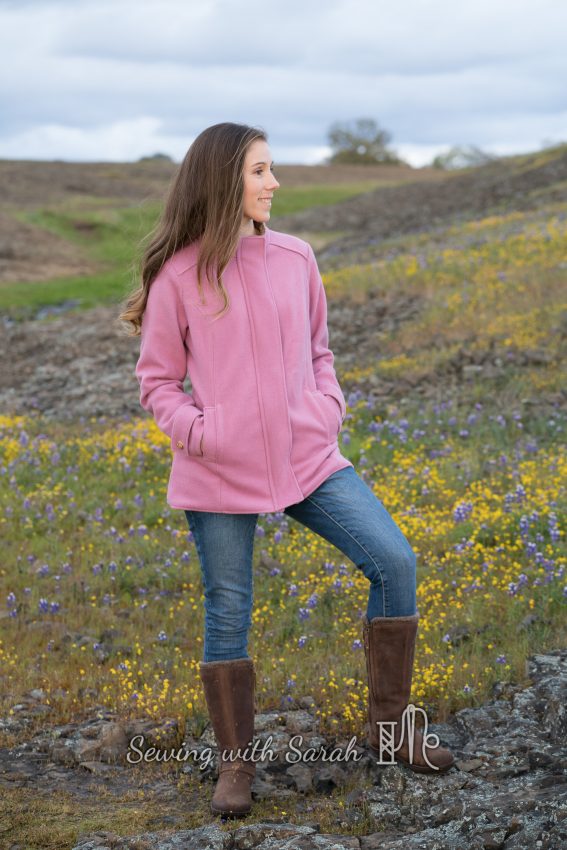
The Women’s Forester
![]()
![]()
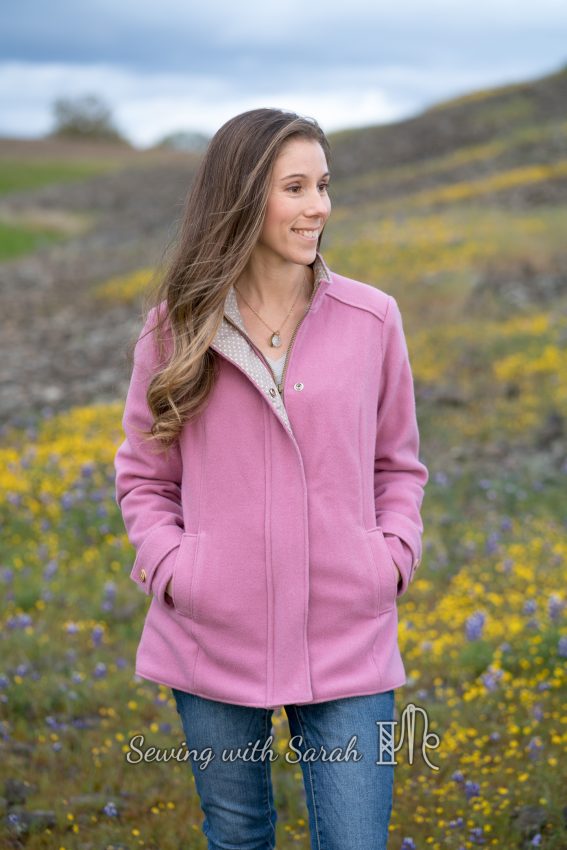
After you go to all the trouble of puzzling out a pattern, you might as well make it again, right? That’s how I got sucked into making a Forester for myself, and I’m delighted that I did!
The fabric for my coat is a 100% wool coating from the flat fold section at Cali Fabrics– quite a bit thinner than the fabric for Stephen’s coat, but still warm and cozy. I had originally purchased this piece in December with the intent of making my daughter a coat- but again, I’ve learned it’s much better to use a piece in your stash, than save it and purchase another. As such, it was only 1 and 3/8 yards, but I was able to make it work by shortening my sleeves a bit, and planning my cutting layouts carefully. Hooray for using (and not increasing) the stash!
![]()
![]()
Side note: So many Australian and NZ women talk about how they can just go to the thrift store and find dozens of beautiful blankets to upcycle into Twig and Tale patterns- I’ve never come across one of these blankets in my neck of hte woods, so I was limited to what I could find/order for this project. Maybe we just don’t have very many wool blankets in the US? It’s a shame! NZ ladies, feel free to send a few this way!
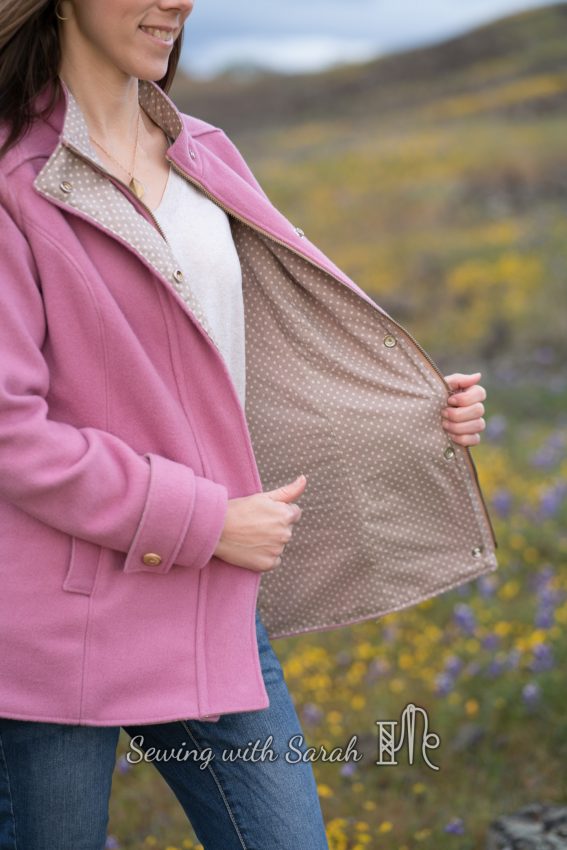
The lining of my coat, with the exception of the sleeves, which were done in bemberg, is a polka dot cotton lawn, also from the stash- despite not loving this fabric enough to make a shirt out of it, I’m really pleased with the feminine touch it adds to the coat.
![]()
![]()
Since this was my second coat in as many weeks, I was able to sew it up pretty quickly, and added all the same touches as I did for the male version, because I wanted this one to last for a long time as well!
![]()
![]()
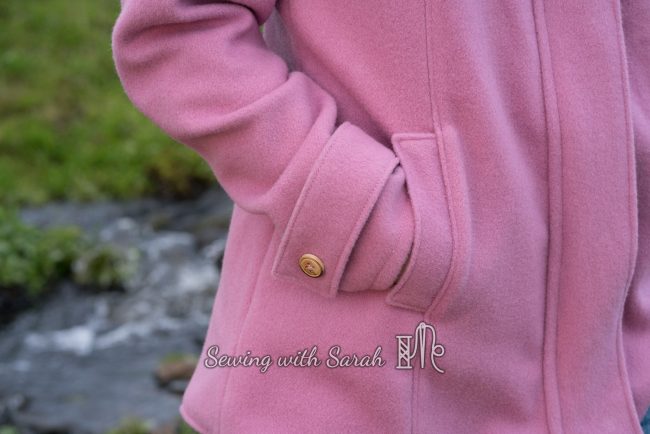
Much like a pair of jeans, this project isn’t really hard, just time consuming with all the pieces and topstitching. I think that an adventurous beginner could certainly tackle this project, and the videos for each step in the tutorial are welcome for all sewing levels!
![]()
![]()
![]()
![]()
![]()
![]()
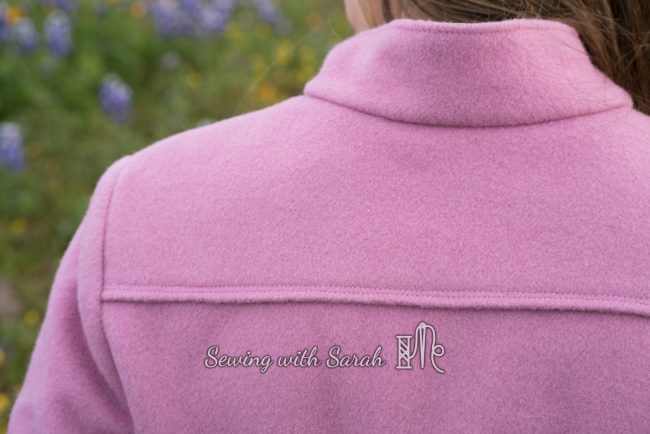
I love the lines of this coat- the princess seams are very flattering, and make small bust adjustments easy (just sew a shallower curve!)
![]()
![]()
You might be surprised that despite living in a cold climate for several months out of the year, I don’t own another “nice” coat, so this filled quite a need in my wardrobe.
![]()
![]()
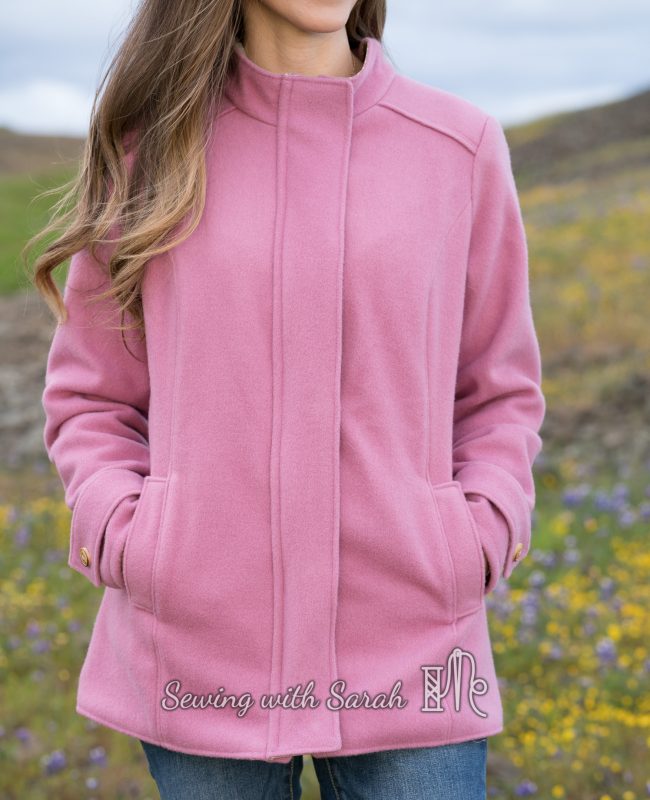
Here’s what it looks like all zipped up and with the wind flap snapped closed- perfect for keeping out those gusts of wind!
![]()
![]()
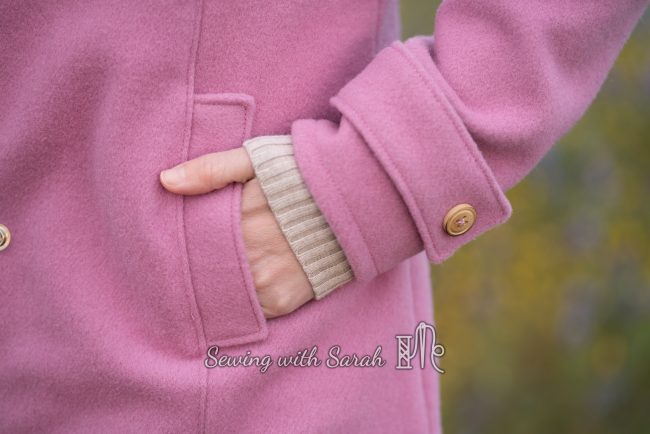
As another special touch, and inspired by another tester, I cut the cuffs off an old sweater (it was a T & T test- I HAD to upcycle something!) and sewed them onto the lining of my sleeves, for a little extra warmth. Sometimes I like to wear short sleeved shirts under my coats, and these little cuffs will keep my wrists from getting chilled!
I opted for a more complex construction method when attaching the lining on my coat, so all the seams would be completely hidden, sewing the sleeve cuffs and lining right sides together, as described in this Grainline tutorial.
![]()
![]()
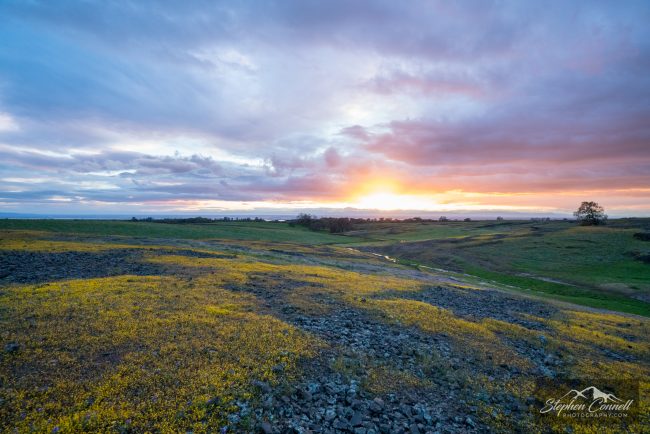
For our photoshoot, we went to a local nature preserve, where the wildflowers were just starting to bloom.
![]()
![]()
![]()
![]()
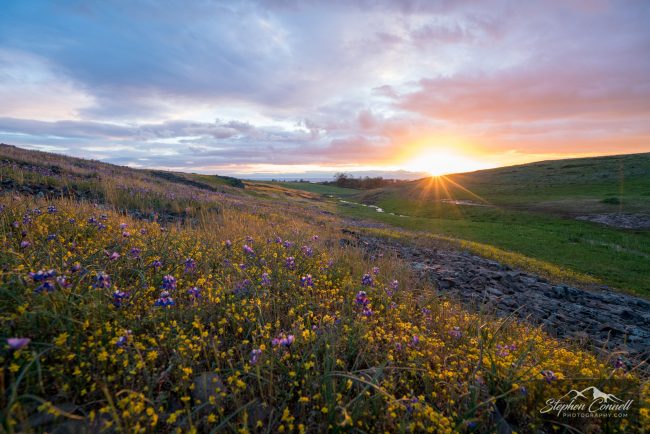
It was crazy windy and muddy, but beautiful, and quite a fun date, even if I almost got stuck in the mud on the way back to the car!
![]()
![]()
I highly recommend these coats- even if you’re in the northern hemisphere like me, and winter seems very, very far away, this is a great pattern to have in your stash for when that first frost hits! I think it would also look lovely as a lighter spring coat in a linen or gauze fabric, if you have a need there!
Here are my affiliate links, if you’re so inclined, thank you!
Thanks for stopping by and checking out this project! If you’re interested in seeing more, you can find me on Instagram and Facebook, and I’d love to follow you as well!
This post contains affiliate links. Thank you for your support!
Very well done!!! I love your post and both coats!
Thank you!
These are things of beauty!! The details are so perfectly done; they look very professional. I don’t like to play favourites but I do particularly like the combo of classic lines with the fabric of Stephen’s 🙂
Both of your coats are so stunning. I love both of them so much, and glad that beautiful fabric made it into Stephen’s coat! I hope they are much beloved pieces in your wardrobe xx
Thank you Lisa! These coats were such a great project and I was honored to be a part of the testing team.
Hi Sarah,
these jackets are awesome! Would you like to do a tutorial on how you attached the cuff in your jacket?
Greetings, Elke
Sure- I’m pretty busy for a couple weeks as my job wraps up but if you still need it after that I’m happy to do it!
Hi Sarah, I just saw your reply today. I still love your jacket and I was wandering if you are still willing to do a tutorial on the cuffs.
I love making coats and yours have some delightful details! I’ve never heard of Twig and Tale… sounds like I have a new pattern shop to browse.
I love Twig and Tale- they have such a sweet and refreshing aesthetic and great drafting! enjoy!
I found your blog through the Itch to Stitch post on the Nottingham Twist top and am very impressed with both the quantity of sewing you get done and the quality of your finished garments. These coats are a prime example. Both look amazing! I love that you used your stash and improvised as needed while turning out beautiful results.
Thank you so much! I did feel super accomplished after I made them! I feel like sewing is a “habit” for me- something I need to make time for and appreciate the same way I do exercise. When I slack off, I miss it!