A Sewing Hedgehog…
![]()
![]()
You know that game people play at weddings, where they shout out a certain number of years of marriage, increasing it gradually, until there is only one couple that is still left standing? No matter how long you’ve been married (we are going on 16 years!) there is always someone who has been hitched longer than you…
If we adapted it for sewing purposes, that game might feature the project that’s been hanging out patiently on your sewing list for the longest period of time, never quite rising to the top and getting stitched up. Maybe it’s because the fabric seems too precious to use. Maybe it’s because it involves a tricky, or time consuming, construction process. Maybe it’s because it’s not a flashy project, and keeps getting eclipsed by more flamboyant sews.
Whatever the reason, the finish line (or the start line, for that matter!) keeps getting pushed back, and the project never comes to fruition. I call these my “hedgehog” sews- they hibernate for a long time on my sewing list, never demanding my attention quite as loudly as other projects.
![]()
![]()

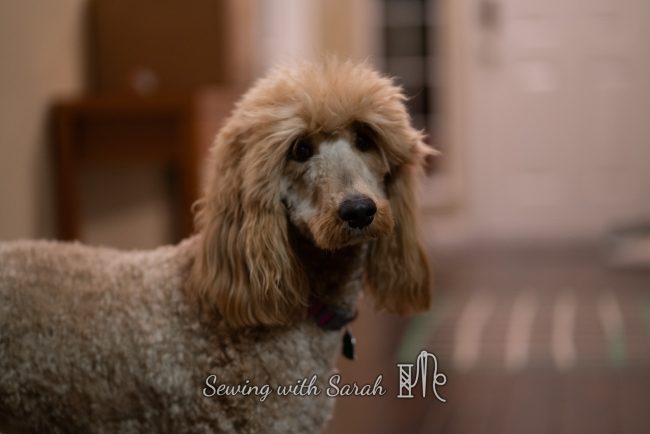
They’re cute, but not ostentatious. As a result, they are often neglected. Kinda like that middle child- or the dog (sorry, Ellie. Many apologies for the haircut daddy gave you while I was busy sewing…)
![]()
![]()
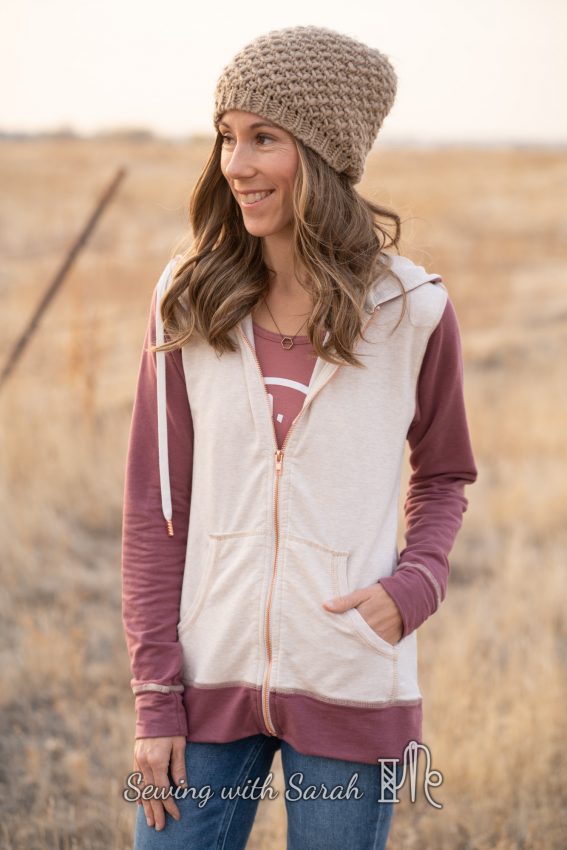
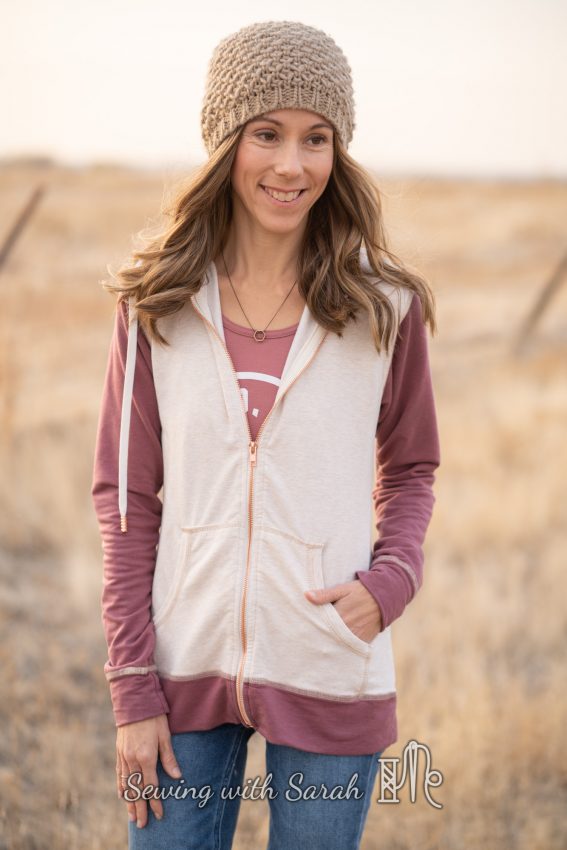
When I decided recently that I needed to really focus on sewing up more BASICS for fall, I took another look at my list, and realized that what I really, really needed was a new zip up hoodie. Casual, easy to style and great for layering, I pretty much live in these nine months out of the year.
In fact, the Halifax Hoodie (by Hey June) has been on my list for quite a while- I actually have a receipt for various widths of twill tape that I bought for the project back in 2016! I’ve used plenty of the twill tape since then…but not for the reason it was ordered (which is true of about half my sewing related purchases, so…)
Flash forward four years, add a blog, and an extra kid, and here we are- a finally finished Halifax! I love it every bit as much as I knew I would, and am kicking myself for not making it sooner.
![]()
![]()
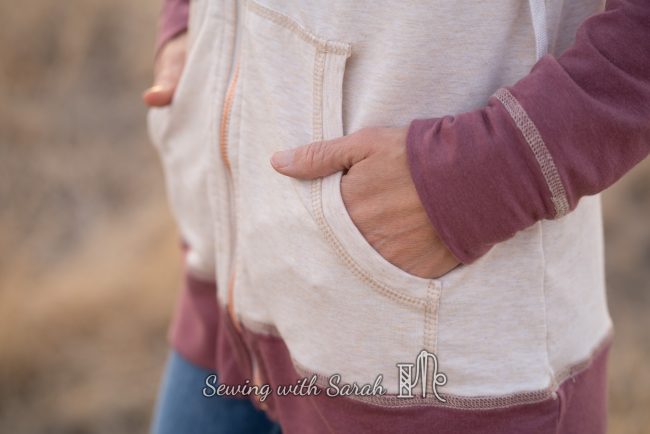
Yes, there is that pesky zipper to line up around the pocket, band and hood, and the method of adding twill tape to the front zipper seam was a new one for me, but really, it wasn’t nearly as time consuming as I thought it would be. I could have had this done, oh, say, 3 years and 20 hours ago, if I had put down my excuses and put my mind to it.
![]()
![]()
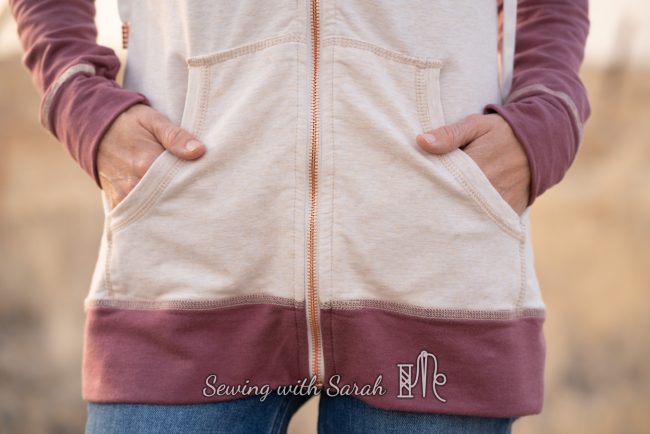
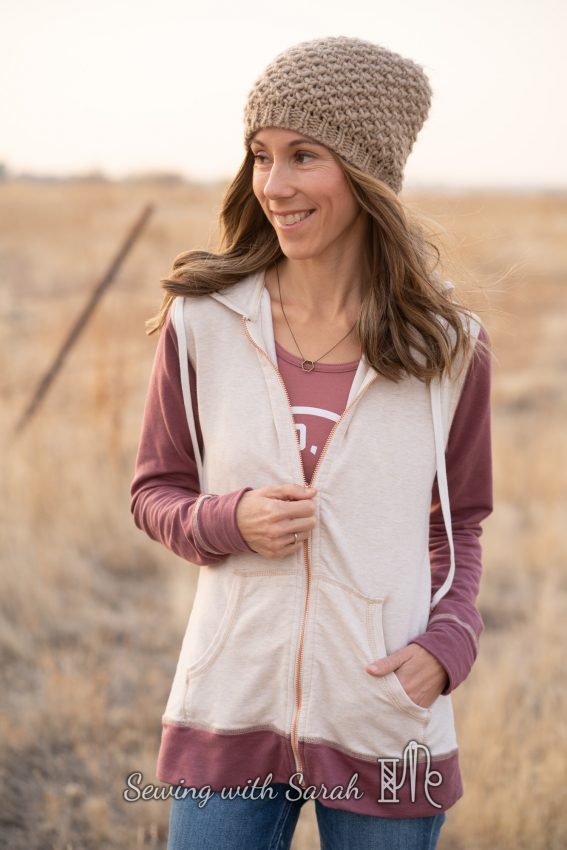
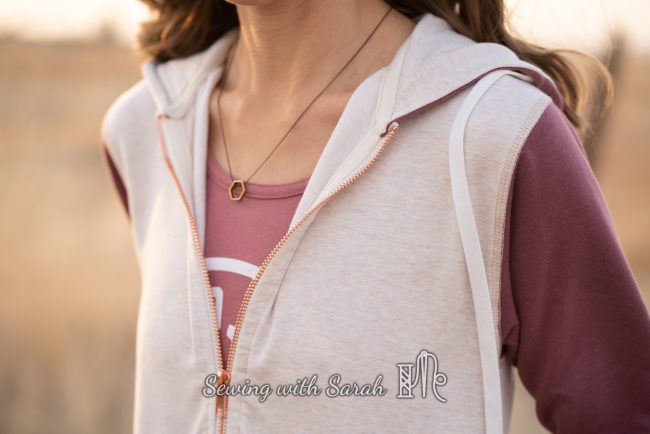
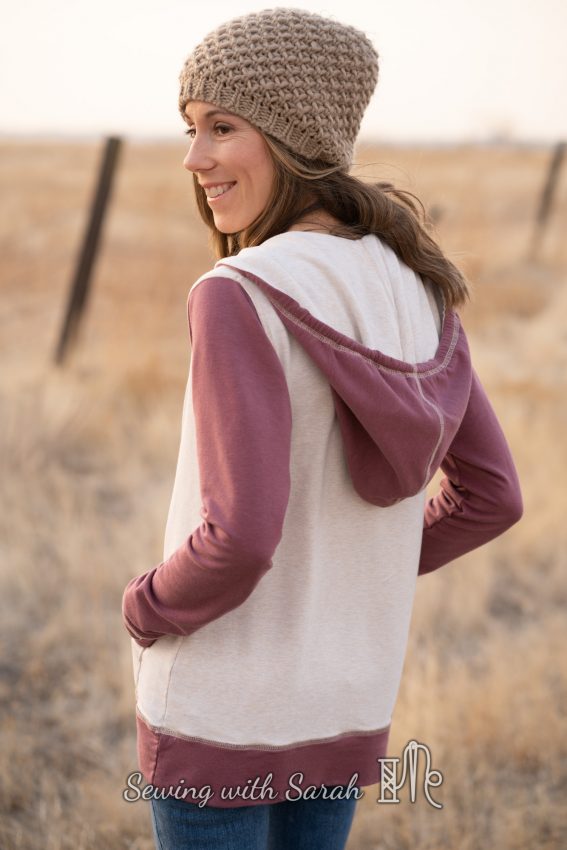
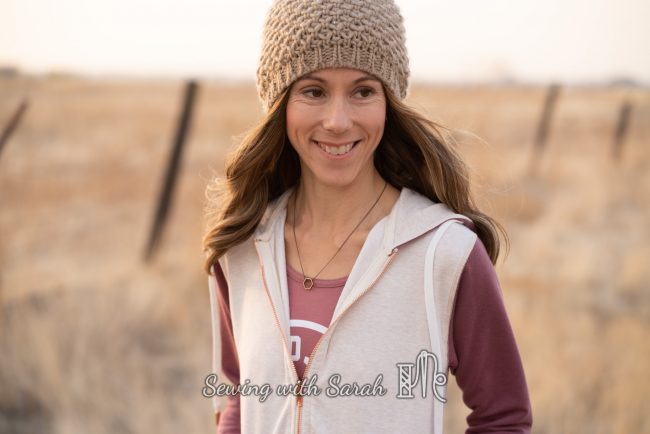
But, better late than never, I suppose! For this inaugural Halifax, I used bamboo French terry from Bow Button Fabrics in oatmeal and dewberry. I love how these look together, especially when paired with the rose gold zipper and drawstring anglets I picked up from So Sew English– the effect is feminine, while not being too fancy or formal.
![]()
![]()
Fitting Changes:
The Halifax is drafted as a boxy, loose fit hoodie- and I needed to make a couple modifications for my shape and preference. I ended up taking in the sleeves by 1″ and the body by 1/2″, grading to nothing at the hip. I also took out 2″ in length, and cut the bands an extra 1″ wider (so it’s only 1″ shorter overall). I ordered 1.5 yards of each color (hooray for being able to order half yards from Bow Button Fabrics!), and have a small amount of each leftover- perfect for band or accents on other projects.
![]()
![]()
I’m a shortie, but my torso is pretty average length, so I’d say this runs a bit long. When I was finished, I felt like it was actually a little too slouchy, so I washed and dried it on hot, which caused it to shrink a little- next time I’ll probably cut the largest size in the kids pattern (the Hatteras) for a more fitted silhouette, which I tend to prefer. The only other thing I would change is the location of the grommet openings on the hood- they feel like they are way too high, so I’d lower them a couple inches on my next hoodie.
![]()
![]()
No worries though- this one will still get plenty of wear, especially because it matches my favorite local tank buy from Upper Park Clothing Co.
I’m also proud of myself for putting down my sewing “frosting” and whipping up this bit of cake- it fulfills a critical spot in my micro-wardrobe (my new term for the small selection of clothing I’d take with me when on an extended RV trip- only my favorite and most versatile pieces get a spot, since space is at a premium in there!), and wearing more me-made always feels good.
![]()
![]()
If you’re planning on sewing up your first zip-up this winter, here are my top 3 tips:
1) Use Wonder Tape
Hey June’s instructions are fabulous, and the recent blog post/photo tutorial on installing the zipper also includes some great tips. My #1 takeaway was to go slow, and use wonder tape to help hold the zipper in place. It also comes in handy when you are stitching down the neck binding.
2) Interface your zipper opening!
![]()
![]()
Wonder tape only goes so far in stabilizing knit fabrics, especially those that are lighter weight, like the bamboo french terry I used. You’ll want to select a fabric that is relatively stable (no rayon spandex, for example), and be sure to interface appropriately. If you don’t, your zipper opening will get wavy, since the zipper tape doesn’t stretch, but the fabric will. I used medium weight interfacing, since my fabric was on the lighter side- you could do the opposite, depending on the weight of your fabric.
While we are talking about zippers, don’t be tempted to skip the twill tape on the inside. It lends a really “finished” look, and adds a bit of extra stability- meaning your hoodie won’t only look good, but will last longer too.
3) Use a metal Zip…or this video to shorten a Nylon Coil Zipper
Metal zippers are far easier to shorten than their nylon coil counterparts. A pair of jewelry pliers, and some good old fashioned elbow grease will get you a custom length zipper. However, they are expensive, and sometimes you can’t find the right color or weight for your project. If you are using a Nylon Coil zipper, we made this video for how to shorten it. It’s a bit trickier, but worth the time if you’re using one of the nylon coil zips that seem to come in every color of the rainbow:
Finally, it’s not really a tip, but don’t be a perfectionist!
Even in Adrianna’s tutorial, she admits to a few mistakes. She also admits to not caring about them enough to fix them. To a Type A sewist like me, this was a breath of fresh air, and just what I needed to get me over that start line. The key areas I cared about the most were lining up the pocket, band and neckline- my stitching around the twill tape in front and around the neckline isn’t as even as it could be, but I decided not to worry about it. I think the key to enjoying more complex projects, or to trying out new techniques, is to decide what matters, and what doesn’t. Don’t sweat the small stuff!
Like, you know, letting your toddler watch the Octonauts Christmas episode for the billionth time while you take photos…
![]()
![]()

That’s all I have for today- it’s been a crazy week of play practice for my twins (they did their first ever performance as part of The Snow Queen through the traveling drama program Missoula Children’s Theater’s this week), and I’m ready for a little down-time before Thanksgiving!
If you want to catch my twins on their YouTube debut, you can find their entire play here (Oliver was cast as the “silly goose” and Noah was a hobgoblin and the Prince- talk about typecasting! LOL!)
Part I:
Part II:
Note: I received the fabric in this post for free in exchange for sharing a finished project with you. All opinions (and most importantly, that hoodie) are my own! If you enjoyed this glimpse into my sewing (and mom-ing) life, I’d love to connect with you on Instagram or YouTube as well!
I love that hoodie, Sarah! It looks so cozy and the colors are so pretty!
Thank you so much Alex!
Oh my I love your hoodie and I have been searching for a pattern that has this type of finish with the twill tape! I admire this in shop bought ones and haven’t jumped to doing it on my own without a pattern for guidance yet lol! I do love the colours you used and hey to another Type A.
PS I have a few hedgehog patterns inc a buffalo hoodie I promised to make this time last year for my other half!
I hope you get to that hedghog this season!
Type A’s unite! Its a great pattern, the twill tape gives such a nice quality finish!
This hoodie is fabulous! I’d love to make one for granddaughter, daughter-in-laws and myself. Where did you find twill tape and appropriate sized zipper? Thank you!
Thank you! I got the twill tape from twilltape.com, and the zipper was from So Sew English. Its not on their site now, but etsy often has some good zippers.
Love this hoodie. Great job! Thanks for the inspiration to keep trying projects that challenge us. I too have to remind myself it is about learning the new techniques first. Perfection comes later.
Enjoy your blog!
Margaret
Thank you Margaret! I think we just need to remember that the process should be fun- trying to make it perfect seems to take that away, at least for me 🙂