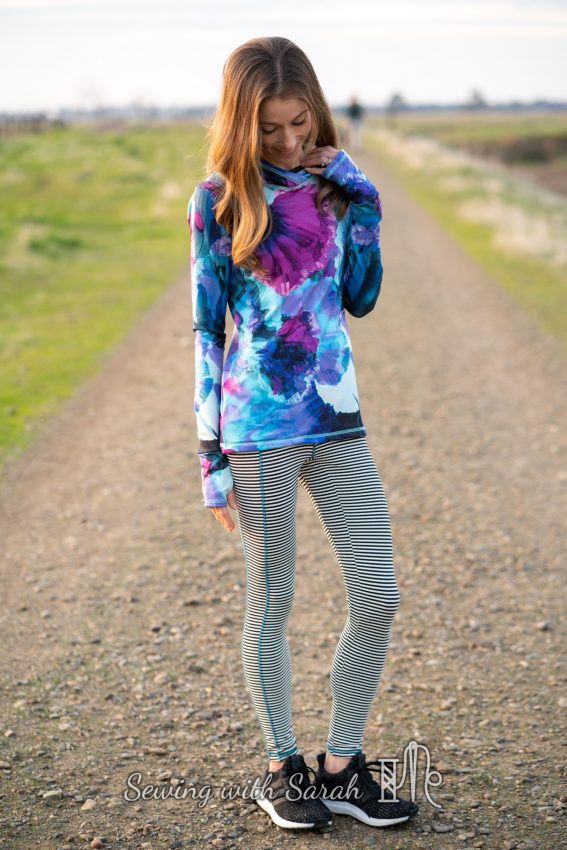
2020 Fit Capsule!
![]()
![]()
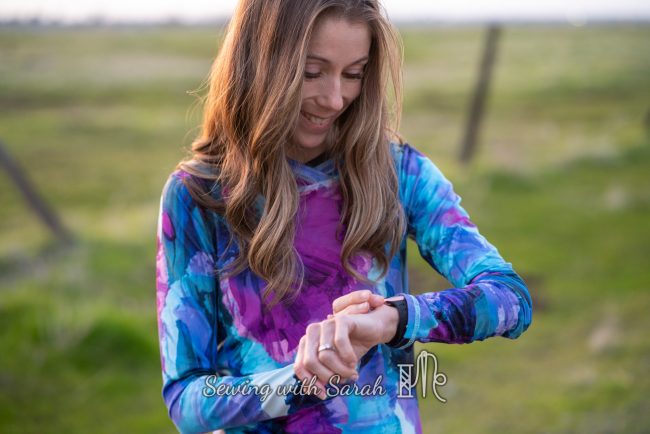
A couple weeks ago, Alex Resch, a sewist extraordinaire and all around amazing person, hosted a “Choose your Own Adventure Activewear SewAlong” over in the Fabric Fairy group. I spent time with her planning out my fabrics, patterns and getting hyped up, only to have life get in the way and knock me off course. One car accident and a major personal loss of a friend forced my sewing to a crawl, and I struggled to find the motivation to dive back into my plans.
Then, during a run the other day, the Peloton coach (Jess Sims, for those of you that are a part of the Peloton Tribe) gave us a focus word of “one”. As in one step forward, one moment, one minute, one task at a time. I decided to try to apply that to my sewing, to see if I could get back in there, and just finish one of the patterns I had started.
![]()
![]()
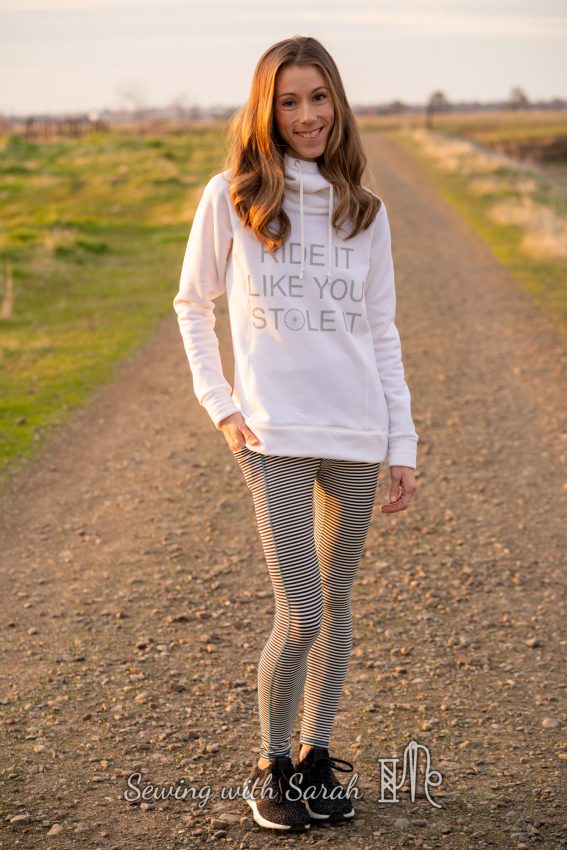
Gunning for the finish line seemed like too much, but as I focused on all the small little tasks that build up to a completed garment, I gained momentum, and was able to finally tackle all 3 of the sewing goals for the event- a base layer, a bottoms piece (two actually!) and a outer layer.
I’m thrilled with how my four pieces coordinate, and while I can’t say that everything else that was bogging me down has been tied up as neatly, I’m going to celebrate this little victory, and enjoy wearing (and sharing!) my new activewear sets!
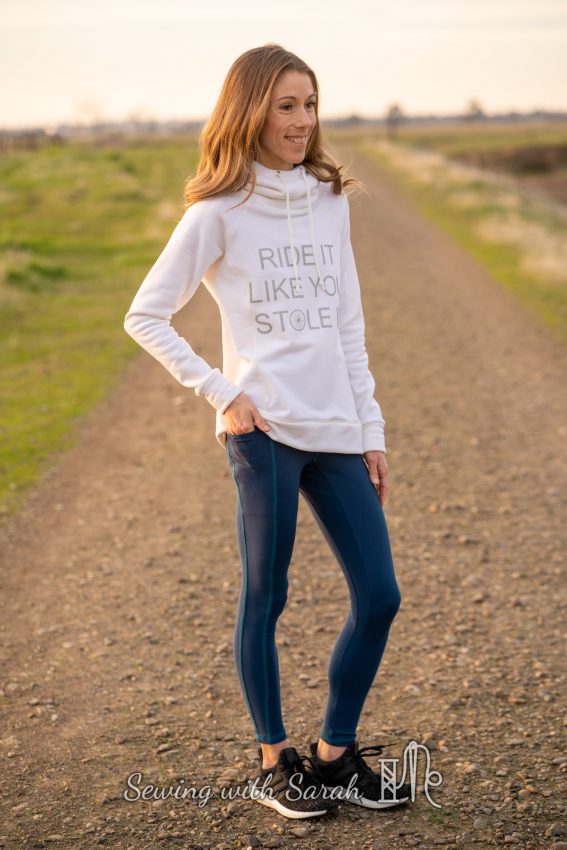
Base Layer:
![]()
![]()
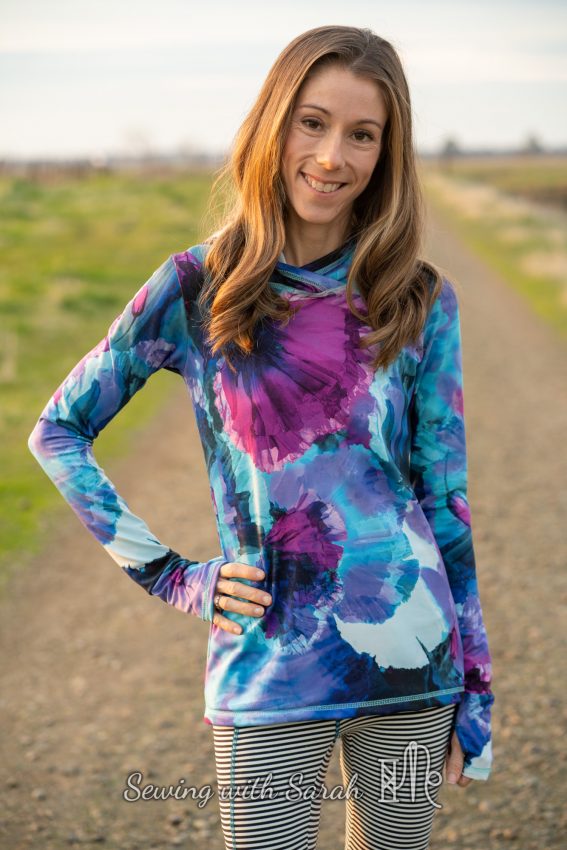
I mashed together a few Jalie patterns to get my base layer- the women’s 2805 tee, which I have fitted to perfection, combined with the three piece hood and thumbhole cuffs from the Marie Claude Raglan.
![]()
![]()
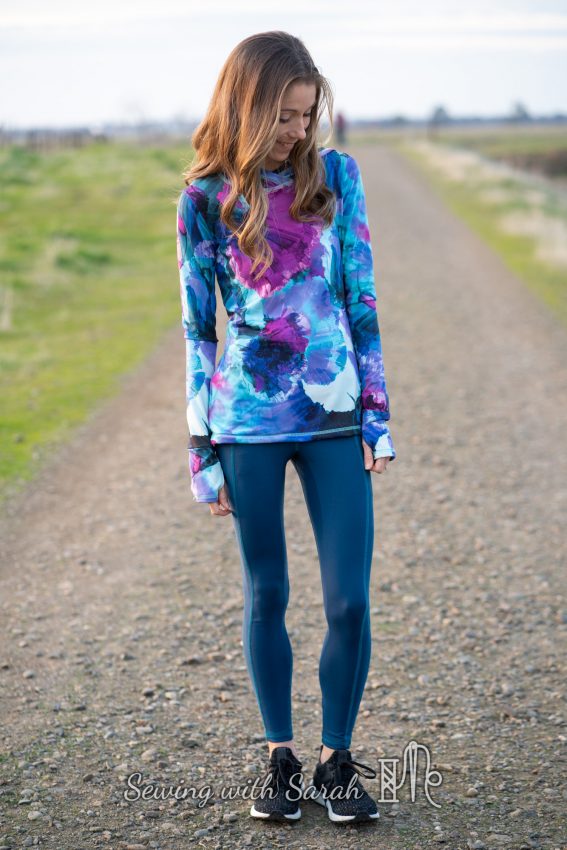
Aside from shortening the sleeves from Jalie 2805 to make room for the cuffs, no other modifications were needed to make this work, and I used a reverse cover stitch on my cover stitch machine to add a decorative accent to the seams and hem of the top.
![]()
![]()
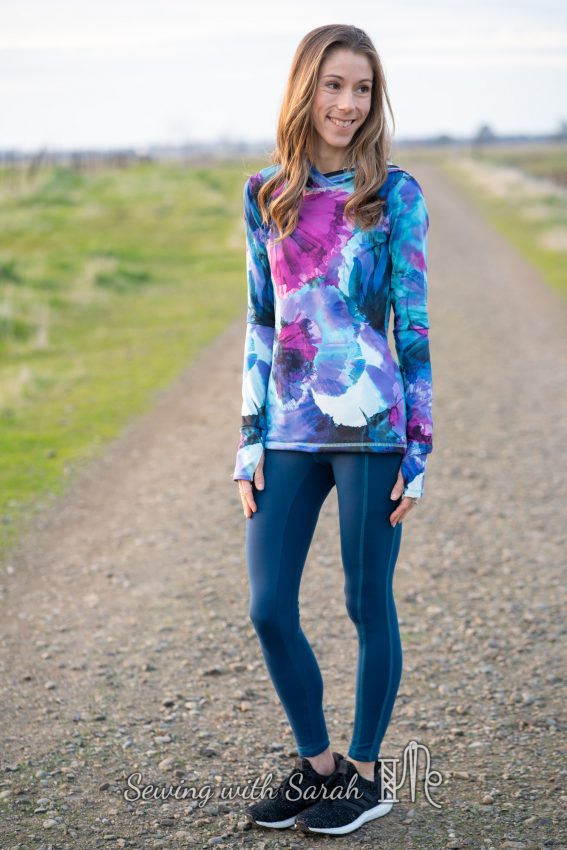
You might be wondering why I used the 2805 for the body of the hoodie rather than the entirety of the Marie Claude. The M.C. is a bit of a looser fit, and I wanted something more compressive so I could wear it under a jacket without getting bunching in the sleeves.
![]()
![]()
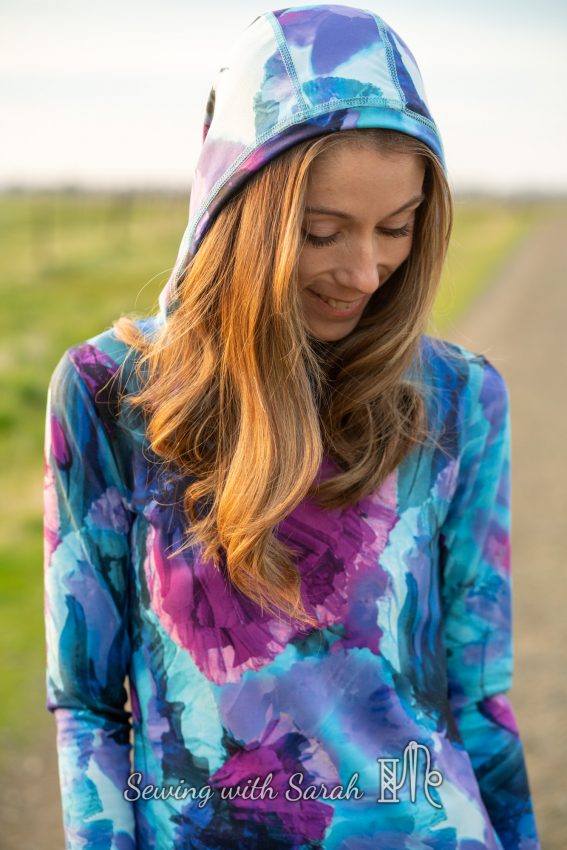
This is the only hoodie pattern I own that’s finished with a binding, and I really like it- it’s a fast and easy technique, and with a little bit of tension in the binding (just as you would on a neckband), the hood forms nicely to my head and stays up while running. The pattern includes an option for a ponytail hole, but I didn’t take advantage of that- my ponytails tend to slip around while I run, and I wasn’t sure it would end up in the right place.
![]()
![]()
The thumbhole cuffs will keep my hands warm on winter runs, and are also unique to this pattern. If you’ve struggled with the traditional enclosed seams on cuffs before, I highly recommend checking these out (you can preview the instructions on the Jalie website before buying), because they don’t involve any complicated sew to point a to c to d to z maneuvers- just a simple sew, press, and topstitch along the thumb side of the cuff.
![]()
![]()
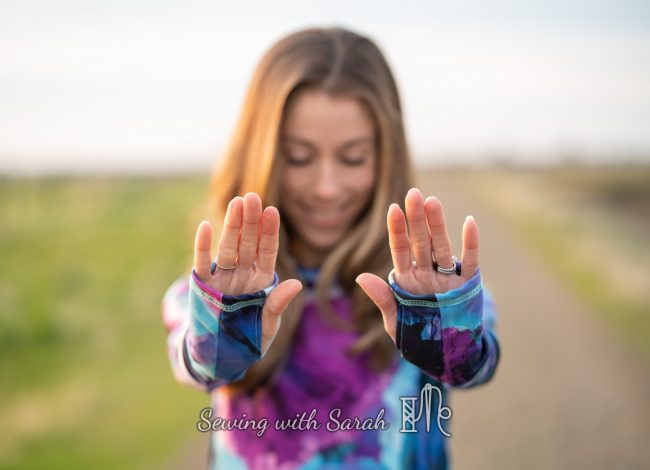
Funny story- the first time I put these on, I reversed the right and left, and couldn’t for the life of me figure out what I had done wrong- why the thumb openings were on the wrong sides! After more head scratching than should have been necessary, it finally dawned on me, and I quickly rectified the cuffs with a little seam ripping- but boy was I confused for a couple hours!
The fabric for this top can be found here– and I find its a delightful mid weight- none too heavy for a base layer, but still opaque and stretchy enough to be used for leggings, or a sports bra, if desired. I squeezed this hooded top out of a single yard, so I didn’t really have many scraps to spare, but the little I have might find its way into a Power Bra at some point!
![]()
![]()
Bottoms:
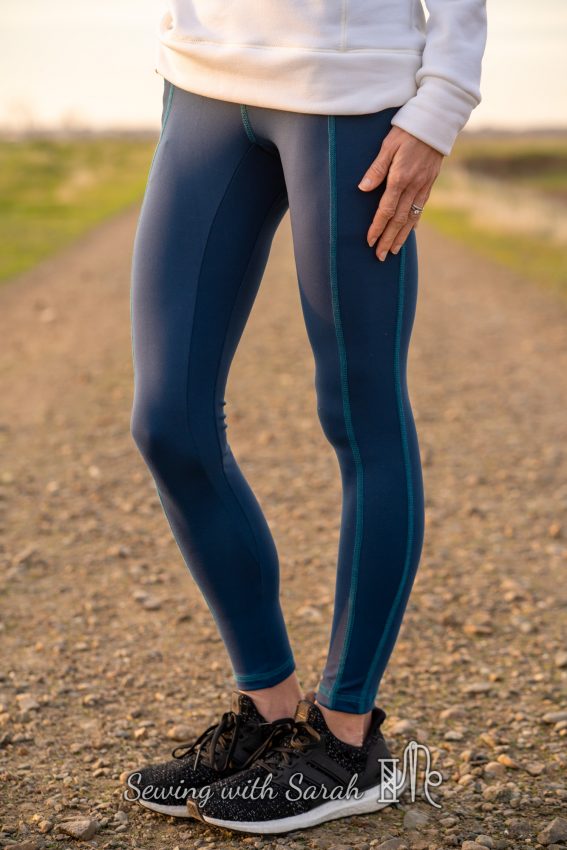
I made two separate pairs of Super Gs for this capsule. Super Gs have been a clear winner for me lately, both in training for my marathon and in everyday life, due to their stretchy and generously sized back pockets, and the long gusset that accommodates pretty much any kind of movement, from sitting criss-cross applesauce for library story time to yoga to a heavy spin workout.
As I continue to fine tune the fit, I have started to stretch the gusset about an inch longer than the marks on the pattern, to acommodate my rather flat derriere, and also take a smaller seam allowance in the calf to give my runners quads room to breathe.
![]()
![]()
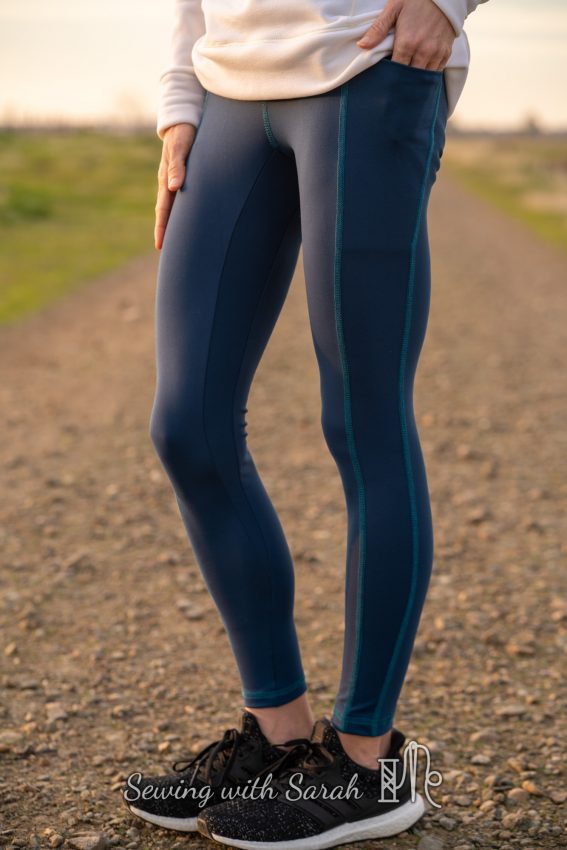
The first pair is sewn in Zen athletic knit from the Fabric Fairy– it comes in a rainbow of great colors, is totally squat proof, and feels like wearing a second (really smooth!) skin. Having sewn with it once, I now want to go back and order alllll the colors- it’s that good! I’ve tried ATY fabrics from other shops, but none felt as smooth as this one, and the stretch is ideal for any fitted leggings pattern (check out my SewAlongs here for support in sewing your first (or 100th!) pair)
![]()
![]()
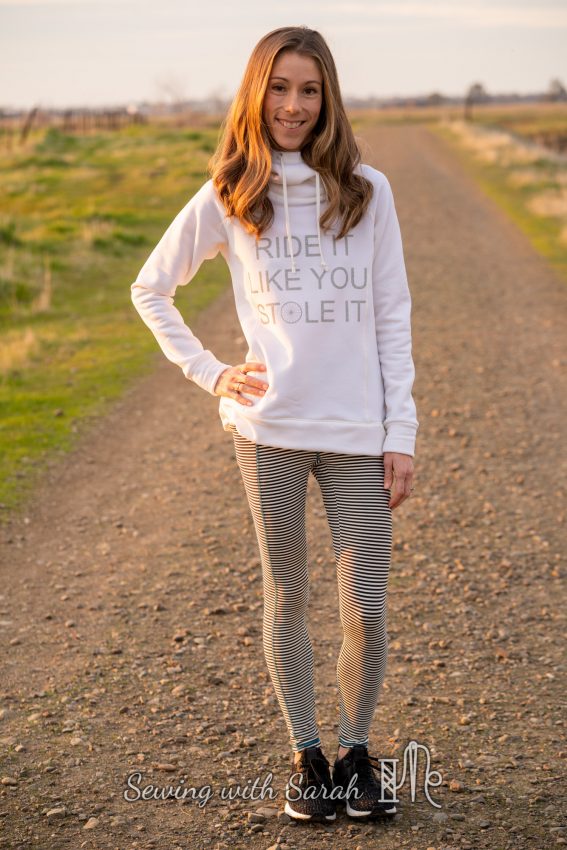
My second pair I modified the pattern slightly to only have one side with a pocket, because they were going to be more of an everyday rather than an athletic legging, and also because trying to match up the stripes was literally making me blind.
![]()
![]()
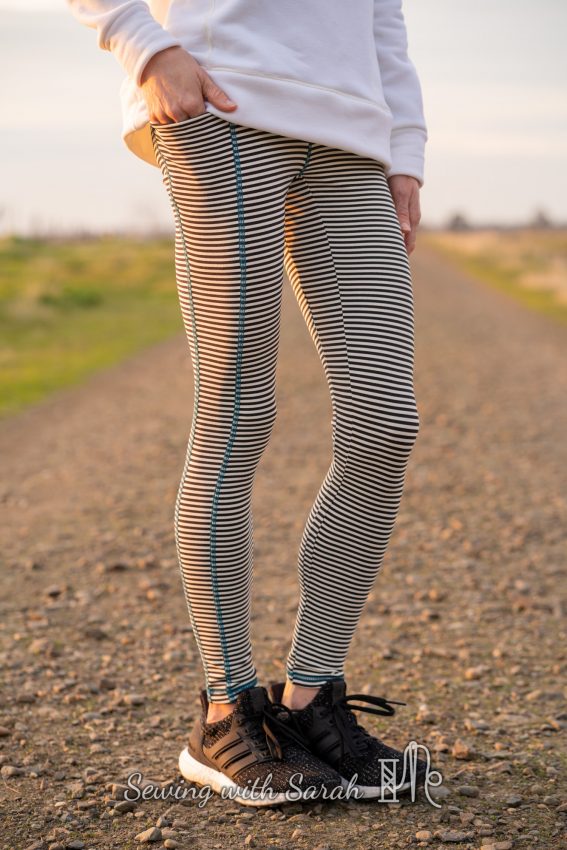
I’m totally enamored with the finished product though, so it was worth all the cross-eyed cutting/sewing- and a little reverse cover stitching (check out the tutorial here) saved me from really needing to match the side stripes after all. Since I didn’t feel like rethreading my machine from the ocean blue pair, these got the turquoise treatment, and I think it accents them really well- sometimes laziness really pays off!
This fabric isn’t available from the Fabric Fairy or anywhere I’ve found online- it was sent to me as a gift by my sweet sewing friend Susi, who visited Chico last year, and made an awesome pair of Tempo tights with it during the testing for that pattern. She must have been paying attention when I commented about how awesome they were, because she sent this to me not long after, and I love that when I wear them, I think of her!
Outerwear
![]()
![]()
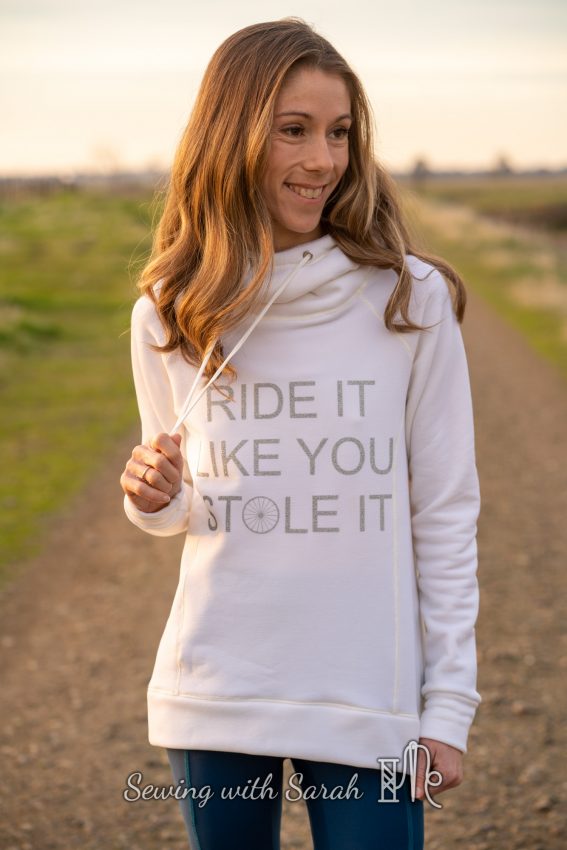
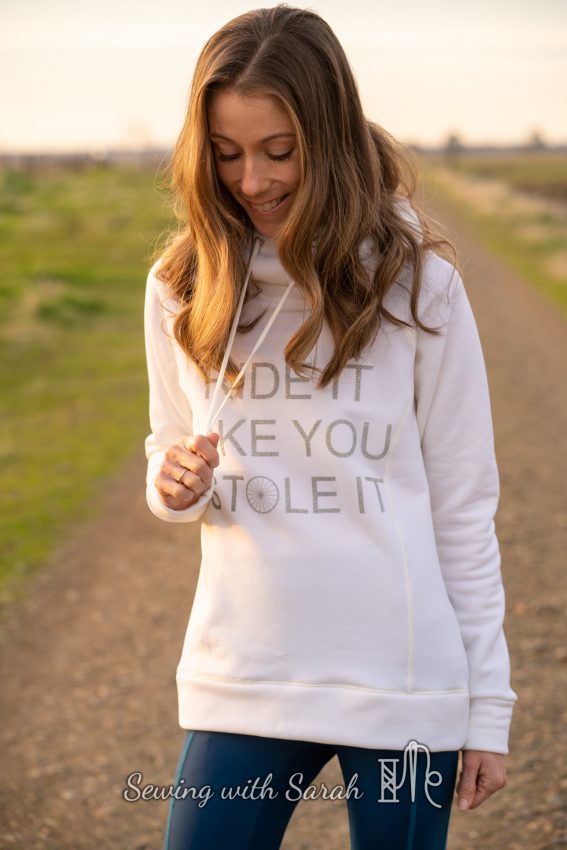
Last, but not least is my outerwear piece- a Summit Peak Hoodie (New Horizons) sewn from “optic white” Polartec Power Stretch fabric. I’ve been hoarding this fabric for the better part of a year, and I’m kicking myself for not sewing it sooner- its delightfully warm, soft and easy to work with!
![]()
![]()
I made a couple modifications to the pattern, eliminating the pockets (who needs ’em with all those Super G pockets?), and taking a couple inches off the length (not a typical adjustment for me, since I have a long torso for a short person) for an *almost* cropped look.
ProTip:
I reverse cover stitched all the seams I could easily reach in a matching cream thread, and really recommend cranking up the differential feed on your serger and cover stitch machine for this fabric- its incredibly stretchy, and can easily become wavy if you don’t stabilize or adjust for that in construction. If you’re using a sewing machine only, I’d recommend using a knit stay tape or a walking foot when sewing.
![]()
![]()
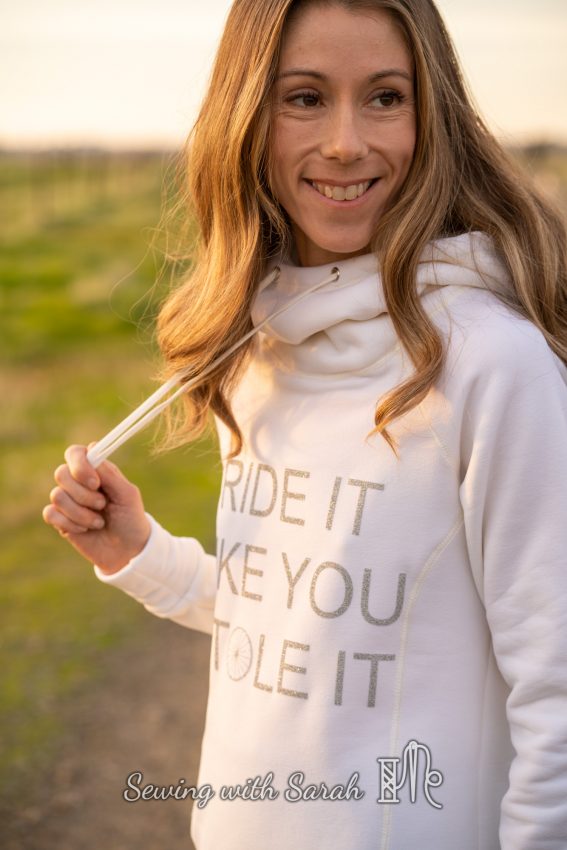
When it was finished, I could tell it was missing something, so I came up with the idea for this cut file. This saying is on the wall at my local cycling studio, and always cracks me up, so my husband kindly designed and cut it for me out of some glitter HTV. You can download the “Ride it like you stole it” Silhouette studio3 file here.
![]()
![]()

I’ve never used the glitter HTV much before, and it looks amazing! The only downside is that it is a little rough, so fortunately this fabric isn’t prone to snagging, because it does feel a bit like sandpaper.
![]()
![]()
Well, that’s a wrap for my first FitCapsule of 2020! I loved seeing what everyone else made during the event, and many thanks to Alex for hosting it!
![]()
![]()
Have you been sewing much this year?
Remember, you can subscribe to my blog for inspiration, or check me out on YouTube here (I just hit 1K followers and I’m so excited!)
If you’re curious about my previous FitCapsules, you can find them here!
Note: This post contains affiliate links. Thank you for your support!
Absolutely stunning capsule! Love the colors and pockets. Hugs for the rough start.
super beautiful all together subtle with a pop
Thanks Susi!
Wow……….just wow. I always look forward to your posts. You demonstrate lots of creativity within an approachable style…..thanks a bunch.
Thank you so much Sheila!
Fantastic wardrobe
The Zen athletic knit, do you think it would be suitable for proper bike shorts that have chamois in them?
I need some new ones, and have decided to make them to customise a couple of things, and don’t really like wet look lycra (getting the weight heavy enough in NZ is also an issue) , but the fabric still needs to be slippery enough to not catch on the saddle.
Thanks.
I think Zen would be great for that!
Amazing capsule Sarah! Thanks for the great reviews of patterns, fabrics, and sharing all your knowledge. I appreciate when you describe your modifications and why you make them. I love your blog and always look forward to reading your posts.
Thank you so much Cyndie! Reading this warms my heart!
Thanks for all your great tips. I’m preparing to make a pair of Brassies out of the red fleece backed polartec. I’ll just be using a sewing machine. I don’t have a walking foot. I usually use knit interfacing for my hems so they aren’t wavy and avoids tunneling etc. You mentioned stay tape though so are you recommending using it on all the seams or just hem/band? That’s where most waviness occurs for me hence why I use interfacing. I haven’t had much luck with stay tape/wunder tape before. I can’t ever get it to either peel or stick. Love your outfits ❤️
I would just use it on the pockets. The bands shouldn’t really need it, unless you are hemming instead of using a cuff. Hope that helps!