Tried, Tested, and True: Mountain View Pants
![]()
![]()
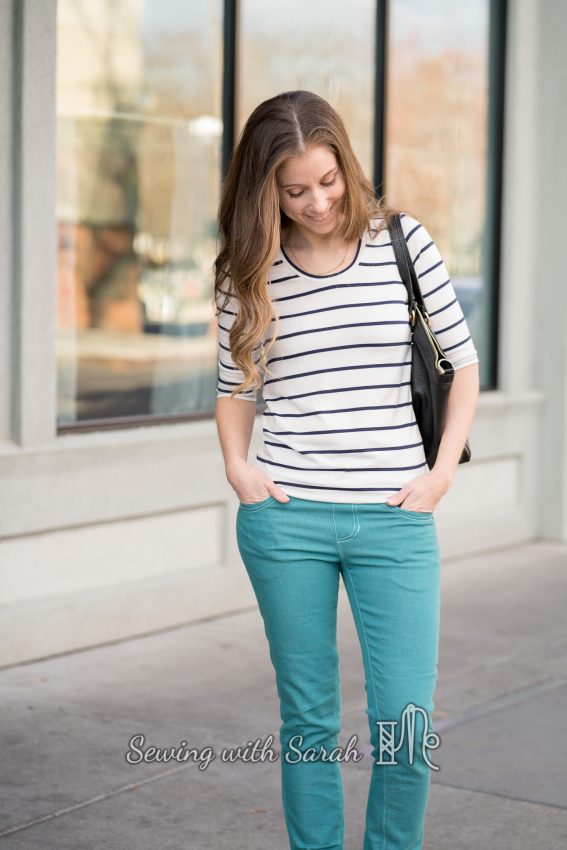
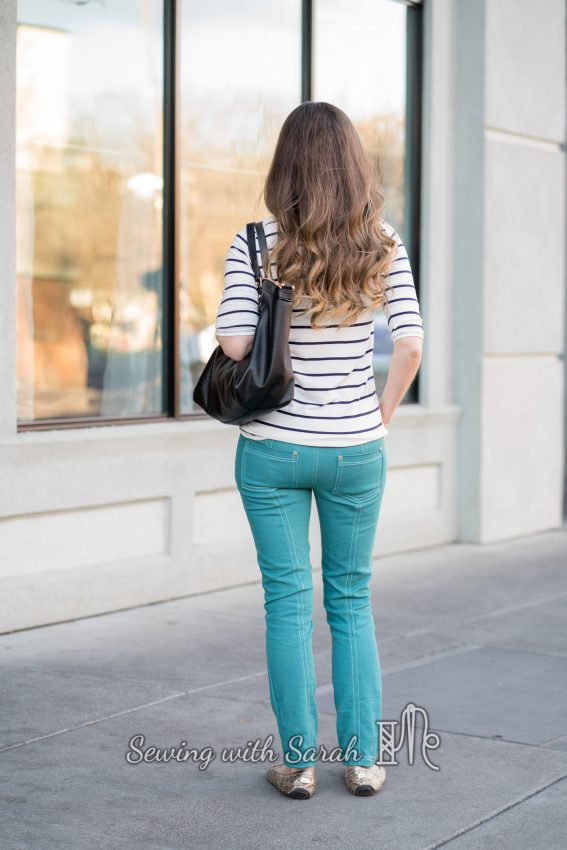
I’m all about the pants making these days (which is good, because my wardrobe was getting a little top heavy!), and my latest conquest is the Itch to Stitch Mountain View Pants.
![]()
![]()
Earlier this year, I decided to sew a pull on style jean, but got bogged down deliberating between the Jalie Elanore, the various Style Arc iterations, and the Love Notions Sabrina Slims. None seemed quite right- the Jalie don’t have real pockets, which drives me nuts, the Style Arc don’t have enough reviews, and the Love Notions are too big for me, and would require grading, which I hate to do, because I’m a special kind of lazy.
Enter the Mountain Views, with perfect timing and just the right combination of jeans styling and functionality- hooray for REAL pockets! I dove into the test, excited to see what I could create.
![]()
![]()
And then my sewing machine staged a rebellion. It sewed through my Ginger Jeans just fine, but flat out refused to give me even tension when topstitching the Mountain Views. Still in denial, I unpicked and re sewed my seams a dozen times before it finally stopped working entirely, seizing up and refusing to sew a stitch.
I messaged Kennis in despair, knowing my local shop has a minimum 2 week repair time. As a last ditch effort I visited my local Wal-Mart- NOT one of my favorite places, but in our small town, options are limited, and this was pretty much the only place that might have a cheapie I could afford. I lucked out, scoring a simple mechanical model for less than $100, and took it home, hesitant to get my hopes up, but curious about what this much less expensive model could do.
And wouldn’t you know it? It sewed through the jeans perfectly, though I did make a few changes to my topstitching methods, so I wouldn’t overtax the smaller motor with the thicker thread. You can see the triple stretch stitch I used here- I actually like it just as well as the single long stitch I used on my gingers, and as a bonus it uses standard thread, so it’s easier to coordinate with whatever fashion fabric you’re using.
![]()
![]()
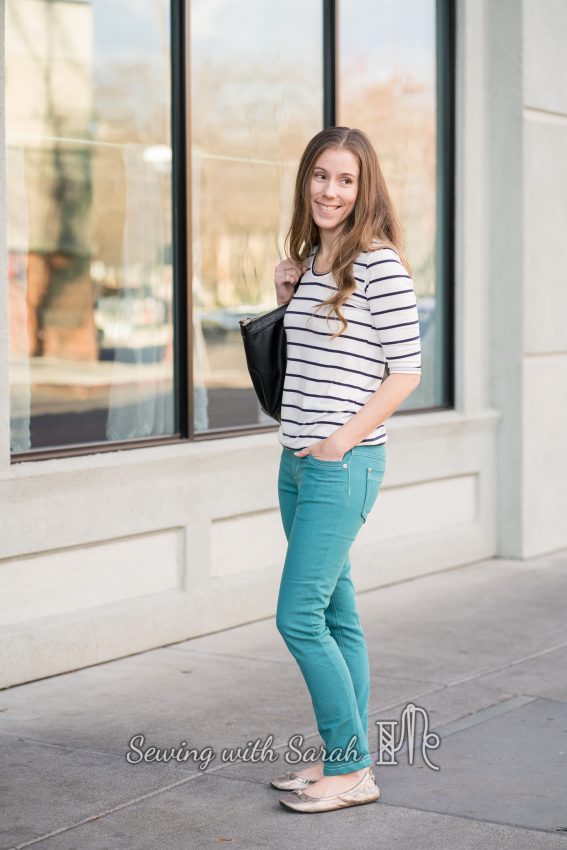
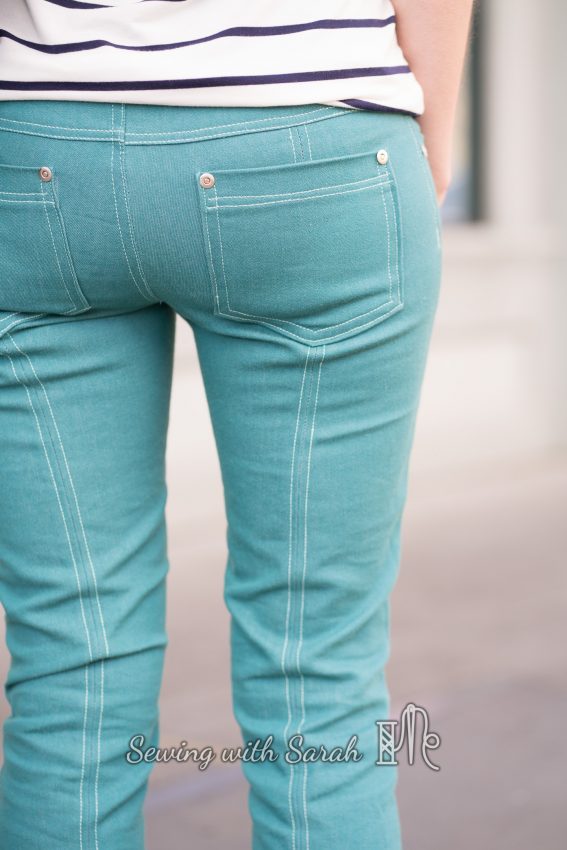
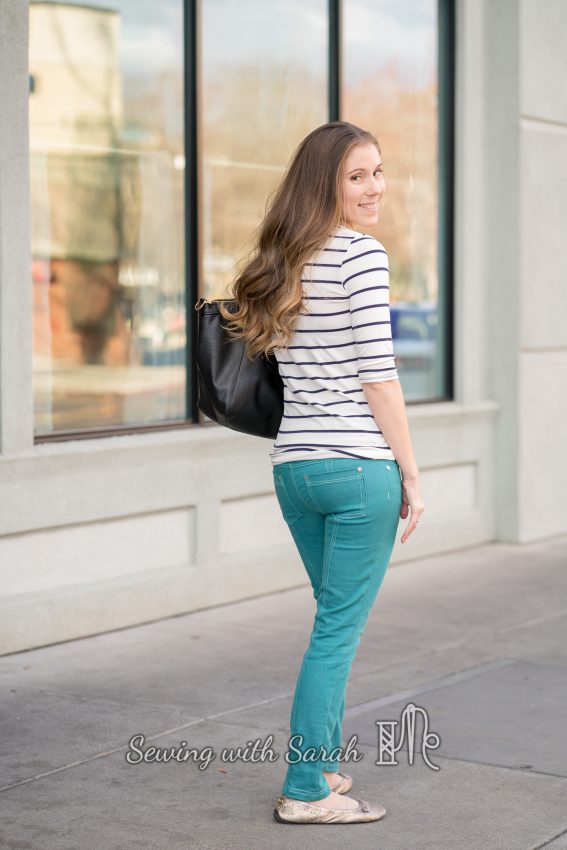
Nothing from my original grey denim pair was salvagable, so I took a deep breath and moved on to a teal denim from Emma One Sock, and decided to make them skinnies. Kennis includes directions for this in the instructions- essentially you try them on inside out, and pin/draw lines to fit your body. I use frixion pens that iron away for this job, and I love how the fit is perfectly contoured to my larger calves and thinner ankles.
I’ve still got a tiny bit of wrinkling back there- but with skinny jeans, this is really unavoidable, and it doesn’t bother me. One of the legs does twist slightly inward- this happened with my Gingers as well, and I’ve yet to figure out the mystery (I think it’s a body issue, and not a grain issue). I had fore-foot aductus as a baby, and had to be in casts for two years to get my feet to turn out properly, so that might be part of it.
You can see it slightly here, in how my left leg seam curves toward the inner leg. It doesn’t stop me from loving them though!
![]()
![]()

Fit Adjustments
I made up my standard size 0, but did find that I needed to use a narrower seam allowance at the top of the hips and in the waistband in this fabric, which had exactly 20% stretch- otherwise they wouldn’t have gone over my hips!
![]()
![]()
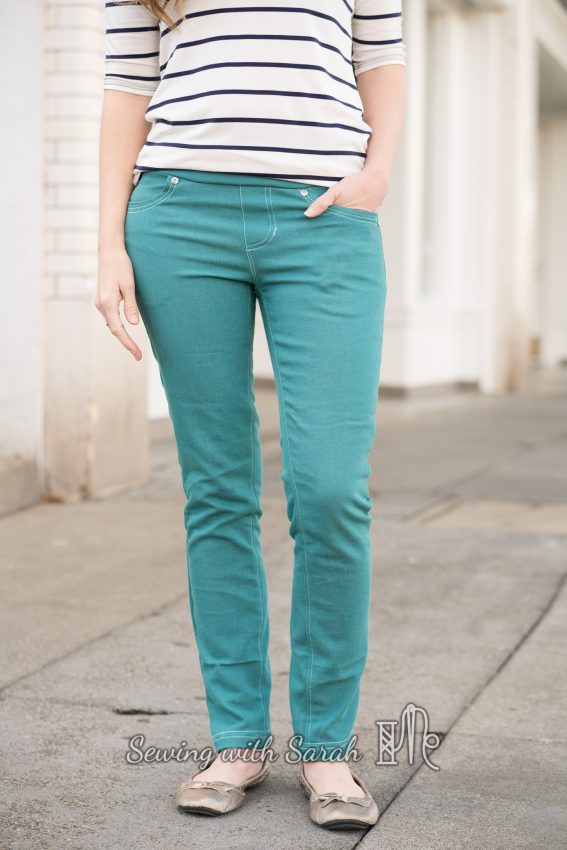
Since no pants pattern is going to fit perfectly out of the envelope, I also made a few other adjustments, based on my muslin. These included scooping out the back crotch (low butt), removing 1/4″ from the back inseam (thin thighs), taking in the back center seam a bit, and shortening 2″ at the upper thigh. I think this is the only hard part about making pants- but there’s no way to learn, other than to dive in and make a muslin and see how the different adjustments work on your body.
![]()
![]()
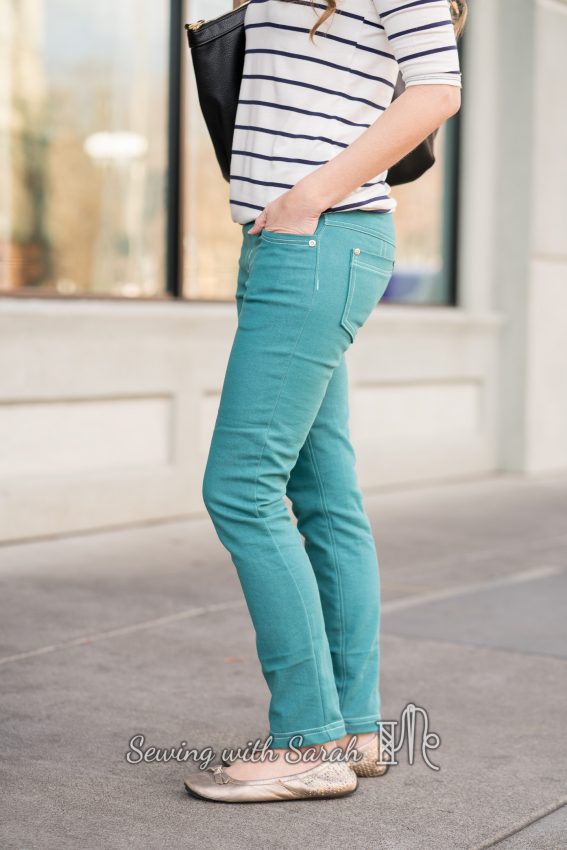
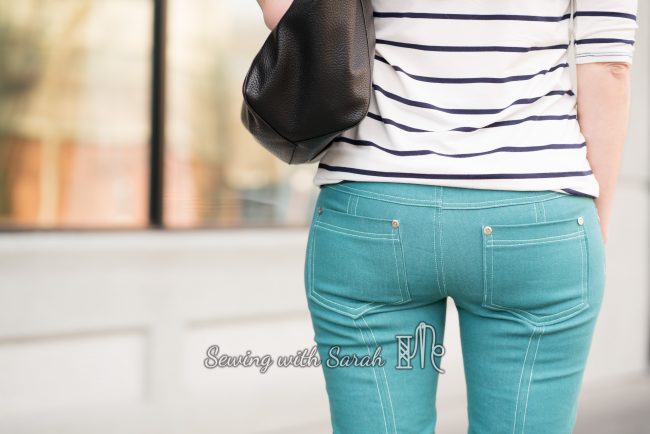
One of the best things about the MountainView Pants are the back leg seams- they aren’t just decorative. Since many women, including yours truly, have excess fabric that pools beneath the seat, these seams make it easy to make adjustments for a better fit. I found that I could take them in a bit and get a much closer fit than with my Ginger Jeans, where I only had the side and inseams to play with.
![]()
![]()
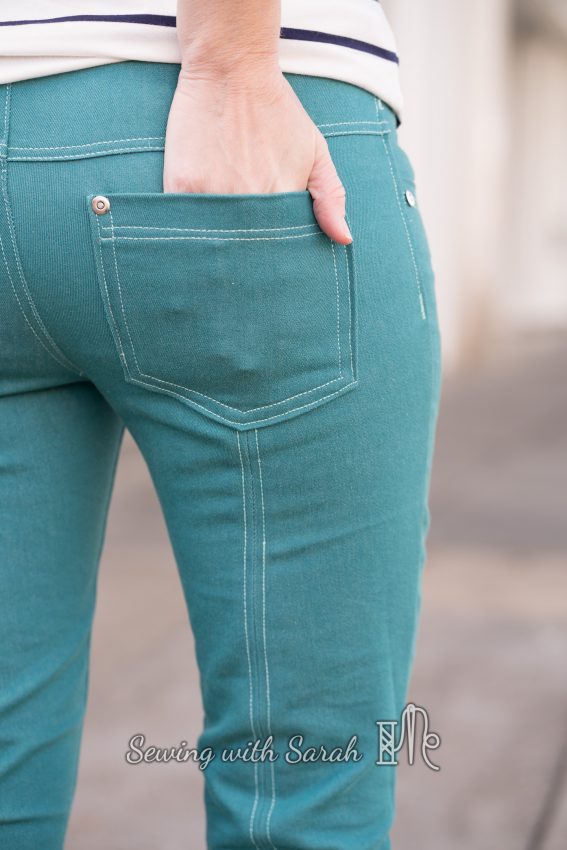
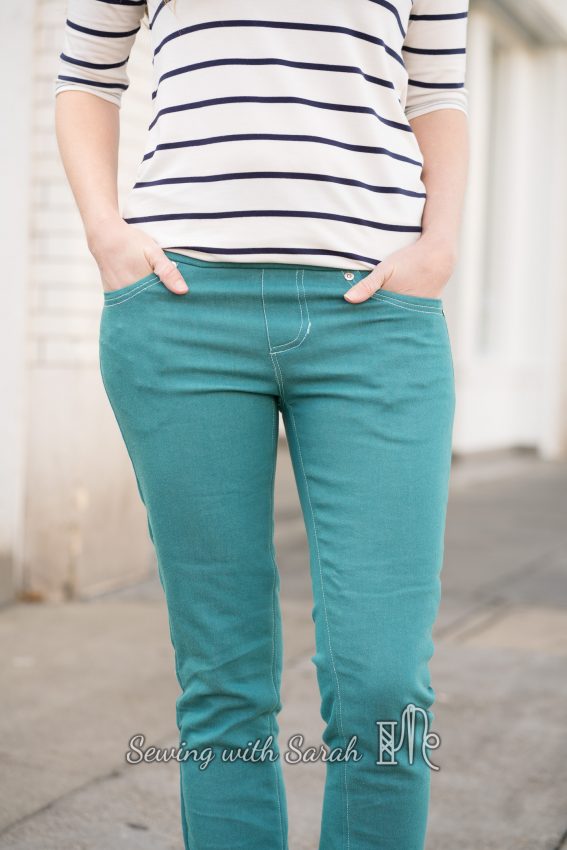
Kennis also nailed the back pocket placement- I didn’t have time to futz around with them, so I just took a leap of faith, and I think they turned out to be in just the right spot!
![]()
![]()
To finish off the jeans look, I added rivets. I was initially terrified about putting them in- poking holes in a finished item!- but after practicing a bit, started to really enjoy using the hammer! I think it was the perfect psychological release for all the frustration over the machine debacle, which, by the way, still doesn’t work, so I’m sticking to my little Wal-Mart buy for the foreseeable future.
![]()
![]()
If you’ve been holding back on making pants, I think this is a great pattern to start with- and if you’re a pants making pro, I still think it deserves a serious look for the great fit and quick finish- I’m dying to make a pair in ponte- they would be soooo comfortable!
The Tee
To reward myself for tackling another pair of pants and not totally freaking out when my machine broke down, I made myself another Union Street Tee, in bamboo knit from La Mercerie.
![]()
![]()
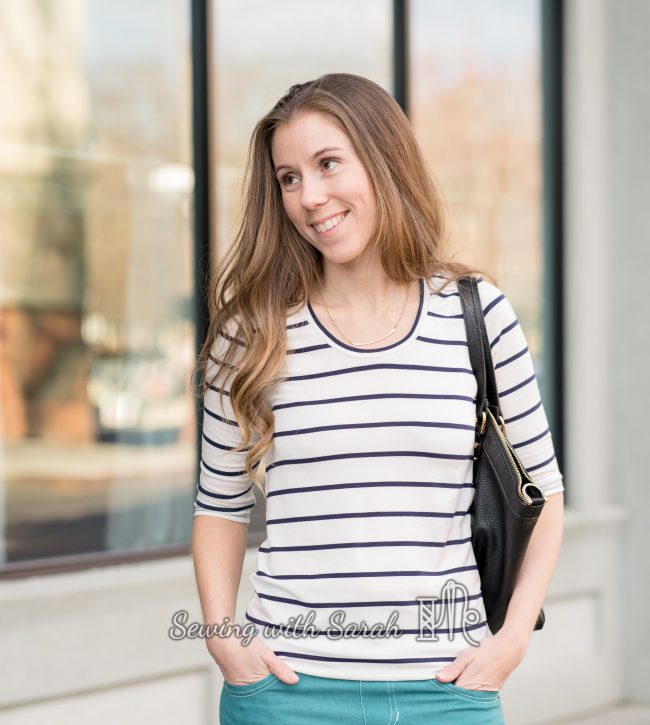
When I ordered this fabric I didn’t realize it was sold by the half yard- so I only ended up with 1 yard instead of two, but I made the best of it with elbow length sleeves, that will be perfect for spring. Whenever it decides to get here, that is.
![]()
![]()

And, just so you don’t think my life is all roses and pretty poses, here’s a glimpse into what my twins were doing while we were taking photos….making up their sister with lip gloss. This is what the baby ended up looking like:
![]()
![]()

I guess that’s #babybloggerlife!
![]()
![]()
Have you made pants before? If not, what’s holding you back?
I have more pants to share soon, if you’re not tired of seeing photos of my behind, you can follow me on the blog or Instagram so you don’t miss it!
Note: This post contains affiliate links. I received this pattern as part of testing- but all opinions are my own. Thank you for your support!
That color! That pattern! That style! You look utterly fabulous, and I definitely want some teal jeans of my own. It’s funny how pocket placement seems like such a small design element, but drastically affects the overall “success” of a pair of pants.
I feel silly admitting this, but I have this long-standing prejudice against pull-on pants. To me, they are specifically “around the house” wear, as if I mentally file them all in the same category as 80s sweatpants (you know the ones I mean). It’s like because I know how to sew a proper fly and zipper, it is now a compulsory feature on all trousers and jeans I make. I also have the issue of being exaggeratedly curvy (my waist is 13″ smaller than my hips), so typical pull-on pants will either gap at the waist or not make it over my butt. BUT (haha!) the pictures for the Mountain View pants, both Kennis’ and yours, really make me want to give them a go. =)
Thank you julia! I agree- I used to be prejudiced against pull on pants too, but these won me over! I think the elastic at the top of the waist helps prevent gapage- without sacrificing the ability to pull them on over dem hips!
Oh I love this!! You look great in your pants. Now, I’m off to grab this pattern and hopefully share my version soon.
Thank you Sharon- they will look awesome on you!
These are awesome!! Love the colour
Thank you!
Just curious, if it’s the teal denim that’s on the website, how did you pre-wash? The description says pre-wash separately, which I’ve never heard of. Do you think if I threw in some extra color catchers I’d be okay to put in with other things in the washer?
I didn’t find it bled much at all- I just washed with my darks on permanent press. I wouldn’t wash with white, but otherwise it will be fine.
They look great Sarah! Love the back seam and love it as another seam for fitting! Great job.
Thank you kiki!
Sarah, you did a great job on these. I had the same issues with the topstitching thread. Ended up just using it in the bobbin when I did the hem. I think it’s too tough on the motor. Won’t do that again. Made a second pair over the weekend and just used regular thread and it was fine.
Glad I’m not the only one that has issues with it! Makes me want an industrial though!
These are fabulous! You make me want to try them out!
These jeans look great. I was surprised to read you ran out and bought another sewing machine in the process. I always just had my old Bernina, I had to have a major overhaul in December and leave it for two weeks in repair. I borrowed my daughters Brother she had bought from Costco and it sewed really nice.
Absolutely gorgeous, Sarah!! –both top and bottom!! (and the messy life part, of course, too)!!!!!
Yes, life is certainly messy sometimes (especially with kids, I know you get it!)
I came back to this post because I remembered reading about your leg seams creeping to your shin. I’m noticing mine doing the same and I’m wondering if you’ve had any thoughts on how to adjust for that? I love these teal pants and on a major search for computer streth denim so that I can try these pants too! I have way too many me-made tops and hardly any bottoms!
Someone suggested making sure that I sew from the crotch down to both ankles- rather than up one leg and down the other. So far, thats the only thing I can think of changing, as I was very careful about grain. I’ll let you know when I make jeans again if that helps! With the summer coming though, I’m turning my eyes toward more shorts for now 🙂
Oh that’s interesting! I will try that on my next pair for sure. Thank you so much for your response. I love your blog and photos!
Thank you Lisa! Glad to help!
Great jeans and congrats on size 0!
With regard to the issue of the left centre back seam not falling completely straight, do you think that if you added a little more to the centre seam when you cut out, or use a smaller seam allowance on the left leg, that that would solve the “problem”?
I’m trying hard to identify issues on others to help me with my own body issues!
Thanks for the suggestions! I think that could potentially work- after I sewed these jeans, I made the CCF Sashas, and went through about 12 muslins trying to fix the issue, with only moderate success. If you figure it out though, please let me know!