Adding a Back Zipper Pocket to Leggings
![]()
![]()
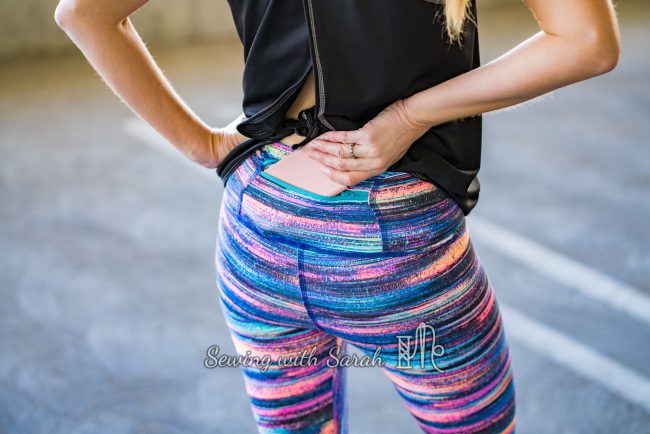
I promised this tutorial last week, when I made the second part of my Fit Capsule (see that post here) and here it is! I learned the hard way during my last leggings modification that if I wait too long to explain it- I forget how I did it, so I knew I had to get this out there ASAP!
A little background before we get started- I used this hack on the Greenstyle Super G leggings, the view without the side seam, because I wanted the clean look but still needed a place for my phone/Gu/starbucks card. However, it CAN be used on any leggings pattern (like the Inspires or Stride tights) as long as the pattern has a two piece waistband (i.e. separate pattern pieces for the front and back waistband). It also helps to have a pattern with an inner and outer waistband included- like all the Greenstyle leggings patterns, because this does all the work of creating a pocket bag for you!
To give credit where credit is due, some of the methods in this hack were borrowed from Dawn’s blog post here. I was actually all set to add seam allowance and create top and bottom pieces for the zipper, and then I remembered her tutorial and how much simpler it would be if I installed the zipper first (you’ll see what I mean below), so thank you Dawn!
I have modified her method a bit to suit my patterns and preferences, so I thought it would be worth a separate tutorial. She has awesome posts on activewear sewing though, so you should totally check her blog out!
Ready? Let’s get started!
Supplies:
You’ll need:
Leggings pattern that has an inner and outer waistband (i.e. not a foldover waistband)
Zipper – the exact length depends on how long you want your zipper opening to be. I used a 10″ and a 12″ zipper coil or invisible zipper- some of it gets cut off, so you want the zip to be a couple inches longer than the opening. I basically measured my phone, and added a couple inches for insurance 🙂
Zipper foot for installing the zip with your machine- don’t worry if you haven’t ever done this before, it’s easy!
Ruler- I like this quilting ruler!
Marking device- these frixion pens rock, because they are easy to see but erase instantly with heat!
Step 1:
The beautiful part about this hack is that the zipper is inserted BEFORE your pattern pieces are cut- making it easy to get just the right length.
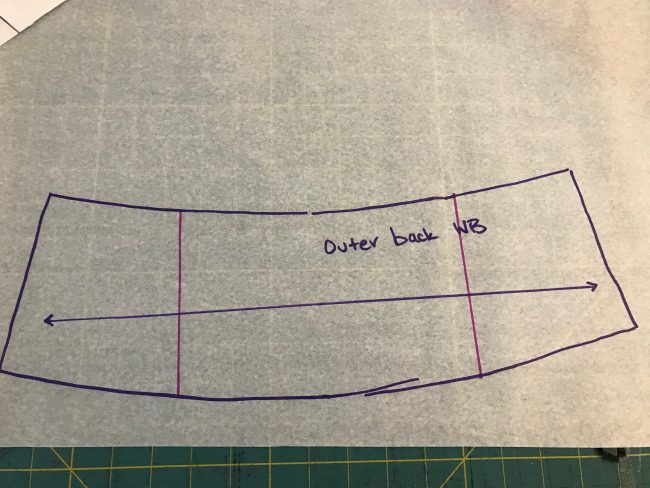
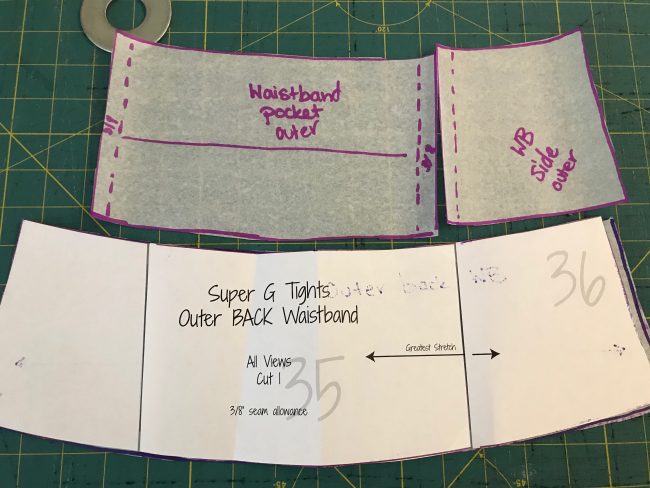
To start, You are going to be dividing your back waistband up into three parts, to make room for your zipper panel.
Start by tracing your outer back waistband piece. Measure the length you want your pocket, and mark two lines on either side. I tried to center them on the back pocket, but wasn’t really precise about this. Make sure to draw them perpendicular to the grain line so they are straight!
![]()
![]()
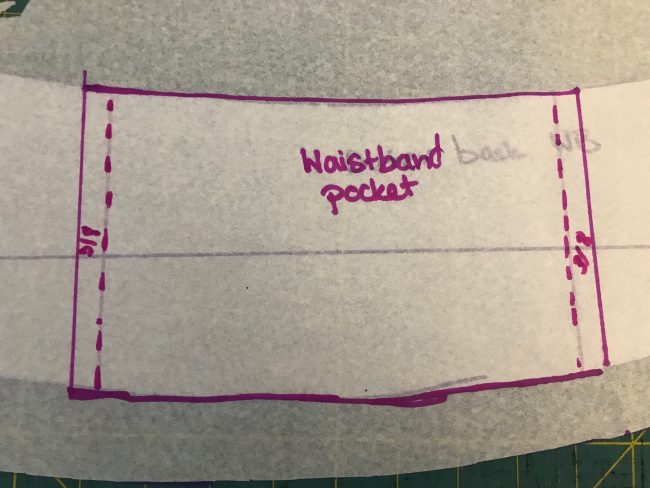
Using the lines you drew, create new outer back waistband pieces.
Make sure to add a seam allowance on each side! I used 3/8″ to be consistent with the pattern. The dashed line will be my stitching line.
![]()
![]()
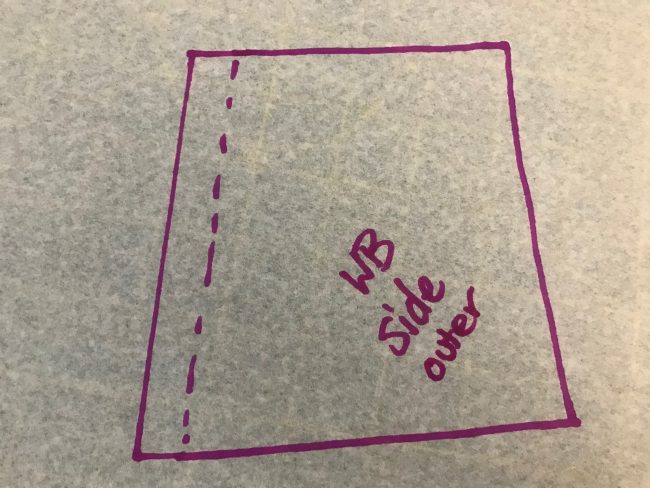
Now trace your side pieces, again adding a seam allowance to the side that will be sewn to your new waistband pocket. The outer edges (the part that will connect with the front outer waistband) already have a seam allowance added, so no need to add extra there. Again, the dashed line is my stitching line here.
![]()
![]()
Now, you should have the following pieces prepared:
![]()
![]()
Step 2: Cutting your pieces and sewing
- Cut out two outer back side waistband pieces from the pattern you made above (no photo for this step).
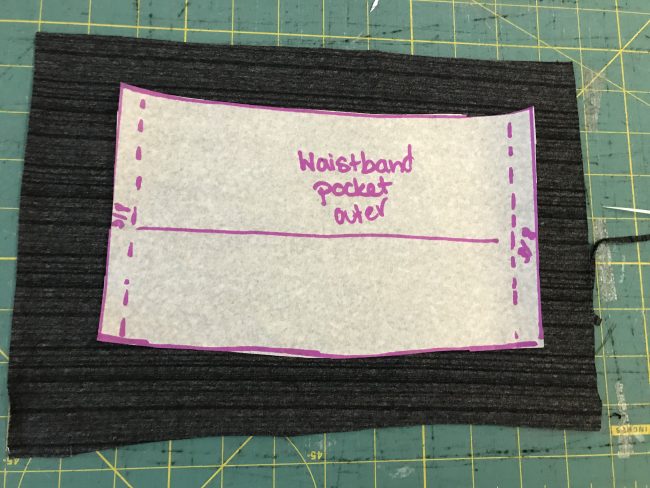
- Cut out a piece for the center back pocket piece that is at least an inch or two larger all the way around than the pattern piece you drafted in step 1.
![]()
![]()
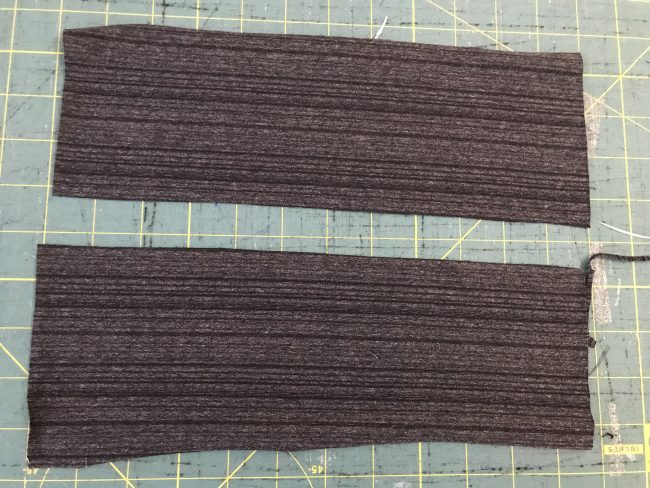
Using a ruler, cut the piece in half. It doesn’t have to be exact, but do your best! This is where your zipper will go.
![]()
![]()
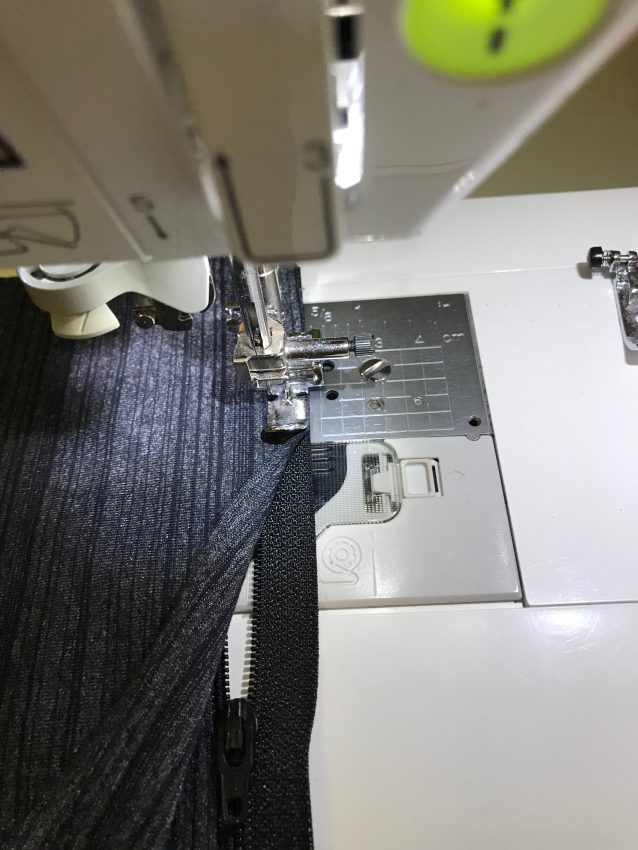
Step 3: Insert your zipper
This isn’t scary at all, promise! I didn’t even find the need to stabilize my opening, though if your fabric is very thin, you may want to consider it.
I used both a regular and invisible zipper- either will work!
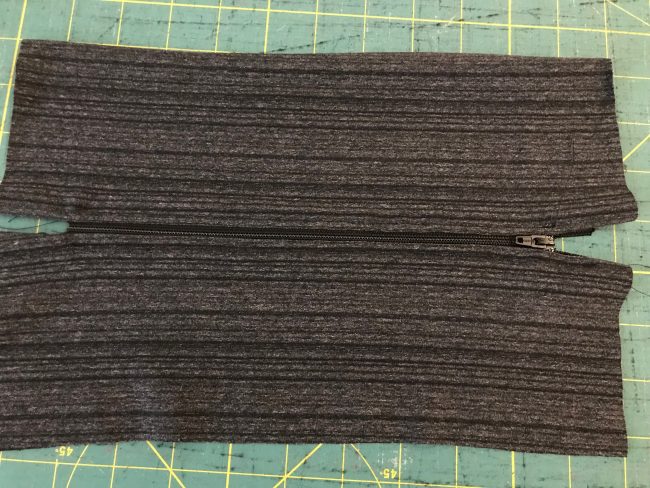
Sew each half onto your zipper, using a zipper foot. I also like to topstitch.
![]()
![]()
You should end up with this:
![]()
![]()
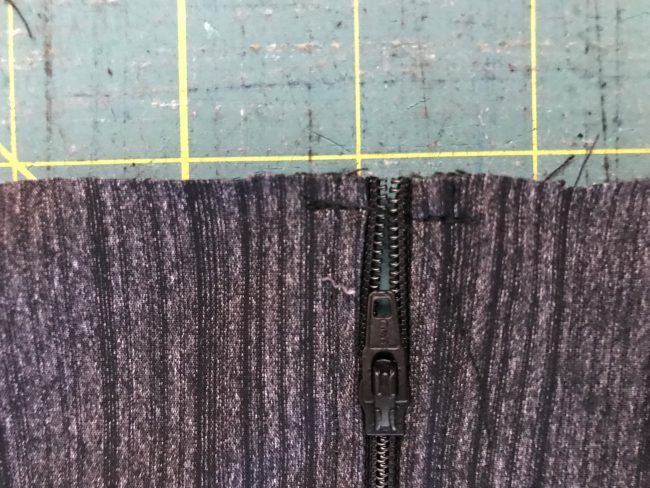
Now, grab that center back outer waistband piece you made, and cut it out!
![]()
![]()

Make sure you don’t cut off your zipper pull. Dawn suggests adding couple lines of stitching across the zipper at the top and bottom to make sure it doesn’t come undone before you sew on your side pieces, since you no longer have zipper stops attached.
![]()
![]()
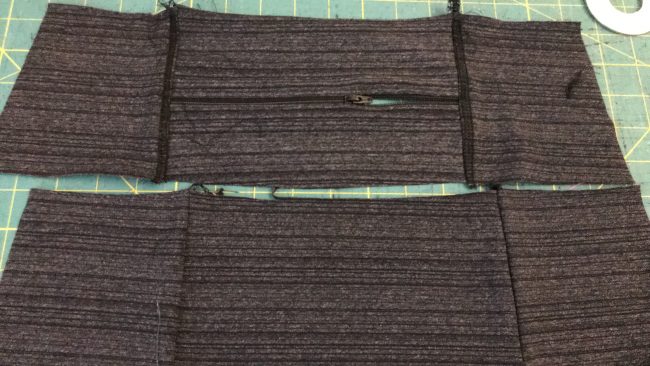
Step 4: Sewing the waistband together
Now, Sew your side pieces onto this center pocket piece, right sides together. Go slowly over your zipper teeth- they did fine in my serger, but I was slow.
![]()
![]()

Topstitch if desired.
![]()
![]()
You have a choice here- you could make a second set of middle and side pieces for the inner waistband, as I have here, or you can just use the inner waistband piece as is. I did both, and found during my run that my phone didn’t move around at all, even if the inner waistband was whole, which saves you the trouble of creating new inner waistband pattern pieces and stitching them together..
![]()
![]()

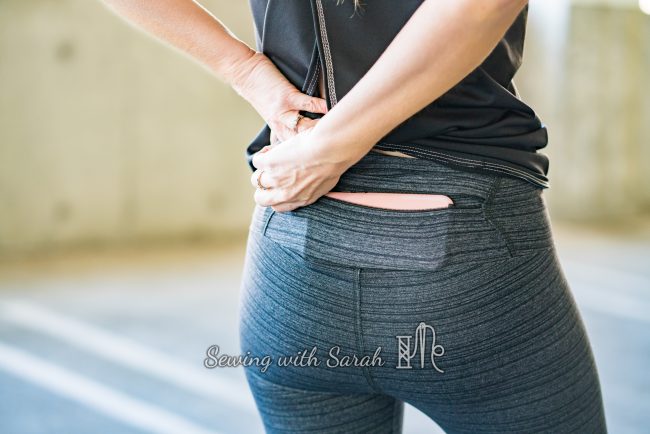
Attach your waistband pieces to your leggings, and topstitch through the seams at the sides of the pocket piece, if desired. Again, I didn’t do this, and didn’t have a problem with things shifting around- I just have an extra big space!
Either way, you can enjoy your new leggings with a zipper pocket! Once you get it down, this modification only takes a few extra minutes and makes your leggings so much more functional!
Additional hack ideas:
If you have a headphone cord, you could put in a grommet to let the cord out through your pocket, or even create an envelope opening instead (if you hate zippers!).
![]()
![]()
What do you think? Will you try this? I’d love to see it if you do- leave me a photo on my Facebook page or tag me on Instagram!
If you enjoyed this post I’d love it if you subscribed to my blog! You can also find me on Instagram here, or lurk my closet (that sounds so creepy, but I promise i don’t mind!) on Pinterest here!
Note: this post contains affiliate links. Thank you for your support!
[…] I knew that a couple of friends were interested in shorts so I asked Jo if she fancied being a guinea pig for a shorts version of the Super G athletic tights. There’s not an official short cut length, but in the testing group a few people tried them out at different lengths so I thought they were a good shorts candidate. I went for view B (love the side pockets) and added in a waistband zipped pocket as well (using Sarah Connell’s suggestion). […]
Perfect tutorial! Normally I find alteration tutorials really difficult to follow but I had no problem with this.
Yay! I’m so glad it was helpful Chelsea!
Thanks for the tutorial, Sarah! I saw this months ago, but was lazy. I’m cutting out my third pair of inspires and finally decided to take the time to do this hack!
Yay! So glad it was helpful! You never regret an extra pocket!
oh! Great idea! and I love the grommet idea for headphones.
[…] I decided to add a zipper to the back waistband, which luckily is divided in three pieces. I used her tutorial omitting the lining of the pocket. So I cut the back waistband piece in two where the invisible […]