Vacation Sewing: North Shore Swimsuit
![]()
![]()
What do you do when you have a big vacation to prepare for? There’s laundry to wash, food to pack, and….clothes to sew! At least, that’s what MY list looks like, and since the sewing is the most fun, it usually gets priority!
![]()
![]()
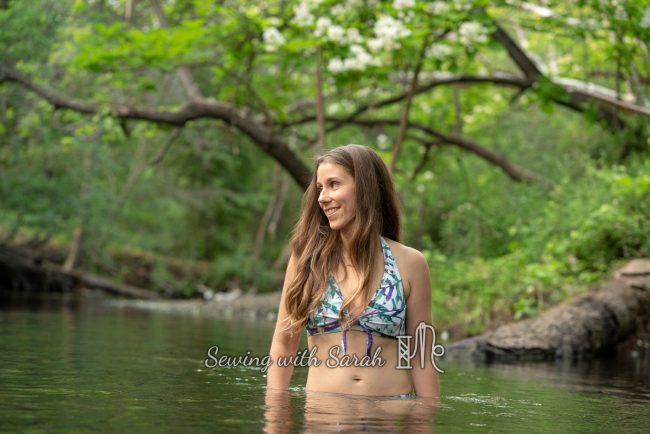
With summer coming and a variety of fun trips on the horizon, the North Shore Swimsuit was the perfect packing-procrastination-project. There are dozens of options included, and I dare someone to do the math and figure out how many permutations and combinations one could make (anyone else remember those ice cream cone math problems in algebra?)
![]()
![]()
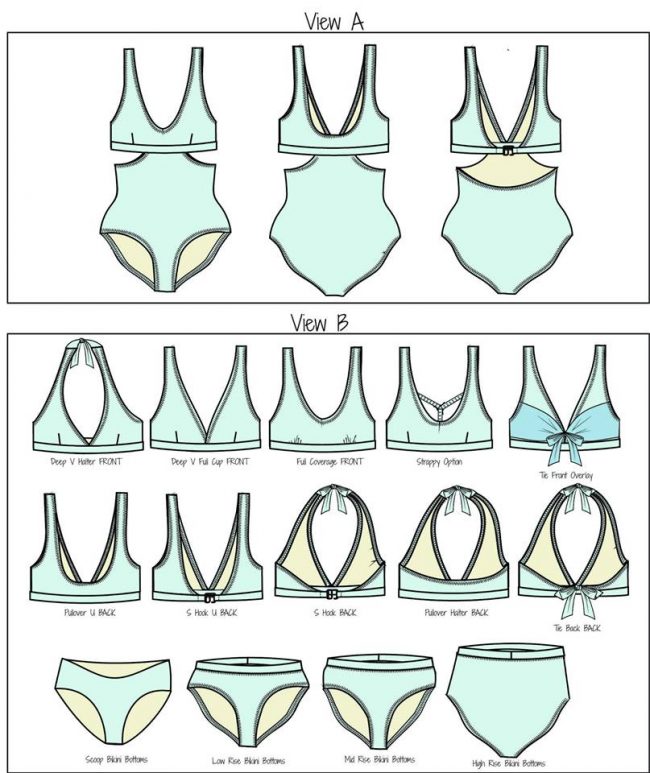
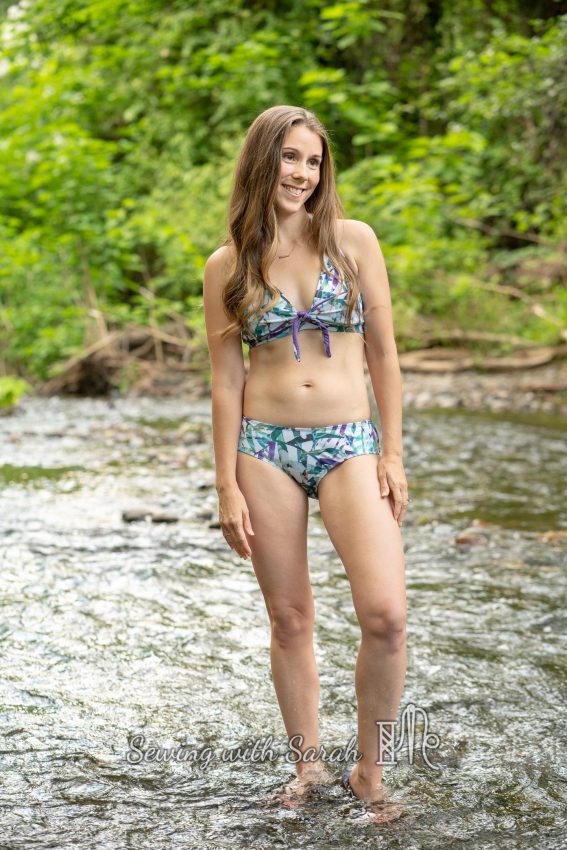
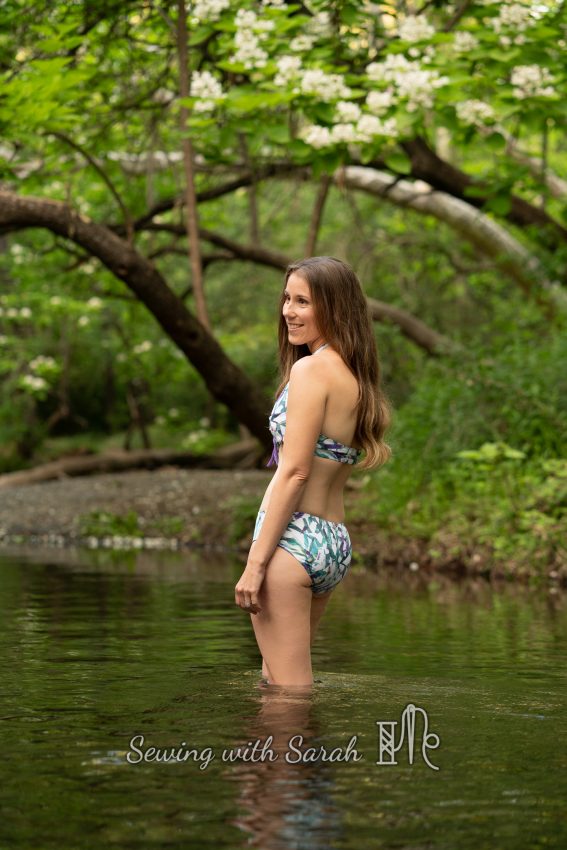
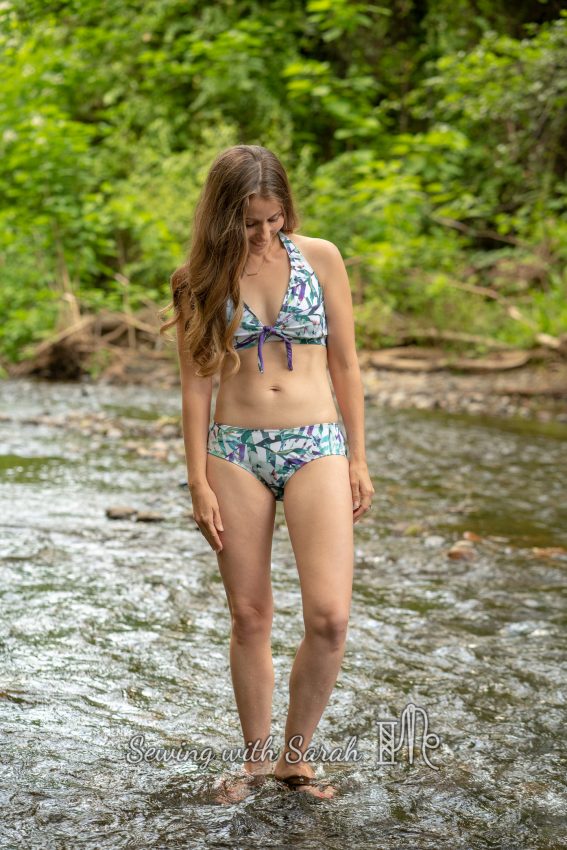
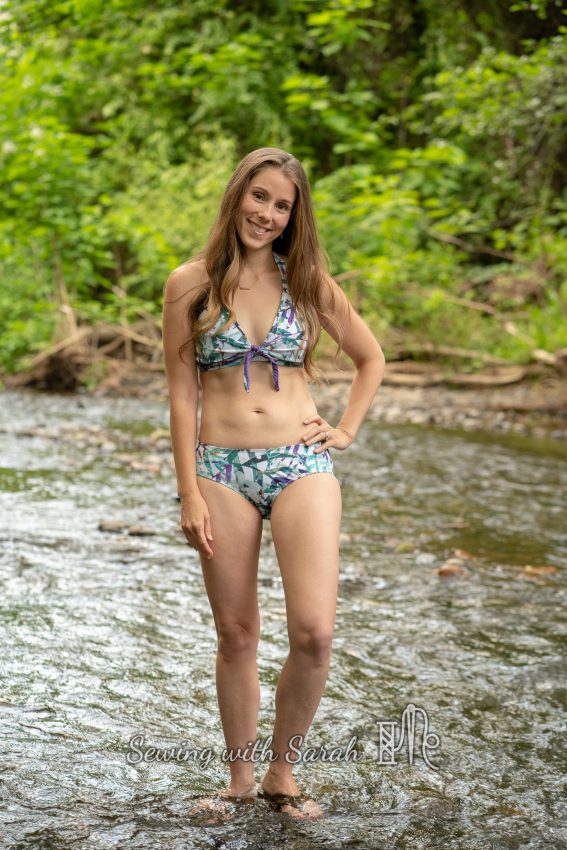
I chose to make the bikini with scoop bottoms, and the halter top (with overlay and pullover back).
![]()
![]()
![]()
![]()
I’ll admit, I’ve let my exercise routine slack a bit this winter, and I had some trepidation about posting photos of myself in a swimsuit on the internet. With a lifetime of body image issues, seeing photos of myself in a suit is hard, to say the least.
![]()
![]()
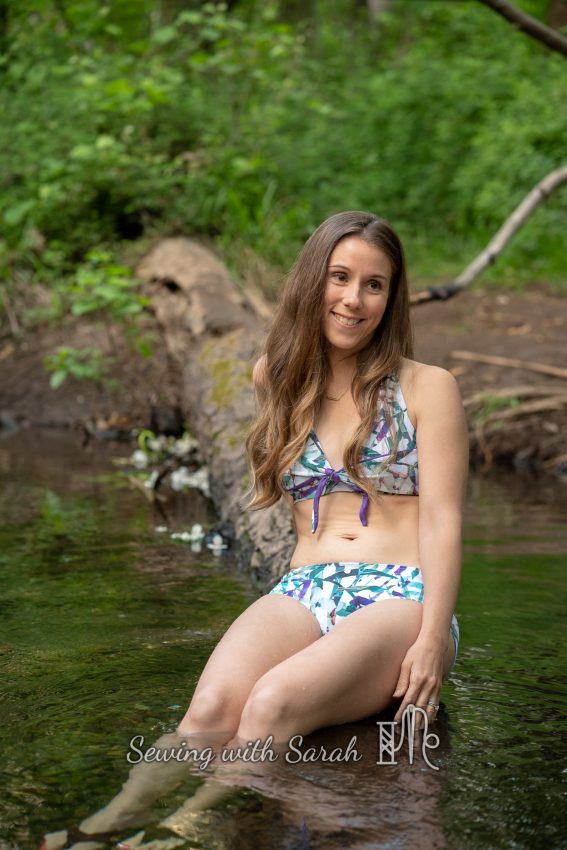
I struggled a bit, until, during our photoshoot, I watched my two year old daughter strip off her clothes and proceed to prance proudly around the shore, happy to show off her round little tummy and chubby thighs as she danced around in the mud (at least she put her boots back on!).
![]()
![]()
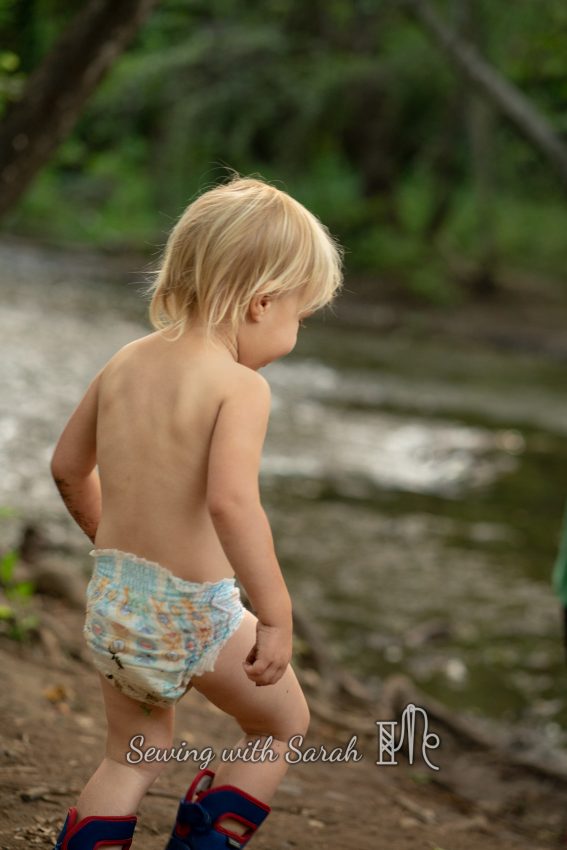
I realized that while I have strong feelings about teaching her to respect and admire her body as she grows, I can also learn by her example- enjoying the moment without feeling self conscious, proud of what I’m able to accomplish. So without any body criticism, let’s dive in!
Fabric Details
If you’re new to sewing swimwear, you might want to check out my post on supplies here– I go into detail in that post about elastics, etc.
For this suit, I used swim fabric purchased last year from Raspberry Creek Fabrics. The hand of this fabric is a bit different than other swim I’ve used (less slippery, maybe?) and it was very easy to handle.
![]()
![]()
By contrast, the lining was purchased from JoAnns and was crazy slippery- I used a lot of washaway wondertape and basting to keep the layers together so they didn’t slip out of place as I was surging. For my next suit, I have some activewear lining coming from the Fabric Fairy that I think will be much better- I’ll keep you updated!
For my version, in the size xxs, I was able to get the entire suit out of 1/2 yard of the main fabric, which was great, since that’s all I had on hand! I did line the overlay with a swim/performance knit from JoAnns (also a PITA to work with, I was so glad I didn’t need much of it!)
Construction & Video Tutorial
![]()
![]()
The majority of construction was done on my sewing machine and surger.
I used the following general order for construction:
- Baste seams if necessary (sewing machine)
- Serge seams
- Serge on elastic
- Topstitch with sewing machien
All topstitching was done with a three step zig zag. I do own a cover stitch machine, but it just felt like I had more control with the regular sewing machine, and I think the zig zag looks just as professional (check out your lingerie- most of those seams are done with a zig zag).
Since I had all my equipment out for the Super G Tights Sew-Along (starts Friday! Join the Surge Fabrics group for an exclusive coupon code, and make sure you’re subscribed to my blog so you get all the videos delivered directly to your inbox!) I went ahead and did a quick video for you on how I attach my elastic.
Sewing swimwear isn’t hard- if you can sew a t shirt, you can make a swimsuit. The key is being able to sew in your elastic- so I hope this video is helpful!
Sizing
This pattern ran very true to size- I just love it when that happens!
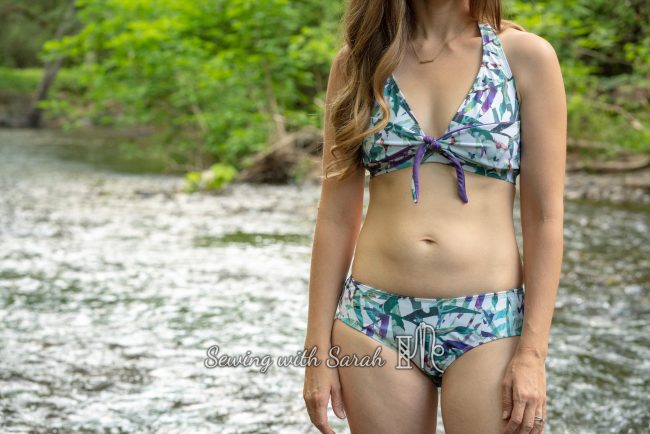
I was anxious about my small cup measurement (I’m an A/B cup, and Greenstyle drafts for a C), but I made my measured size anyway, and it worked out perfectly. I did experiment with darts vs. gathering on the front bodice, and found that the dart provided a better fit for my small bust- the gathers seemed to create too much empty space. The halter ties also helped with this, by allowing me to adjust the tension against my bust without sacrificing the look of the suit.
![]()
![]()
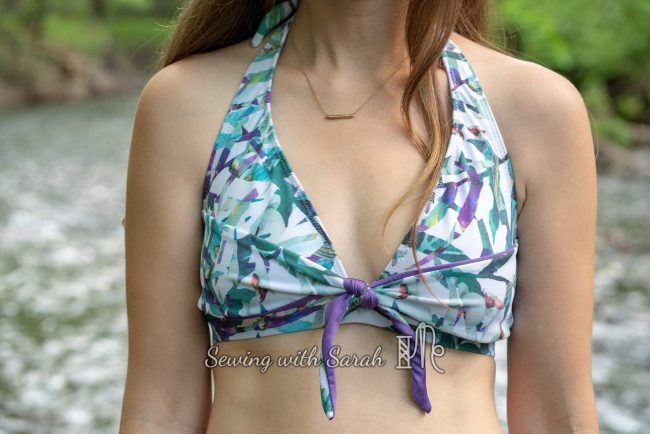
During testing, I tried both the “deep V” and “full cup deep V’ cut, and I felt most comfortable in the full cup version, which refers to the amount of coverage over the bust, rather than cup size. After nursing three kids, I’m not very perky anymore- but I’m proud of the nurturing my body has done, and I’m OK with that! I do feel like the tie front overlay adds a bit of extra “oomph!” to the front, and I’m OK with that optical illusion too!
![]()
![]()
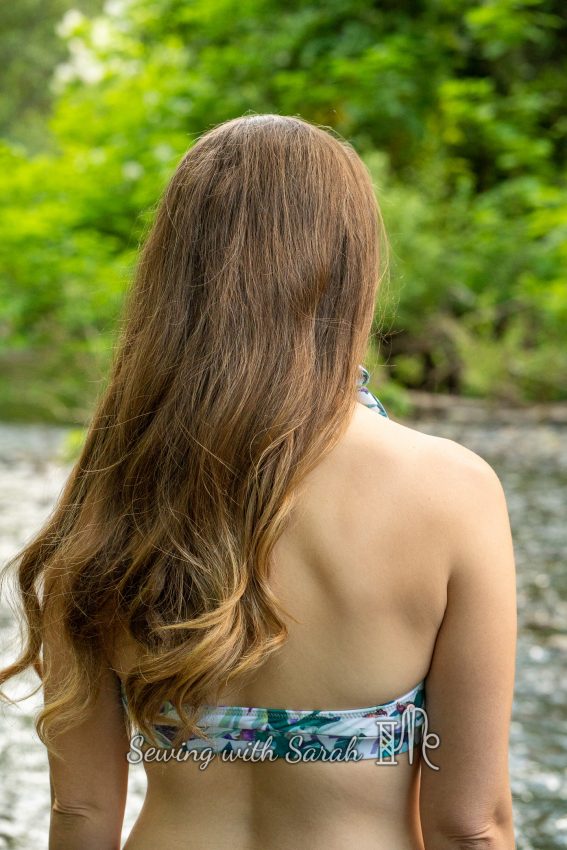
One thing I love about sewing my own swimwear is the opportunity to customize the fit- my top and bottom half measure in different size ranges, and that’s easy to adjust when you make your own! I made an XXS top, graded out to an XS for the scoop bottoms. To accommodate a bit of a scoop in my lower back, I graded the back of the bottoms in to the XXS at the waist, and they sit perfectly.
![]()
![]()
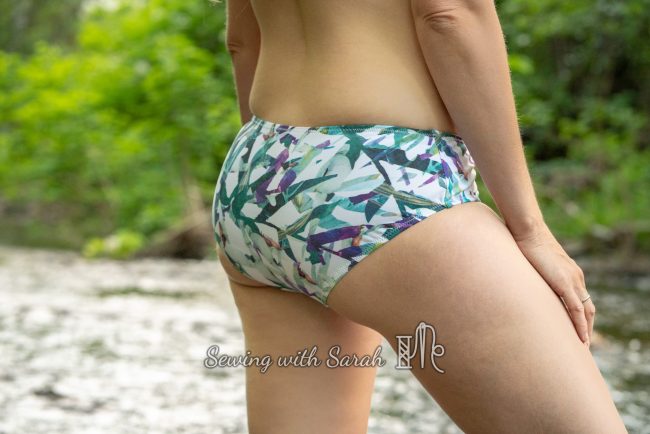
Another thing I was anxious about was the amount of “cheek” I would be showing- I think these bottoms walk that line very well- flattering on all the testers, but not overly showy or threatening to travel up into places they shouldn’t!
Final Thoughts
![]()
![]()
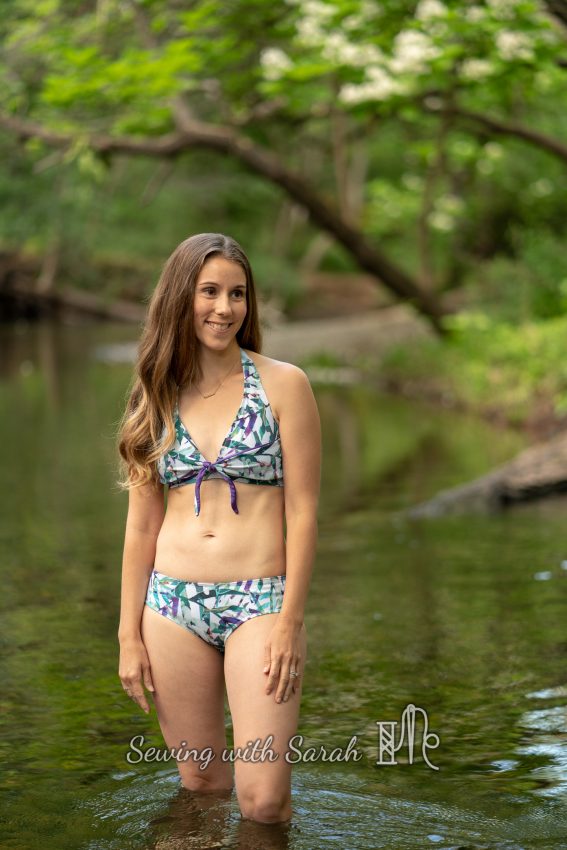
Overall, I’m very pleased with my North Shore, and I can’t wait to wear it onto the beach! Greenstyle has also released matching cut files- and I’m hoping I have enough time to make an extra green tee or Open Back Pullover with the new logo!
What about you? Have you made (or plan to make) any swimwear lately? What should be next on my list? If you’d like to see what I sew next, you can follow me on Facebook or Instagram for some sneak peeks!
You can find the North Shore on sale here (for 48 hours only!). And, if I haven’t convinced you how awesome the pattern is by now, 10% of the sales will go the Hawaii Relief Center- I can’t imagine the helplessness that I would feel if my home were threatened by lava flow, and I’m proud to be part of a company that cares and is doing something to help those folks, many of whom can’t afford the gas to even relocate.
Note: This post contains affiliate links. Thank you so much for your support!
Sarah, is there elastic in the band that goes under the bust? I’d like to try this style bikini top, but I’m worried about it staying put during real life activities.
Unfortunately I just bought swim lining for Joanns, I guess it’s good that I also recently bought wondertape.
There is 1″ or 3/4″ elastic in the underbust band on all the views, yes. It feels pretty supportive to me- but I know I’m not the best judge. I would recommend the “full cup” Deep V or full coverage front, with an extra layer of powermesh for support between the swim lining and main fabric. You can also stitch cups directly to the powermesh, so you have that too, if you like cups. Hope that helps!
Sarah your swim suit looks great and I found the video on elastic insertion helpful. What kind of closure did you use on the back of the top? Thanks love all of your pattern reviews.
The back of the top is just a band of fabric- it pulls over my head. The top ties as a halter. There are options in the pattern though for a hook closure, if you prefer. Thanks!
You look gorgeous in your beautiful new suit! I love all the different looks you can make with the North shore. As usual, you did a great job with your sewing and fabric selection and your photoshoot setting is beautiful. Seriously, don’t worry about how you look, you look like a teenager. In fact, I showed my 87-year old mom your blog the other day, telling her I’d found a great new sewing blog and she said, “She looks like a young girl” and was very surprised when I said you’re a mom of 3!
Awe, this is the best comment ever! Thank you so much, and tell her I loved hearing it!