Tip Tuesday: Side Boob (and how to avoid it!)
![]()
![]()
Happy Tuesday! We are back from vacation, and (semi) recovered from all our adventures (lets not talk about the laundry though, m’kay?) and I’m excited to share a new blog series with you: Tip Tuesday and Fail Friday!
This idea came up while a dear friend was visiting a couple weeks ago- I’m sure you know the type: they’ve known you for so long they don’t bother to sugarcoat their opinions, and that’s what makes them so valuable!
![]()
![]()
Anyway, this friend took a look at my blog, and instead of telling me how awesome I was, she stepped up on her soapbox and told me I’m part of what’s wrong with society today. All my nice photos and pretty garments, were, in her view, making sewing moms everywhere feel like crap, because they were still hiding in the bathroom in their store-bought yoga pants with puke on them at 1PM, eating chocolate they had squirreled away behind the toilet paper so they wouldn’t have to share it (we’ve all been there, right?)
That may or may not be true- but I figured she had a point! I should show you my learning experiences, challenges, and failures (and there are plenty!), not just my carefully curated photos and successful projects, if I really want to call myself a sewing mentor.
So, here we go with my first Tip Tuesday! I hope you’ll follow along every week, and offer me some suggestions as well! You can subscribe to my blog via email HERE, so you don’t miss a post! But I warn you- it’s going to be raw and real for these posts. If you just want pretty photos, you might want to stick to the other 5 days of the week.
Still here? Good! Today’s topic, then, is side boob! Yeah, its a thing. My adventures in fixing side boob came about as I was sewing my latest Pink Zeppelin strike off. I wanted to use a cool applique (see my appliqué tutorial HERE) from knitpop, and I had carefully chosen the Striped Swallow Designs Harbor Knot tank add on (plain version with no knot), as I thought the lines fit the shape of my appliqué well.
![]()
![]()
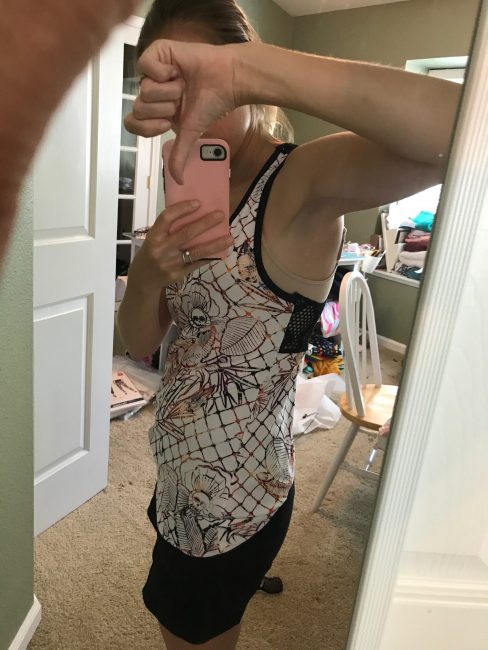
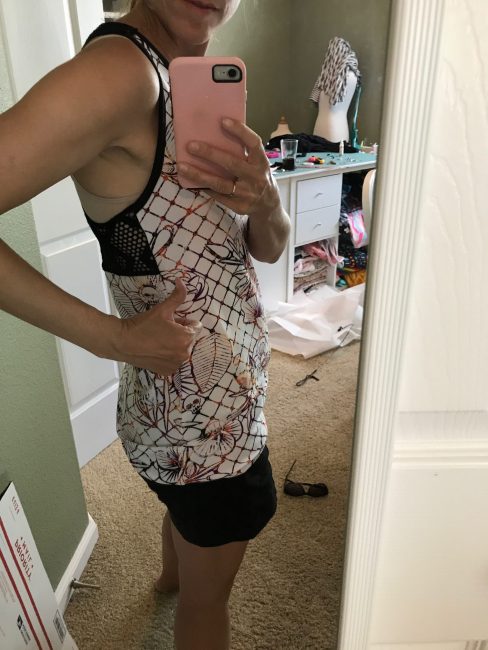
All was going well until I tried on my tank….and there it was: side boob!
![]()
![]()
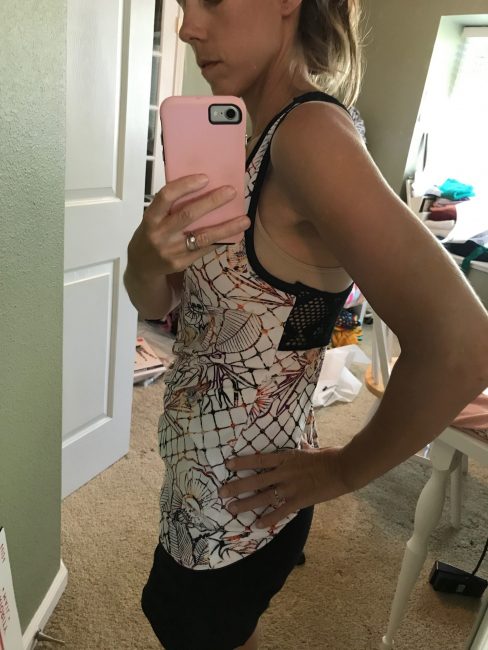
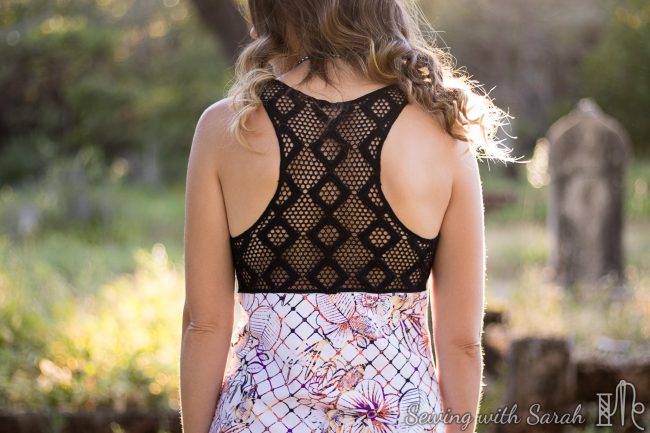
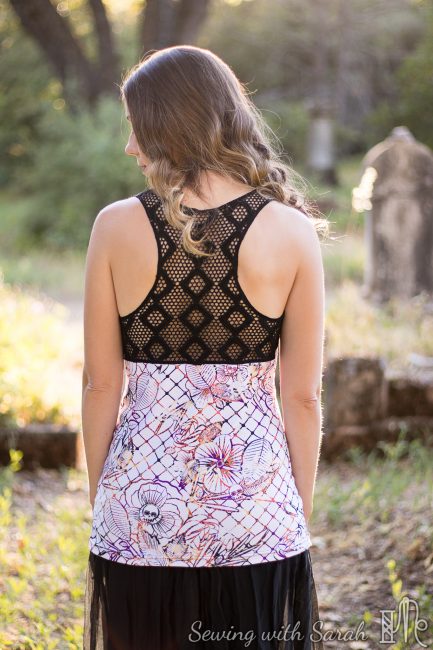
I usually bind the edges of my tops when using an applique, so I don’t add any width that would interfere with the look of the appliqué when it’s sewn to the edges of the tank. Unfortunately, in my haste, I forgot that with this particular pattern, the neck and arm edges were already somewhat low.
If I had used a band, rather than a binding, it would have added a critical 1/2″ to the neck and underarm edges, eliminating any side boob peek. However, when I chose to use binding instead of bands (curious about the difference? Check out this post on the Colette blog), this extra width was eliminated.
It was not a flattering look. I kept a bra on for these photos, both so you could see the difference and to save you the trauma of seeing the side boob in its full glory. You’re welcome. (also, I suck at selfies. So that’s my finger in the way of the camera. But you get the idea).
![]()
![]()
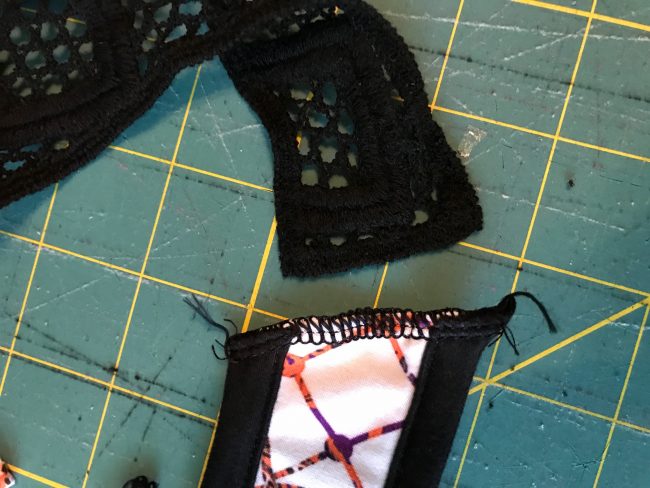
I evaluated the tank with apprehension (strike offs can’t be replaced!), and then decided on a very simple (and effective) solution- I would raise the underarm and neck by unpicking the shoulder seam and taking up the shoulder edges by about 1″. This had the added bonus of tightening up the neckline, since it also wasn’t being “pulled in” by the bands and wasn’t laying quite flat against my chest.
![]()
![]()
If you’re unsure about whether a pattern is going to hit too low in the neck and arm, you can always baste it together at the shoulders and underarms first- I had already sewn mine, so I had a little unpicking to do. After I had unpicked, I overlapped the edges by about 1″ and sewed the applique back down on top of the front shoulder.
![]()
![]()
Fortunately, with this simple solution I managed to rescue my strike off, and save myself from an embarrassing situation! I am much more comfortable with the height of the neckline now, and it’s still plenty low enough for nursing.
![]()
![]()
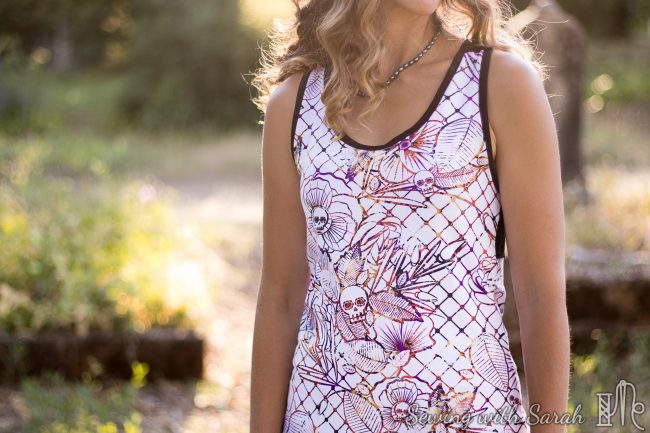
Note: If you knew in advance that this was going to be a problem, you could also re-draw the lines on the pattern pieces, raising them before cutting. The solution referenced above is more appropriate after your pieces have been cut.
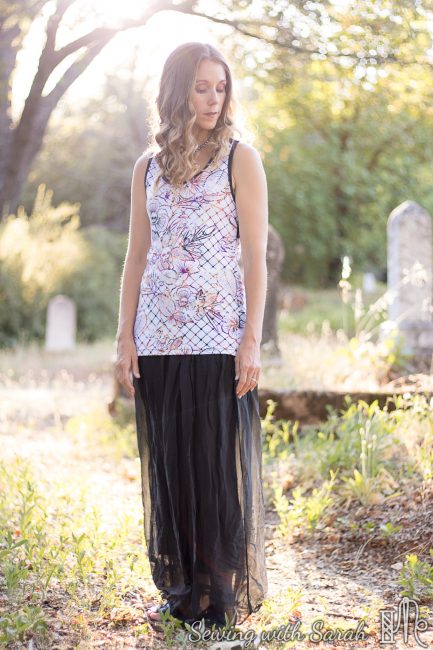
Once I had the tank fitted properly, we took our photo shoot to a nearby historic cemetery at dusk for its eerie ambiance, only to find it quite peaceful and serene. A doe even joined us and ventured quite close as we explored the area.
![]()
![]()
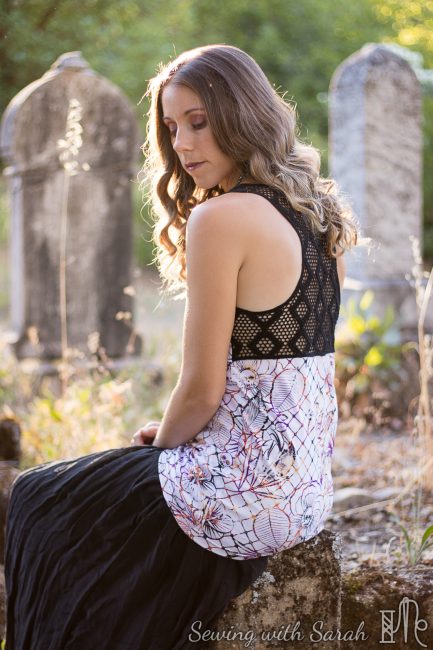
It was a lovely date (after 13 years of marriage and 3 kids, we got to take ’em where we can get ’em!), and reminded me of the importance of enjoying family and making the most of the moment (even if you’re reading this in the bathroom at 1PM hiding from the kids!).
![]()
![]()

If you’re interested in the fabric I used in this post, you can get in on the pre-order at Pink Zeppelin Fabrics through 7/20!
The Striped Swallow Designs Harbor Knot Tee is available HERE, and the Tank add-on (which includes the plain tank I used) is available HERE.
Note: This post contains affiliate links, which I use to help support my blogging! Thank you!
I’d love to hear from you! You can follow me on Instagram HERE, or “Like” my page on Facebook HERE.
13 years? It will be 14 years in less than a month!
Great post and clever solution. The top turned out wonderfully and our cemetery outing was indeed very lovely.
I’m super excited about your new series!
Ok ok. Sorry, it’s been so wonderful you just make me feel young. Love you!